How to Fold an Origami Elephant Head

 Francesco Mancini
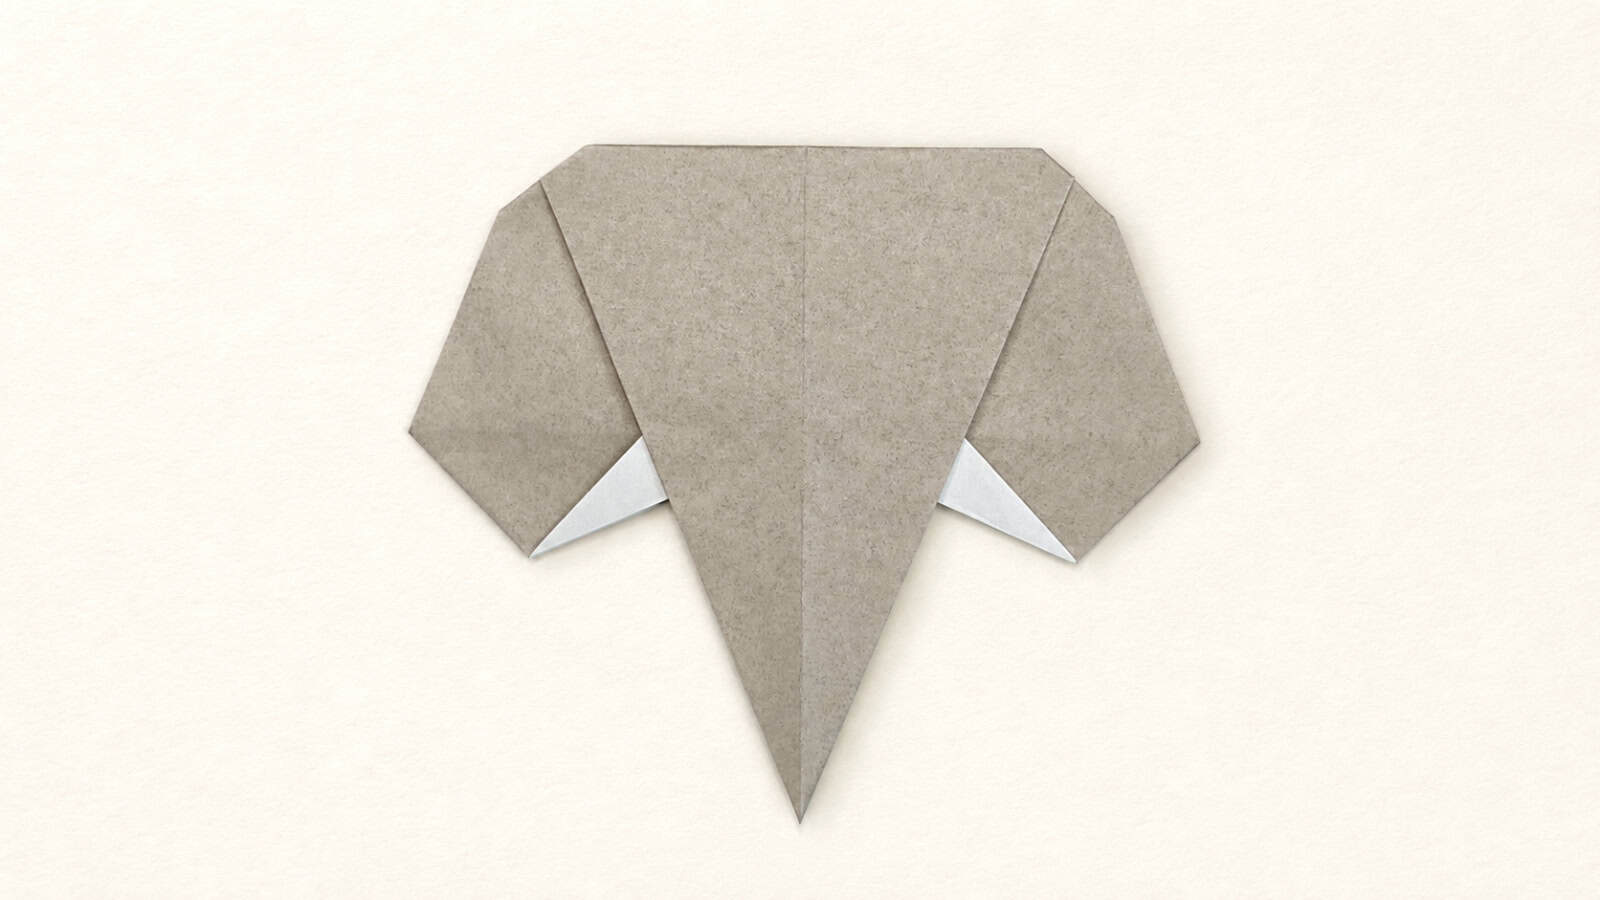
 Let’s learn how to fold an origami elephant head designed by Francesco Mancini. This is a quick and easy model that creates a recognizable elephant using just a few well-placed folds.
The finished design has a broad forehead, large floppy ears, and a long pointed trunk. Small white triangles peeking out from the sides form the tusks, adding a nice touch of detail without making the model more complicated.
This tutorial is suitable for beginners and can be completed in just a few minutes. The only fold that may be new to some folders is the squash fold, but don’t worry, we’ll guide you through it step by step.
It’s a fun little project for anyone who enjoys animal origami or is looking for a simple model with a strong silhouette.
Origami Elephant Step-by-Step Instructions
- Difficulty: Easy – Beginner level 3
- Folding time: 5 minutes
Recommended Paper
6 x 6 in (15 x 15 cm) origami paper (Kami)
Step 1
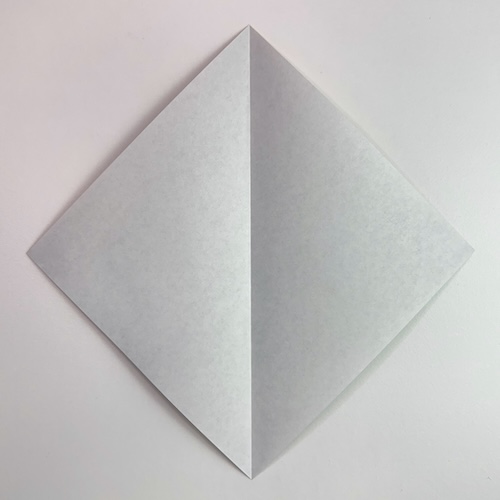
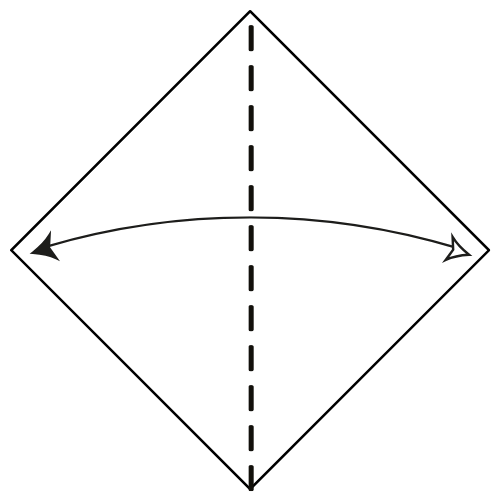
Start with the white side of the paper facing up in a diamond position. Fold the paper in half vertically, then unfold.
Step 2
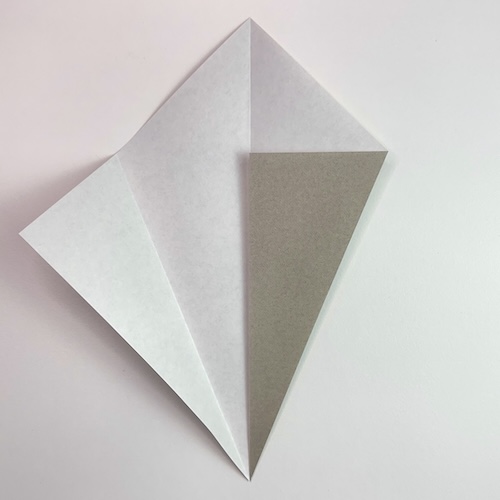
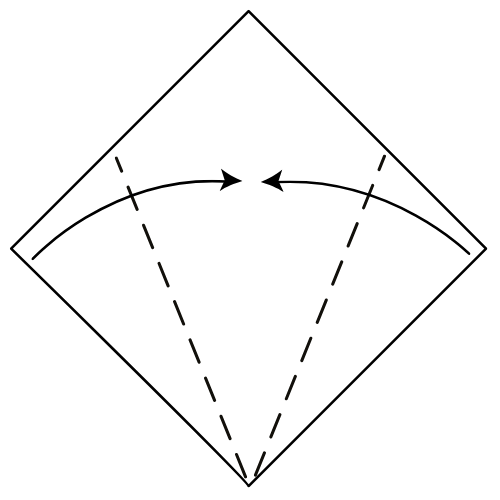
Fold the bottom left and right edges to meet the center crease.
Step 3
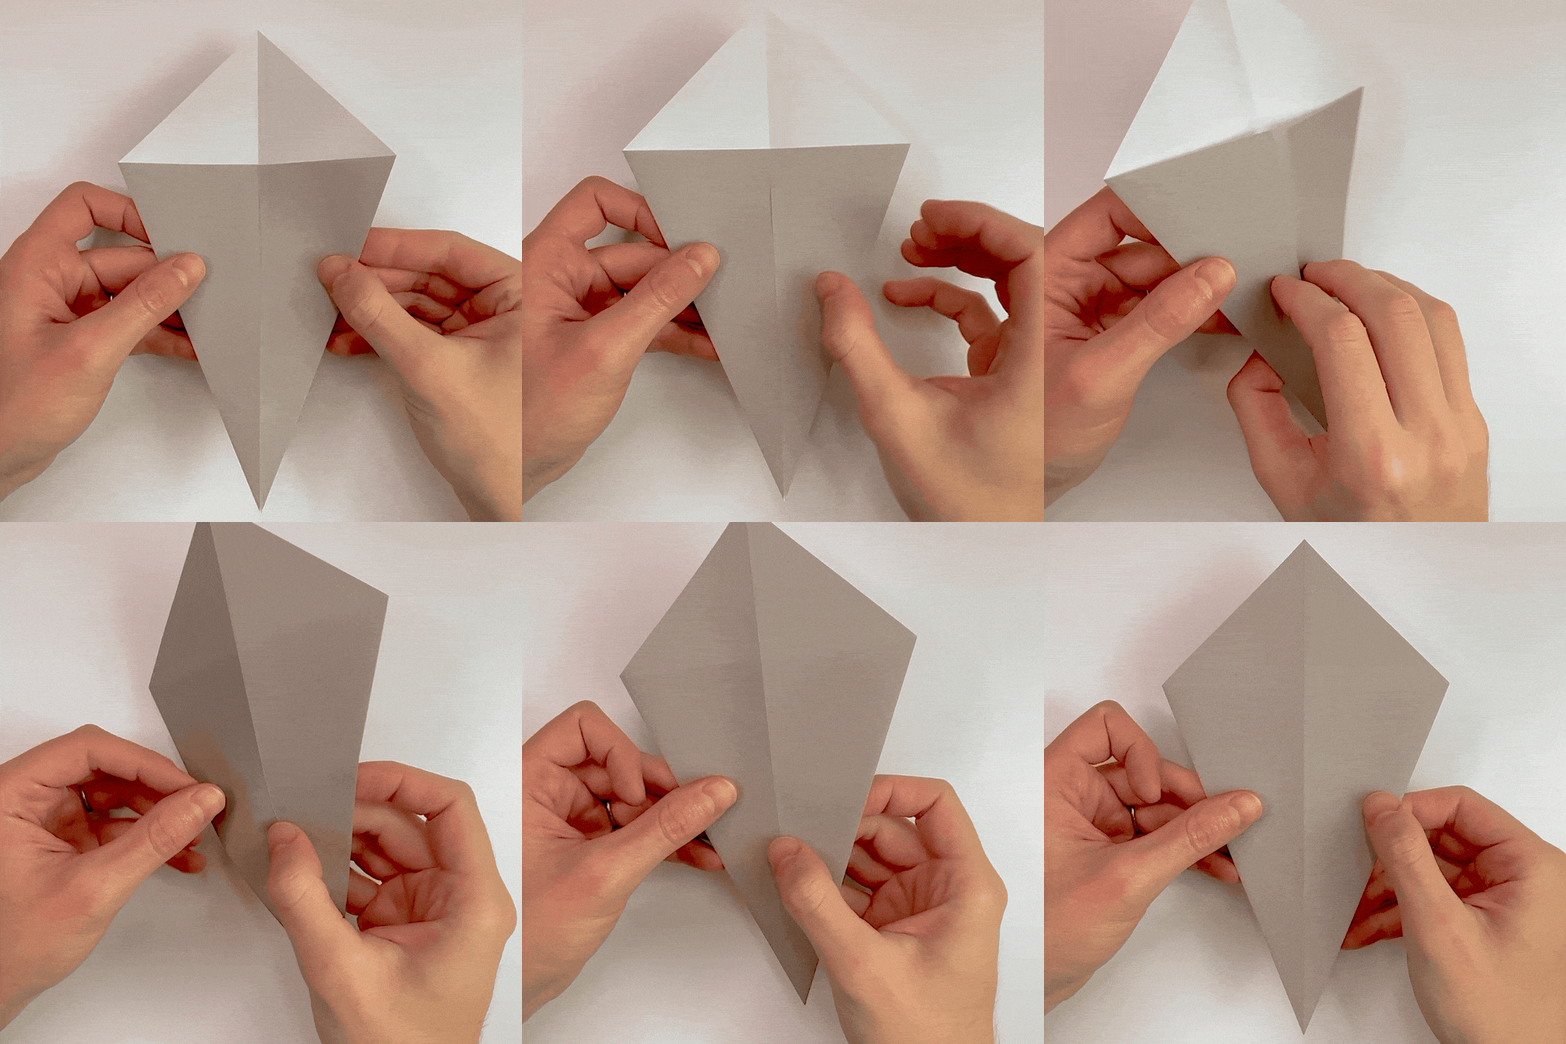
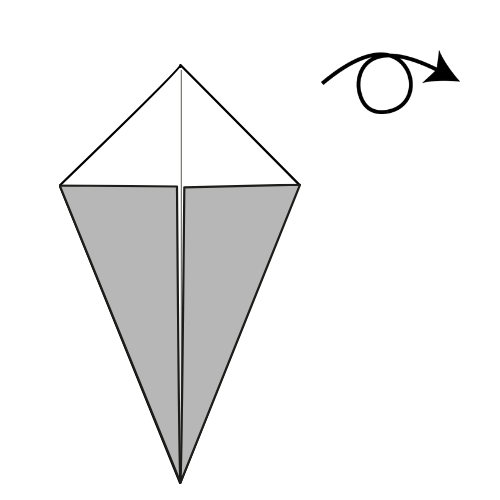
Turn the paper over.
Step 4
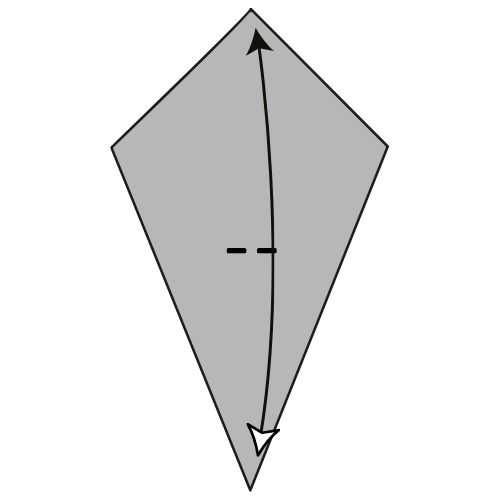
Fold the bottom corner up to meet the top corner. Make a small pinch mark at the center, then unfold.
Step 5
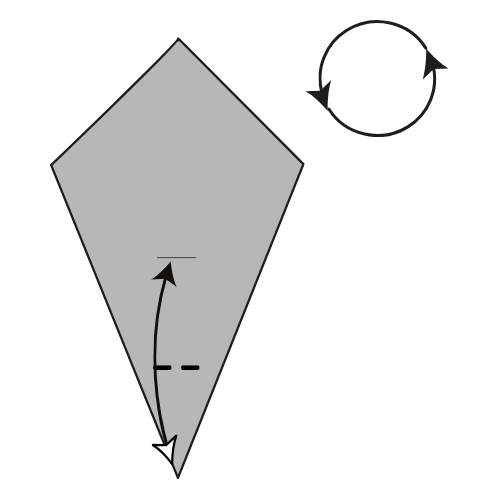
Fold the bottom corner up to the pinch mark you just made. Make another pinch mark at the center, then unfold. Rotate the model 180°.
Step 6
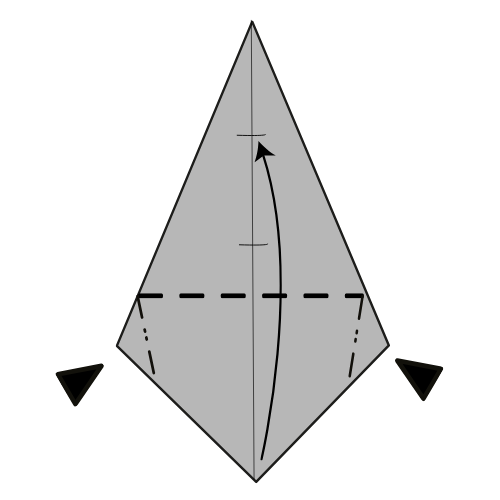
Fold the bottom corner up to the top pinch mark, then squash fold the flaps. The side edges should align as you flatten the model.
🐘 Folding tip: Fold the bottom edge first. Then flatten the left and right flaps. If you’re unsure, watch the video to see how I do it.
Step 7
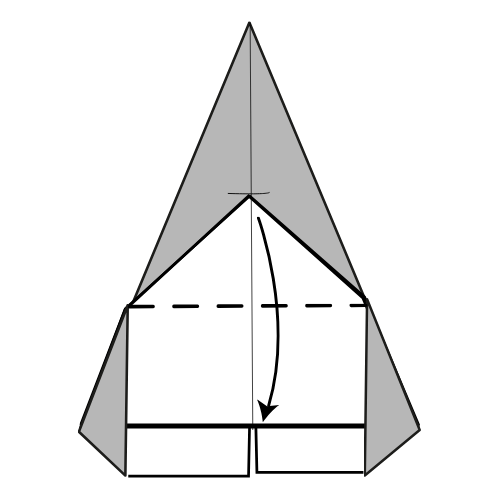
Fold the top corner down to the nearest horizontal crease.
Step 8
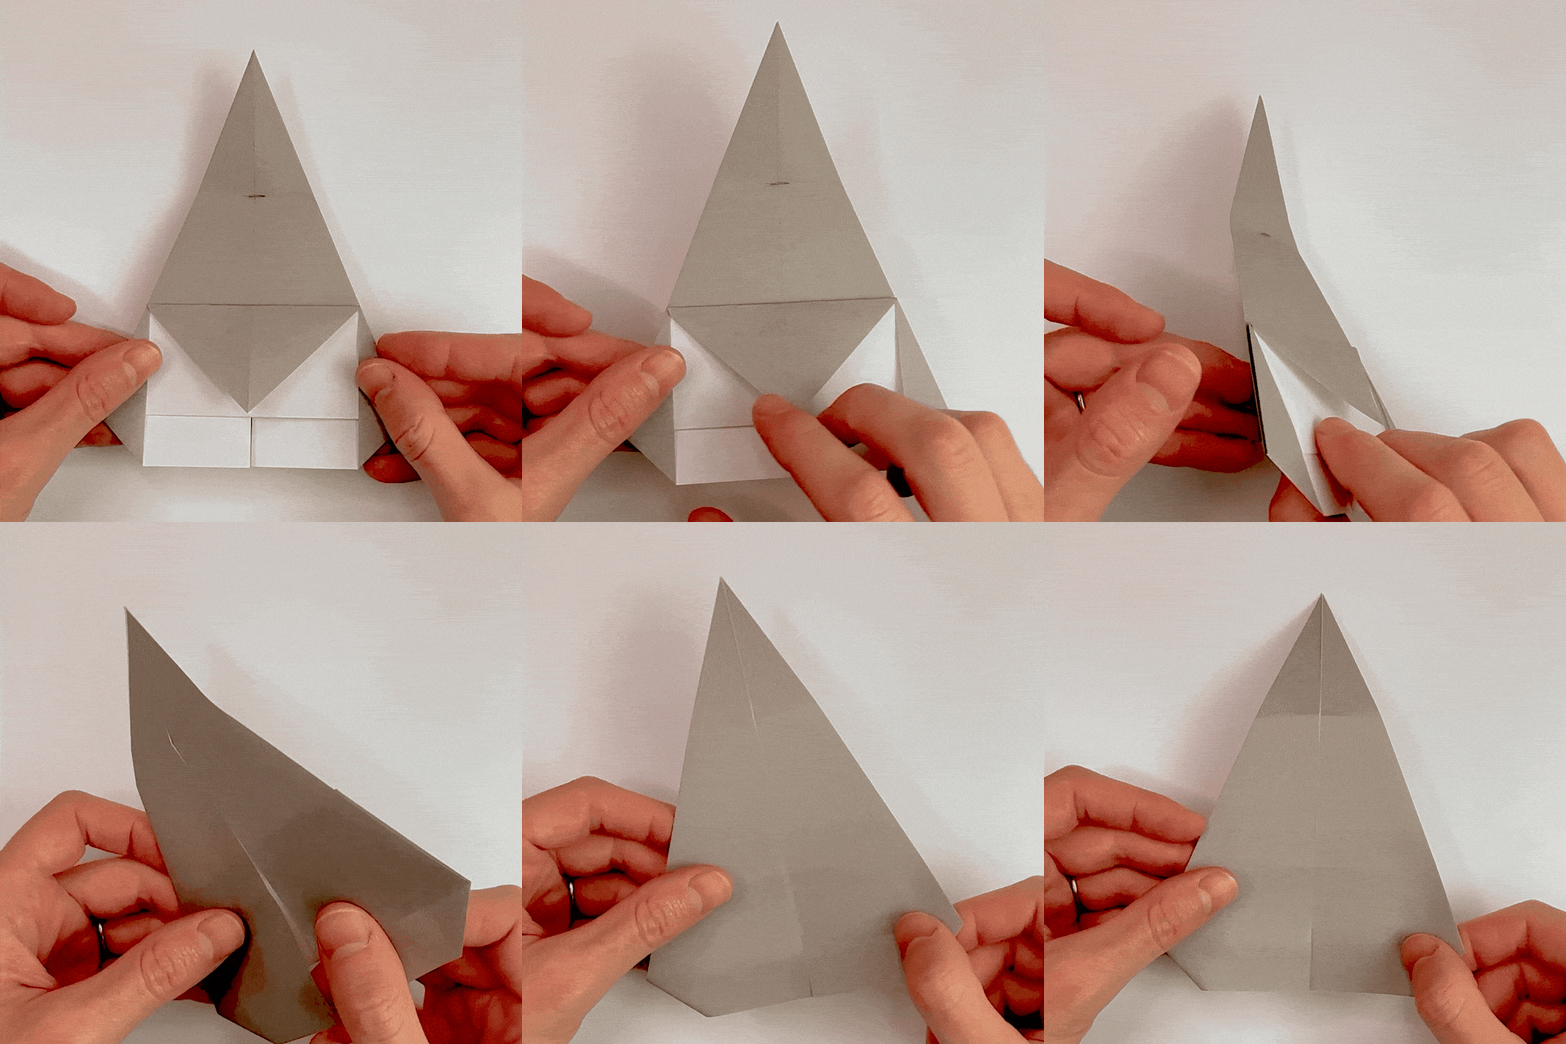
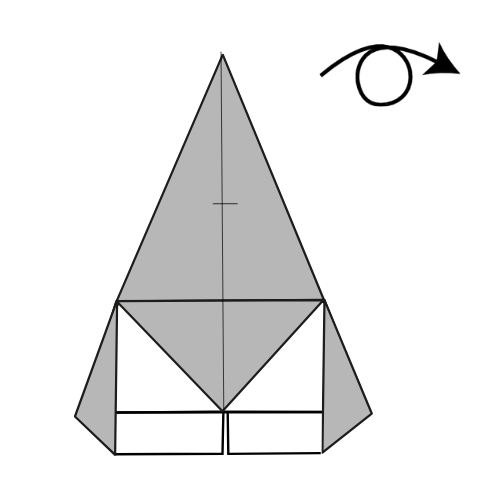
Turn the paper over.
Step 9
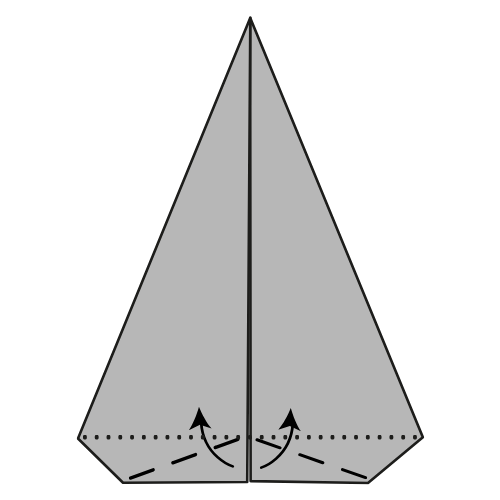
Fold the bottom corners upward along the dashed lines, using the layer at the back as a reference.
Step 10
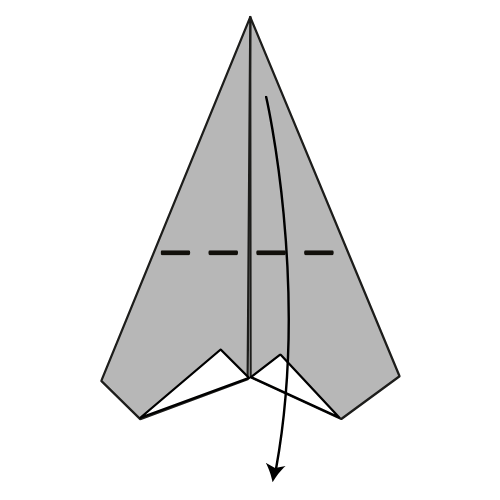
Bring the top corner down and fold along the edge of the back layer.
Step 11
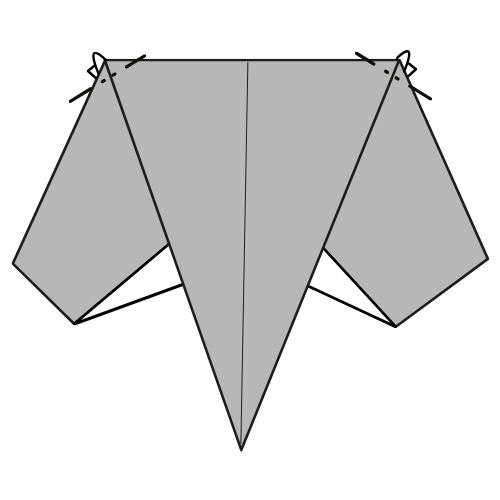
Mountain fold the top left and right corners at the back. There are no exact references for this step, so adjust them to your liking. Just try to keep both sides symmetrical.
Step 12
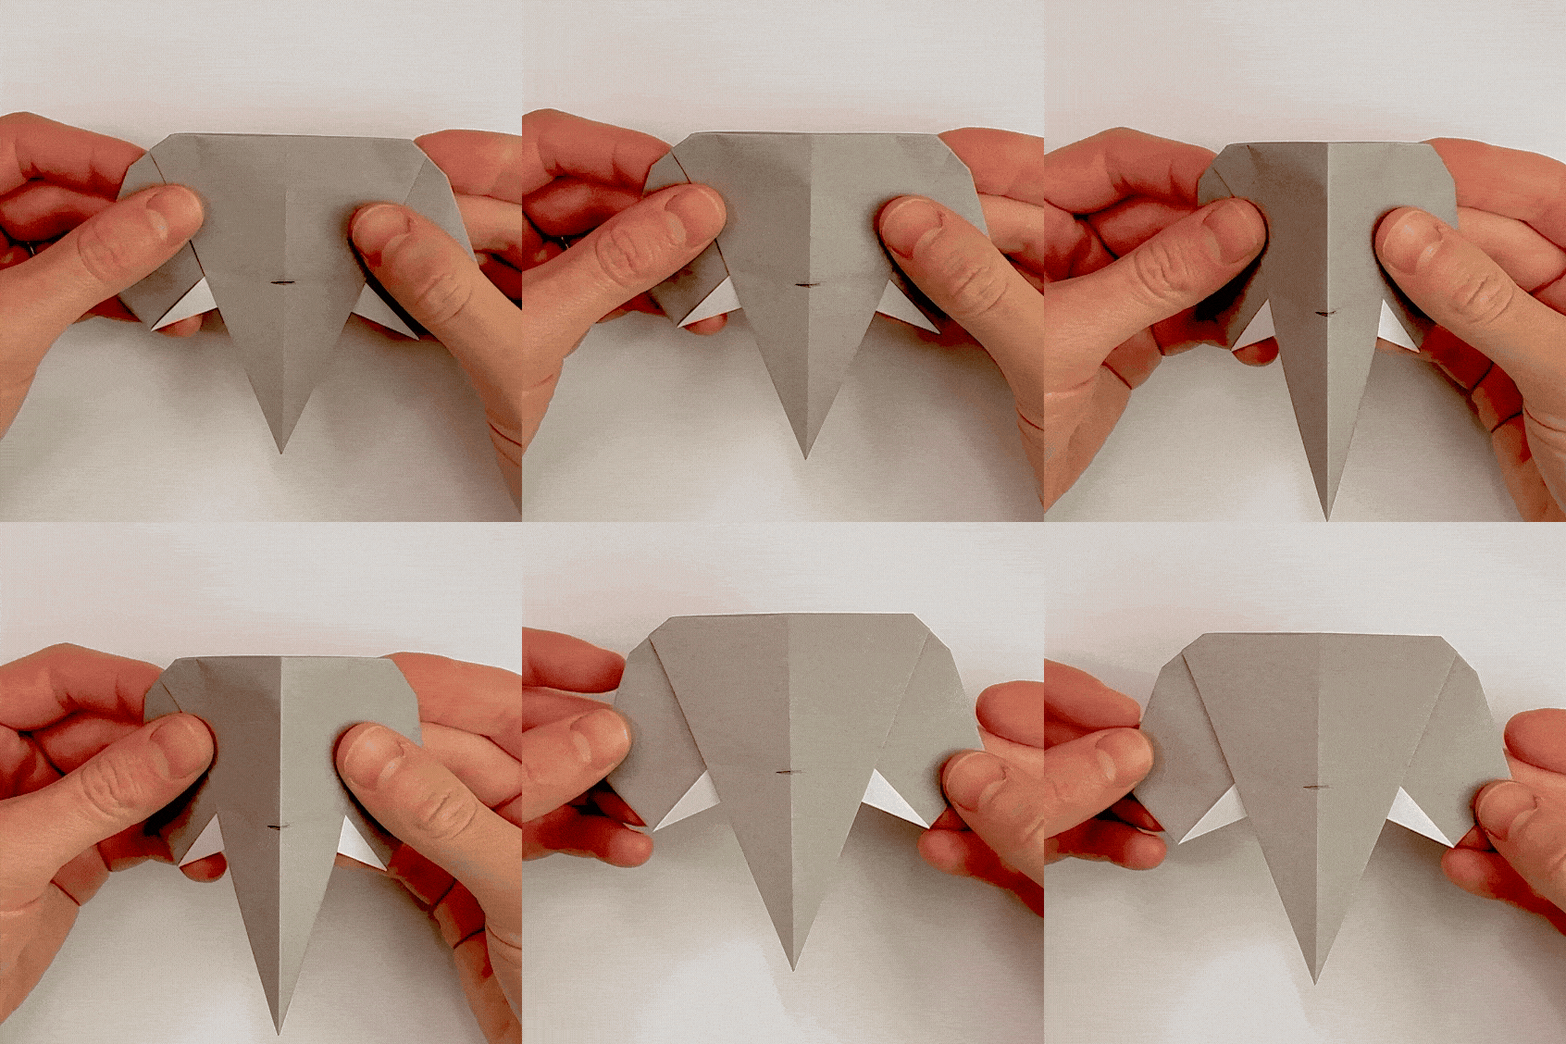
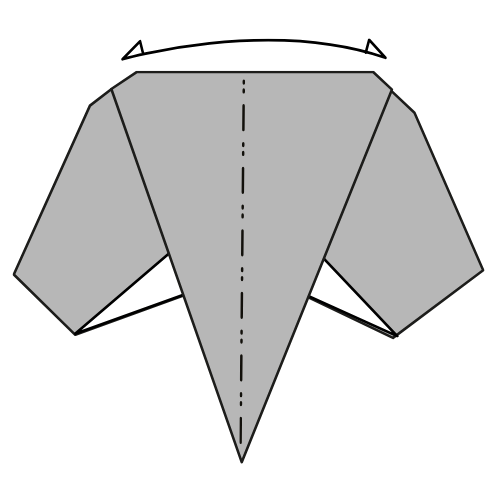
Gently mountain fold the model in half to give the elephant some shape.
🐘 Completed! Your Origami Elephant Is Finished.
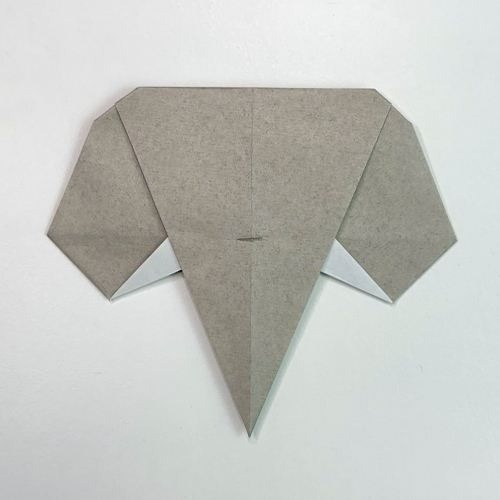
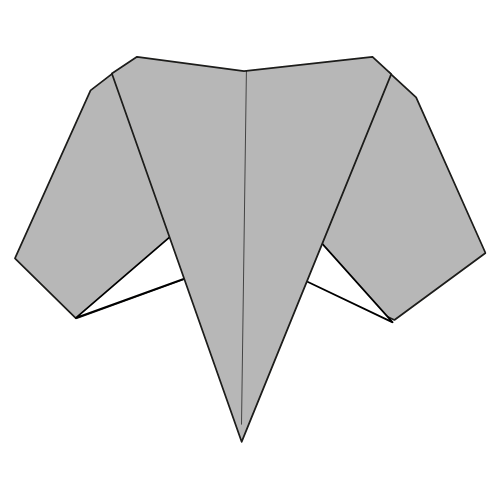
I hope you enjoyed folding this origami elephant head. It’s a simple design, but the large ears, tusks, and trunk make it instantly recognizable.
If the squash fold was new to you, this model is also a great way to practice it. Once you’ve folded it a couple of times, you’ll likely find the whole sequence comes together very quickly.
If you fold one, feel free to share a photo in the comments. I’d love to see the different paper colors and patterns you choose.
If you’d like to keep folding, you can explore more easy origami tutorials or browse our collection of origami animals on the site.
You can also get new tutorials and folding ideas in our origami newsletter here. And if you prefer video instructions, you can follow along on our YouTube channel.
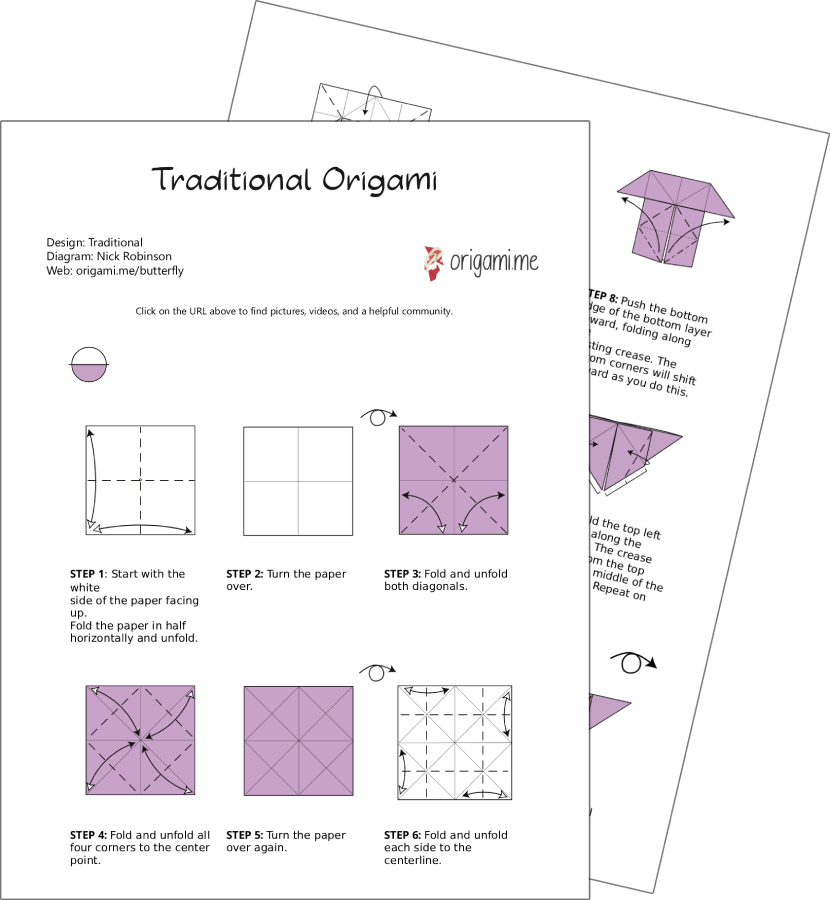
Download the Complete Origami Elephant Printable PDF Instructions
This printable PDF is part of our Origami Friends membership on Patreon. As a member, you get access to these diagrams, our full library of 120+ printable PDFs, and member-only content.
🎓 Need printables licensed for classroom or group use? See the Origami Library for Educators →