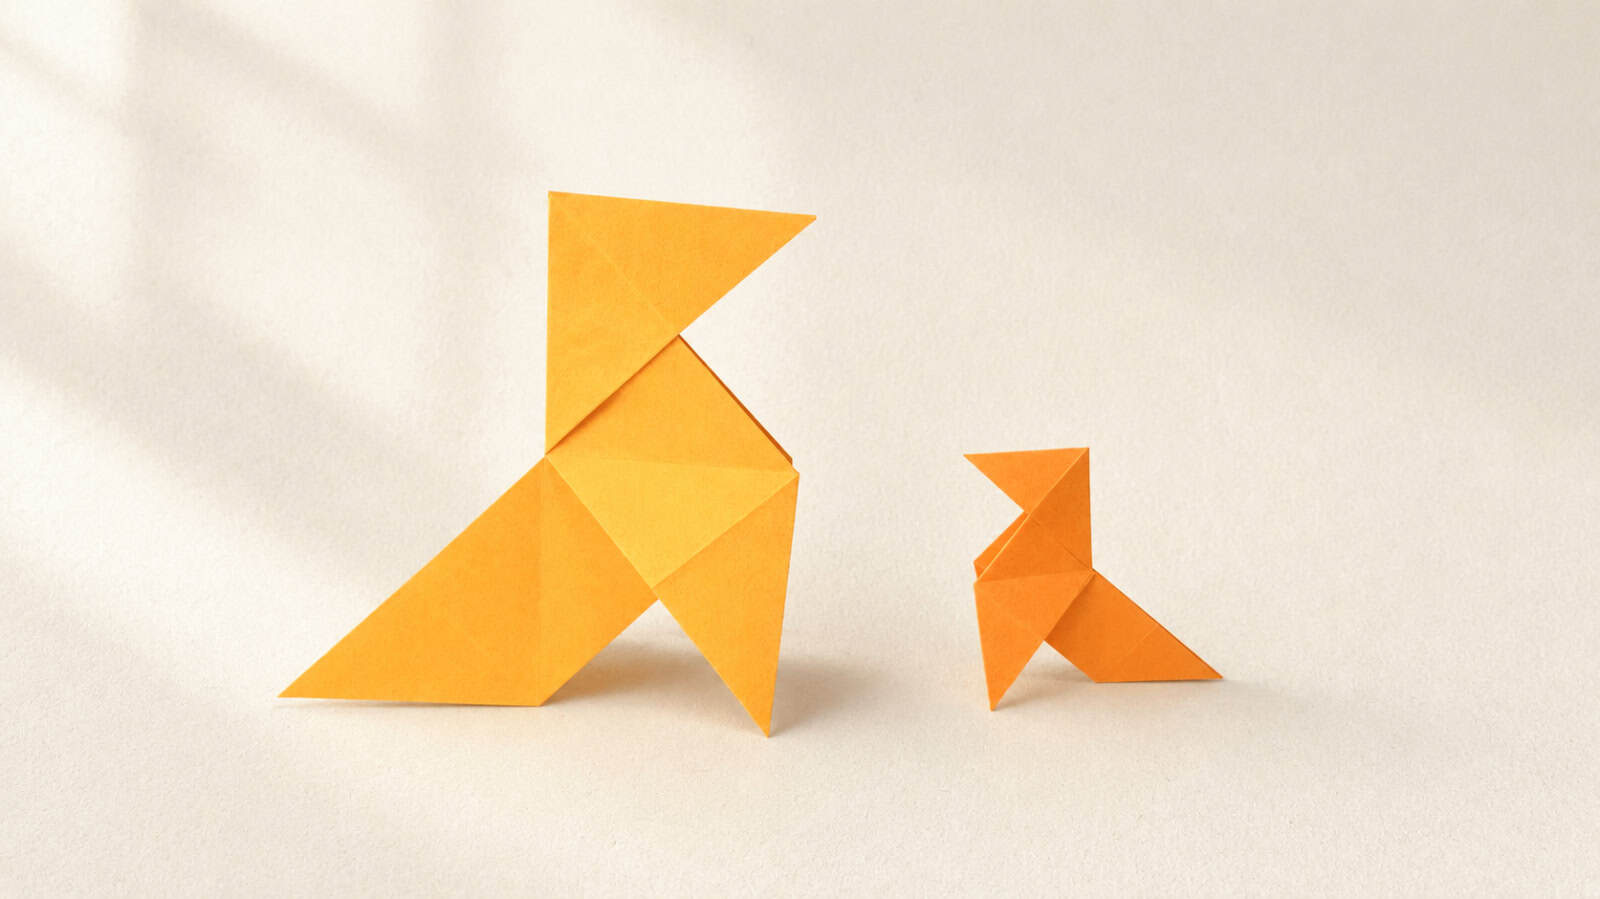
How to Fold an Origami Pajarita

 Traditional/Unknow
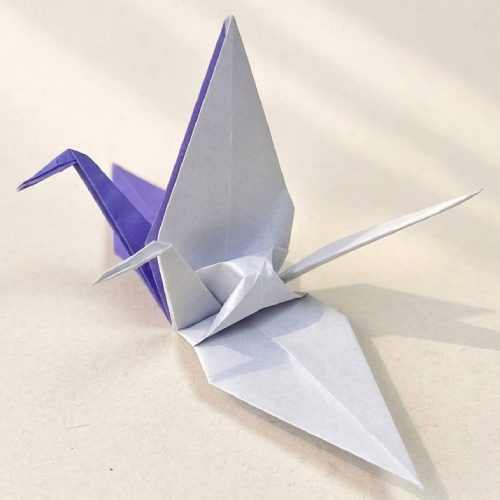
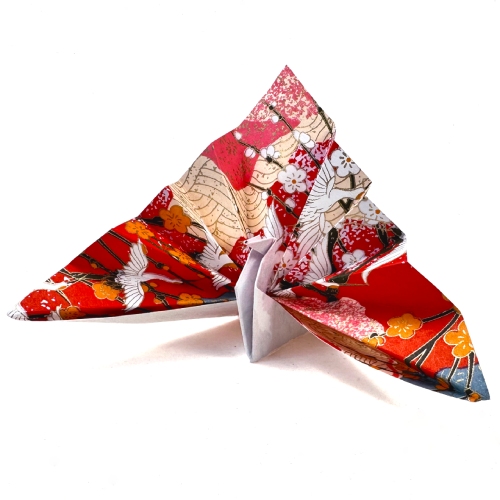
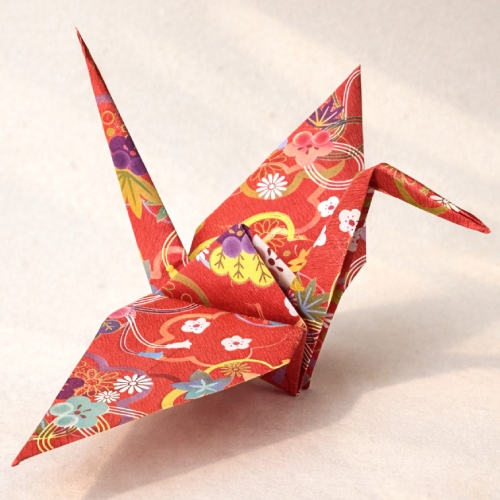
 Let’s learn how to fold a traditional pajarita. This simple bird has been folded in Spain for more than 200 years and is one of Europe’s best-known paper models. In France, it is often called a cocotte en papier, making it a familiar childhood fold in many parts of Europe, much like the paper crane does in Japan.
This version uses a clear folding sequence by Nick Robinson. It’s easy to follow and takes about five minutes to complete, making it a great project when you want a short origami break.
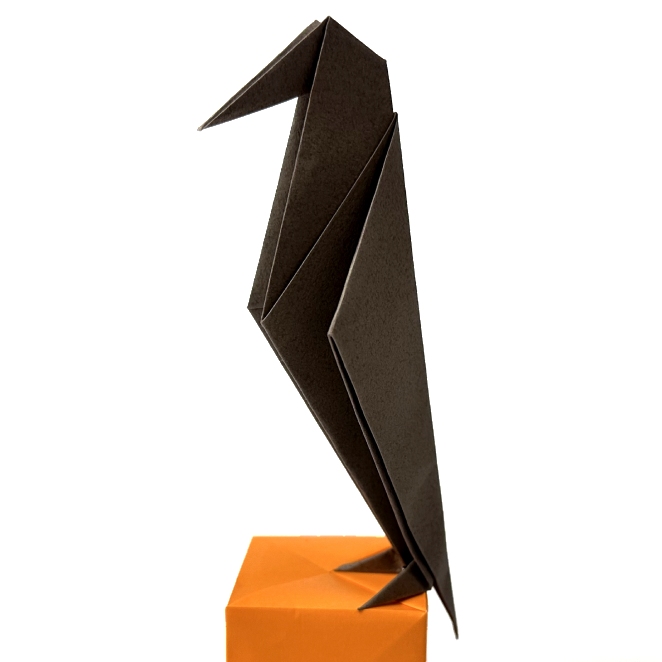
The finished bird has a long tail, an upright neck, and a pointed beak. Along the way, you’ll also practice swivel folds, making this a fun model for beginners who are ready to learn a new technique.
Origami Pajarita Step-by-Step Instructions
- Difficulty: Easy – Beginner level 2
- Folding time: 5 minutes
Recommended Paper
6 x 6 in (15 x 15 cm) origami paper (Kami) or Tant origami paper. If you have smaller paper, give it a try. I think the finished bird looks even cuter.
Step 1
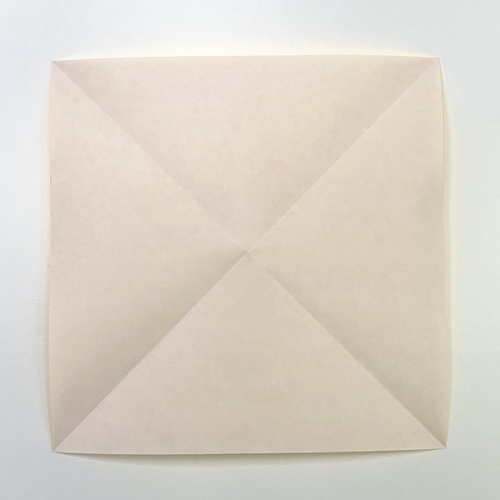
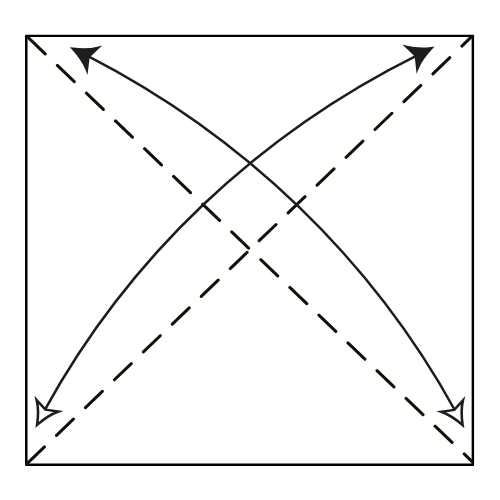
Start with the white side of the paper facing up. Fold and unfold along both diagonals.
Step 2
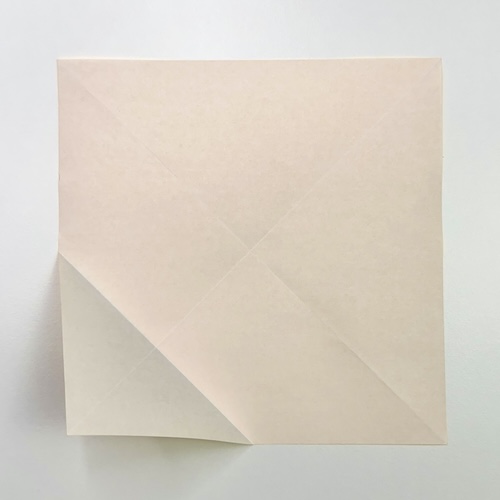
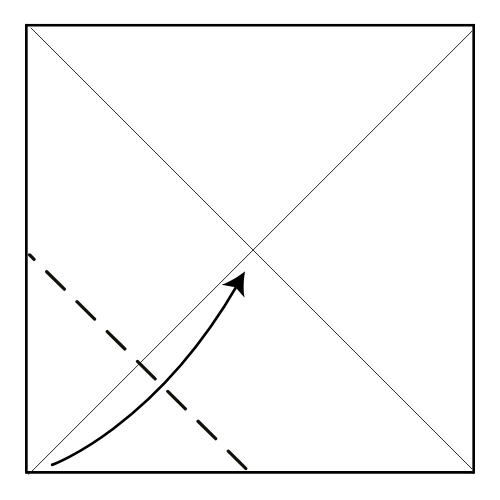
Fold the bottom left corner to the center point.
Step 3
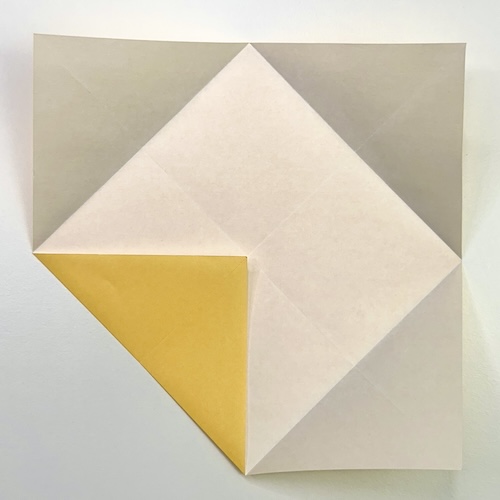
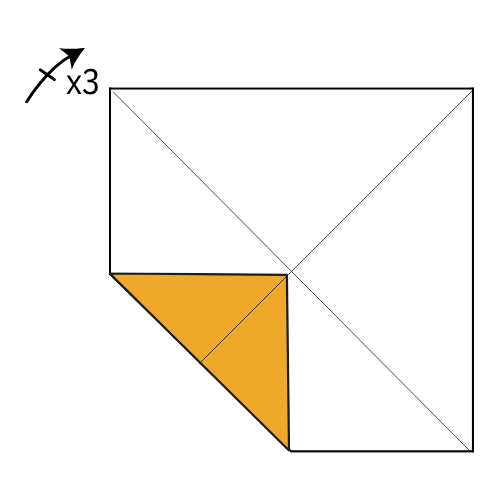
Fold the remaining three corners to the center point.
🐦 Folding tip: When folding to the center point, focus on aligning the edges rather than aiming directly for the center. Make sure the fold lines meet neatly.
Step 4
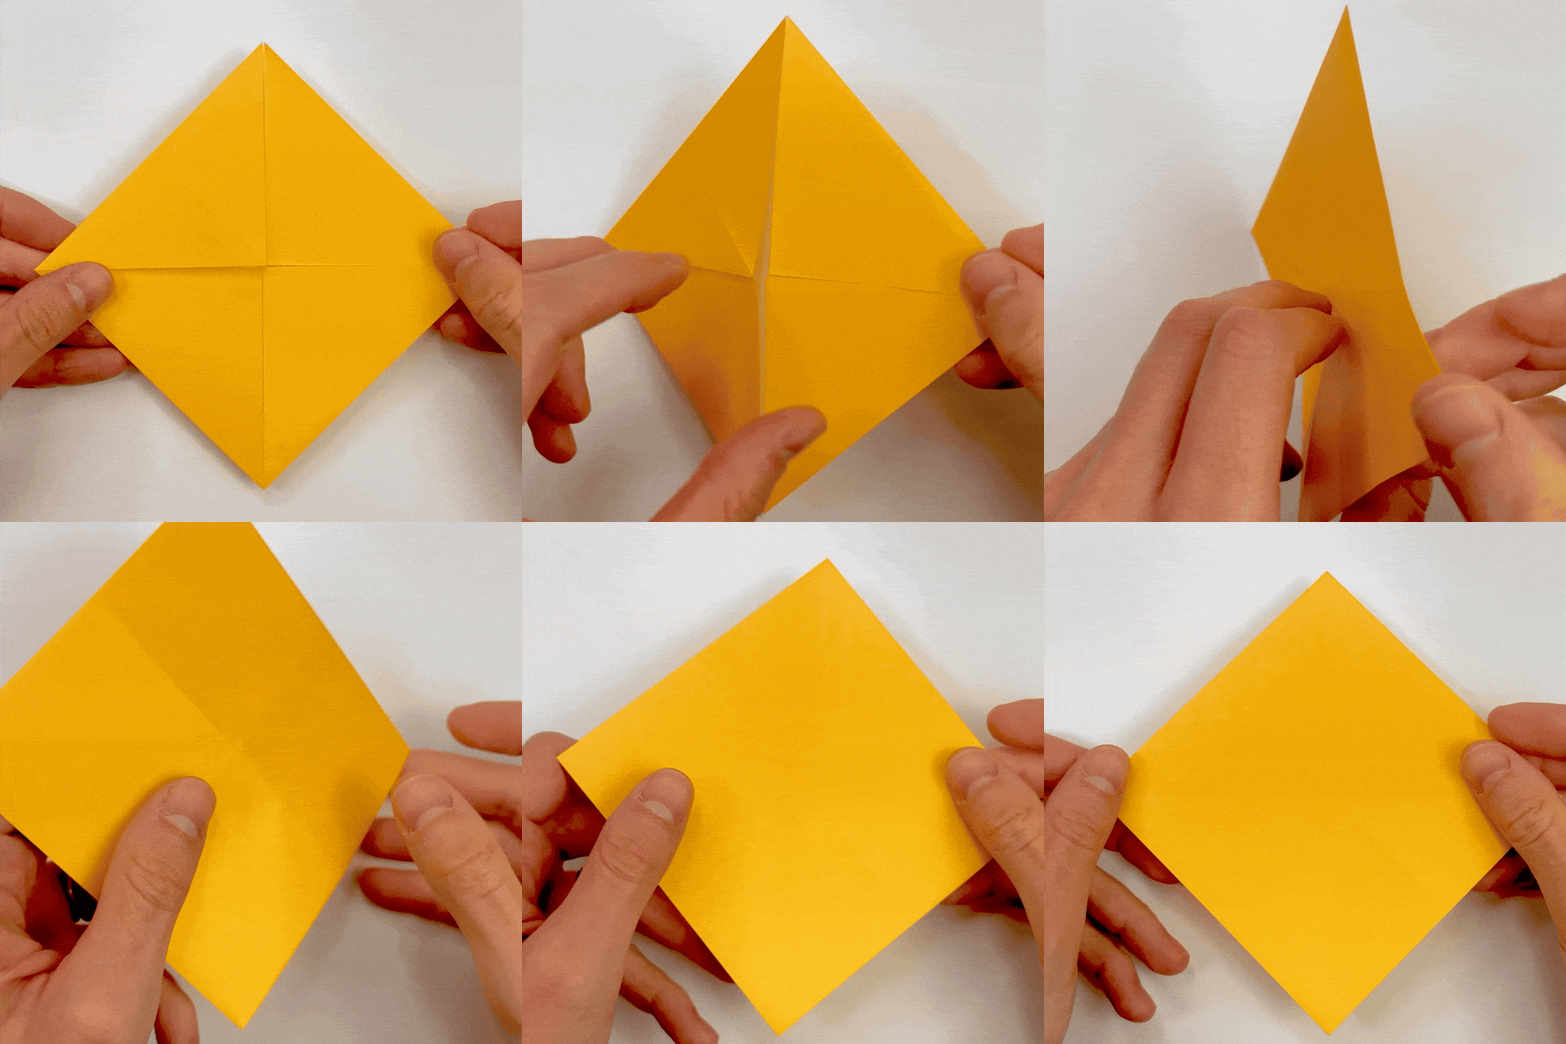
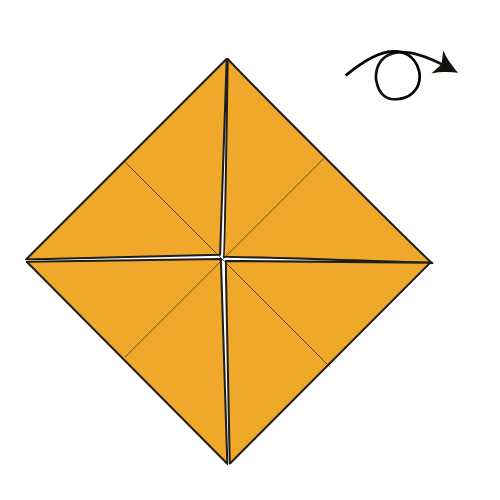
Turn the paper over.
Step 5
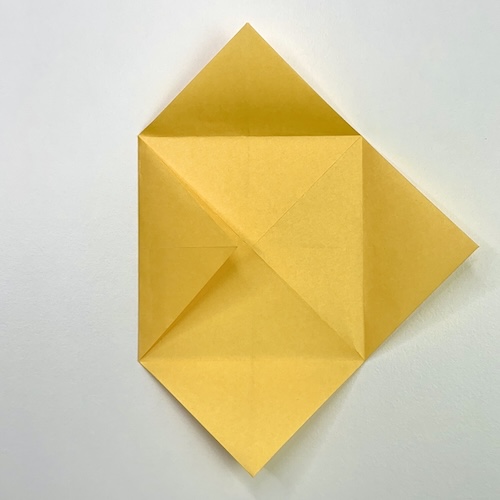
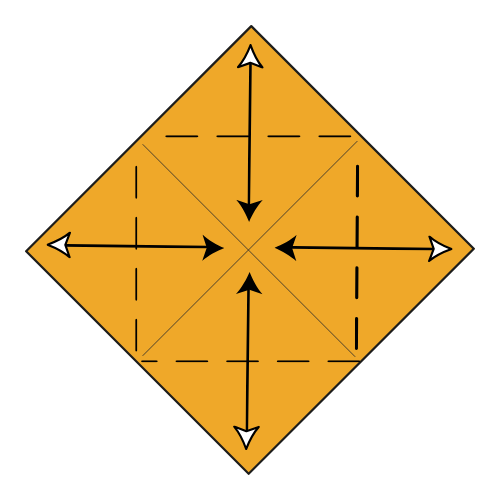
Fold and unfold each corner to the center point.
Step 6
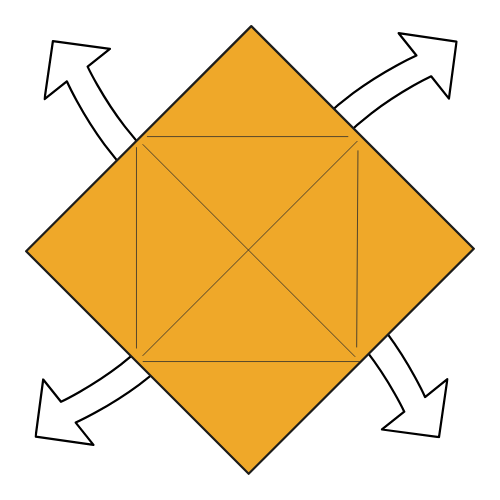
Unfold all the folds from the previous step.
Step 7
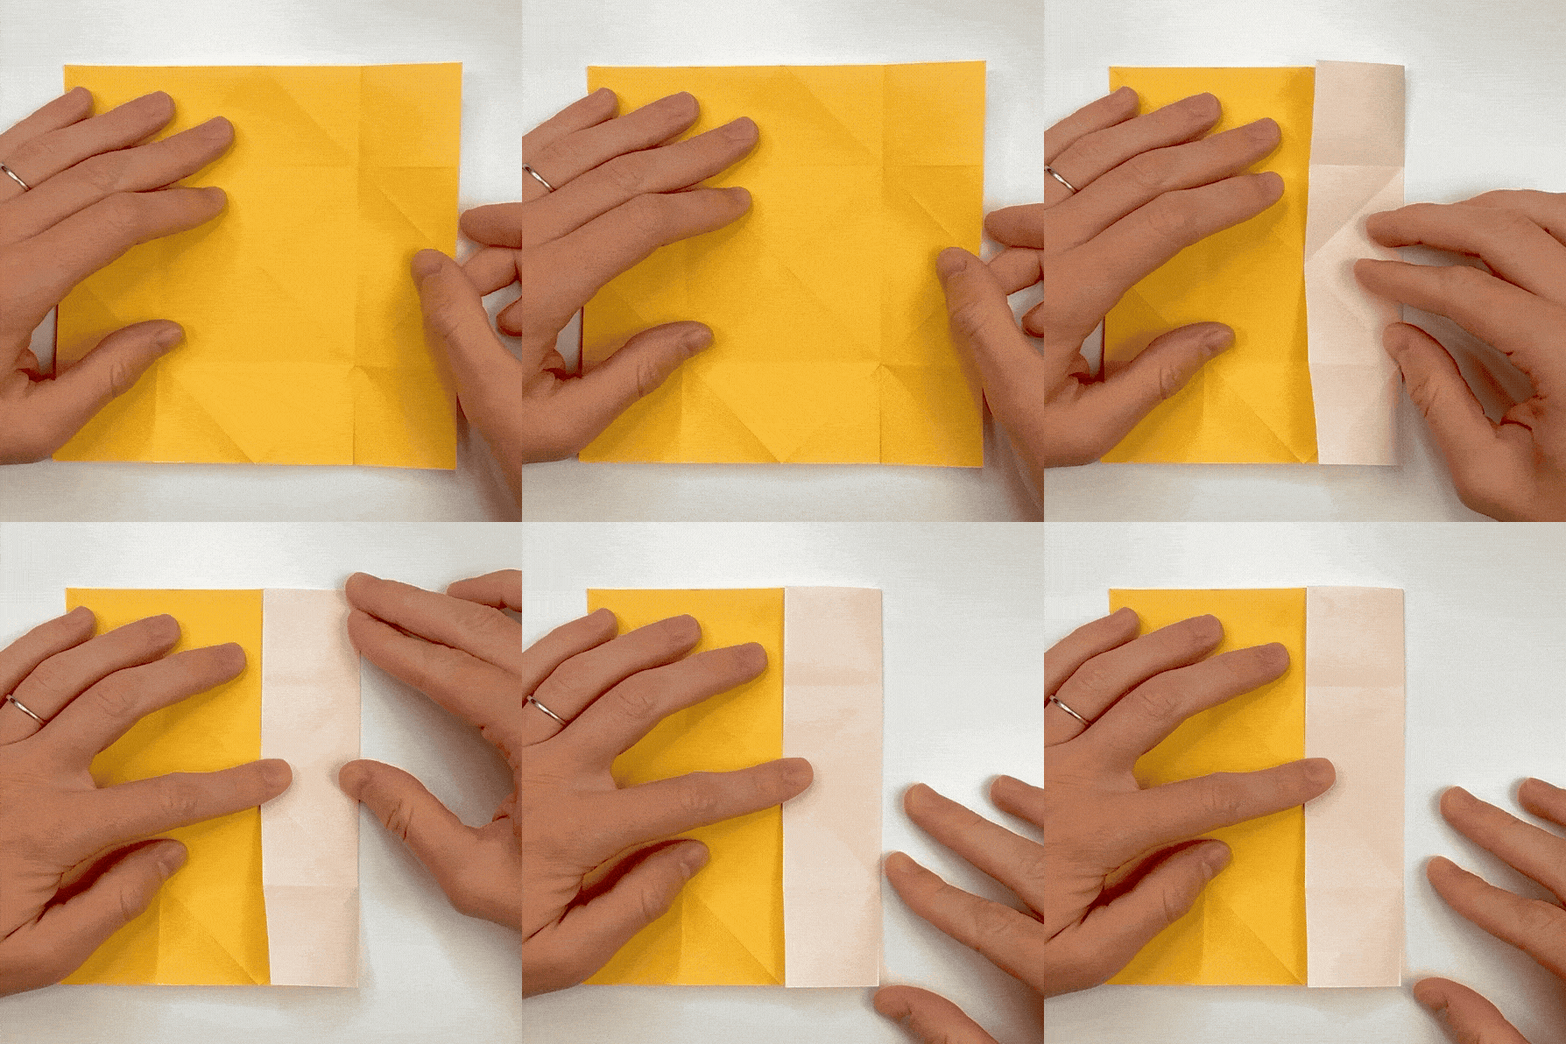
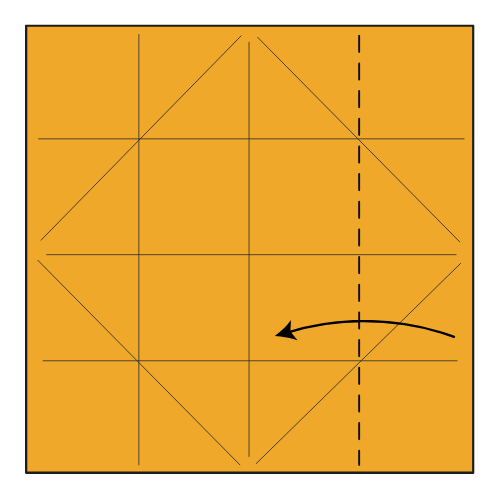
Fold the right edge to the vertical center crease along the existing crease.
Step 8
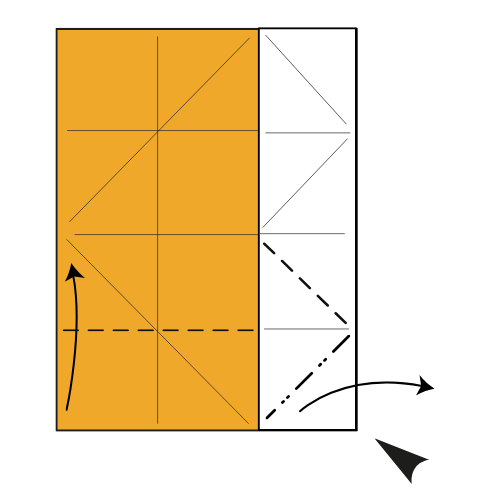
Slightly lift the bottom right area of the top flap, then fold the bottom edge to the horizontal center crease, creating a swivel fold.
Step 9
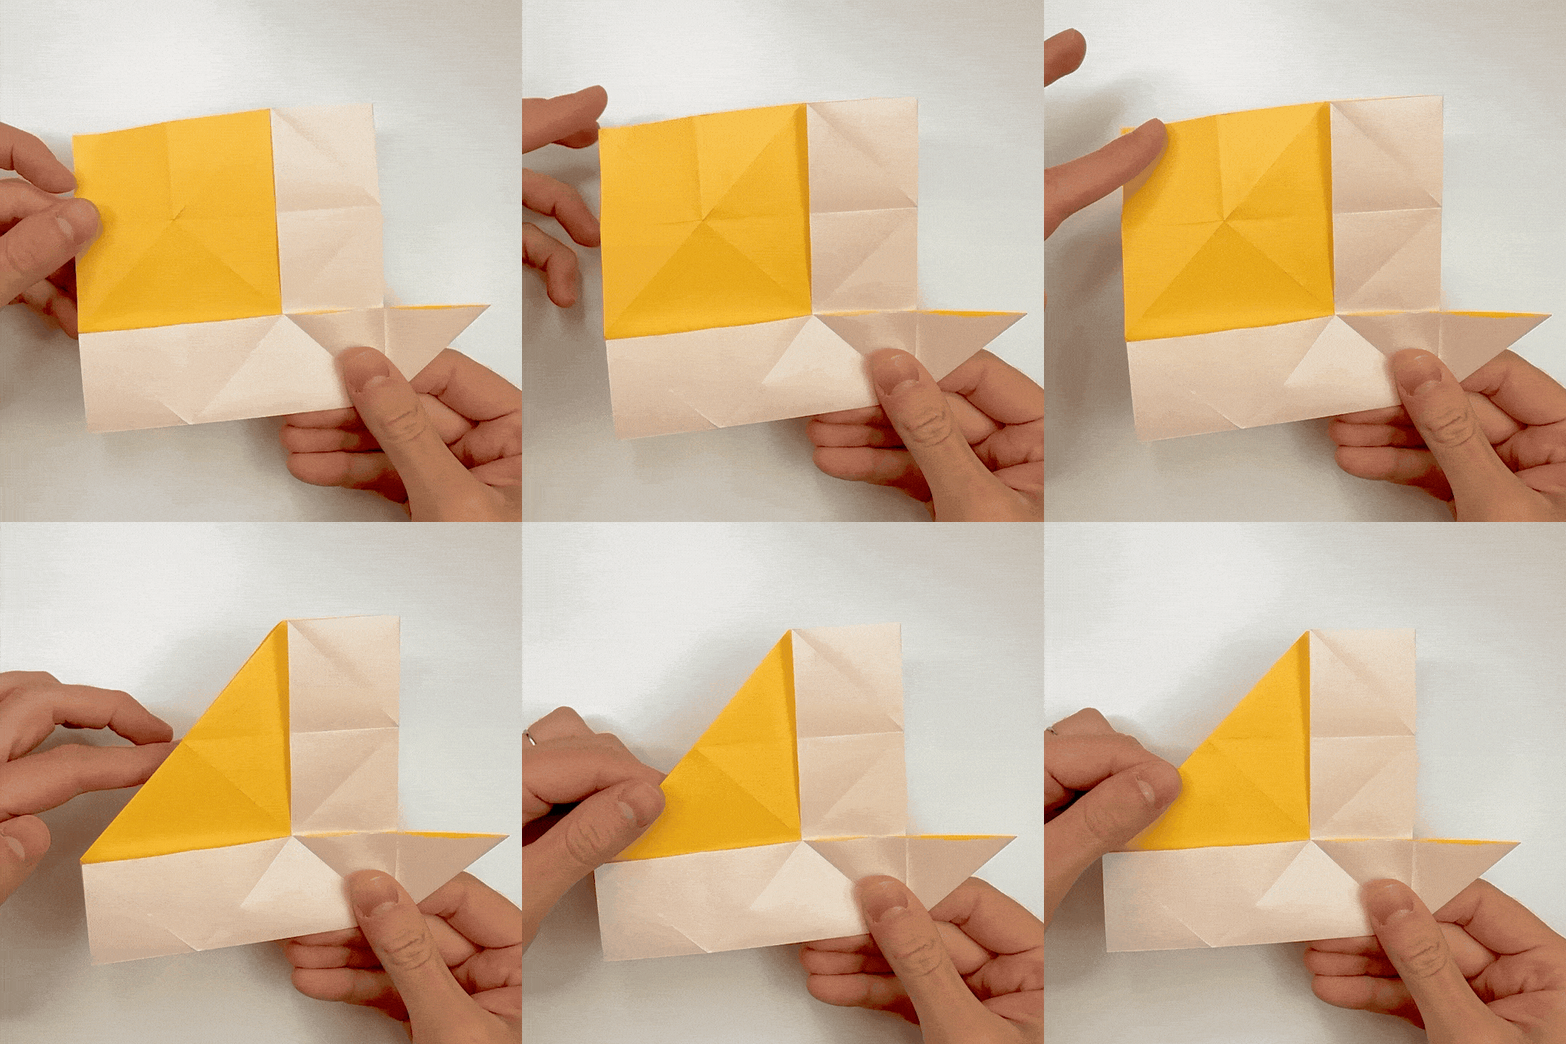
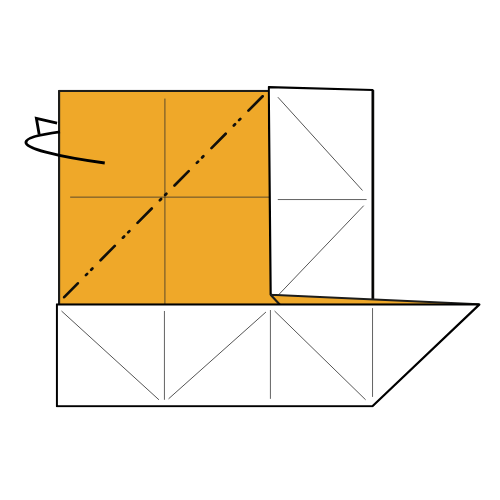
Mountain fold the top left corner behind the model along the existing crease.
Step 10
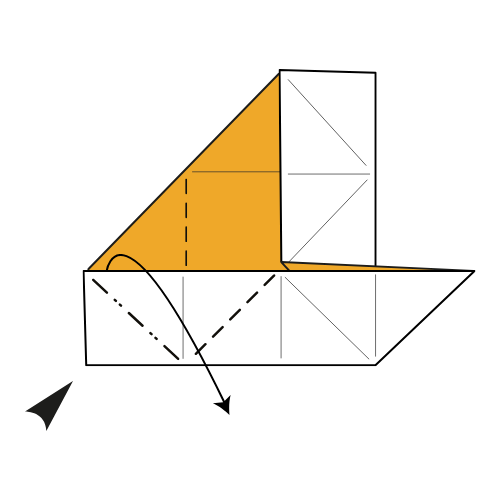
Slightly lift the bottom left area of the top flap, then fold the left edge to the vertical center crease, creating a swivel fold.
Step 11
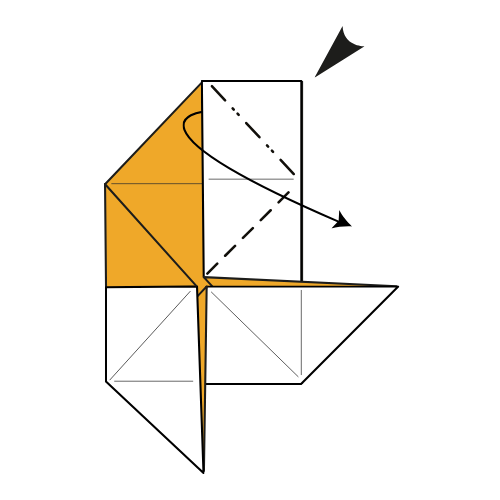
Slightly lift the top right area of the top flap, then push the top right corner inward and swivel fold to the right.
Step 12
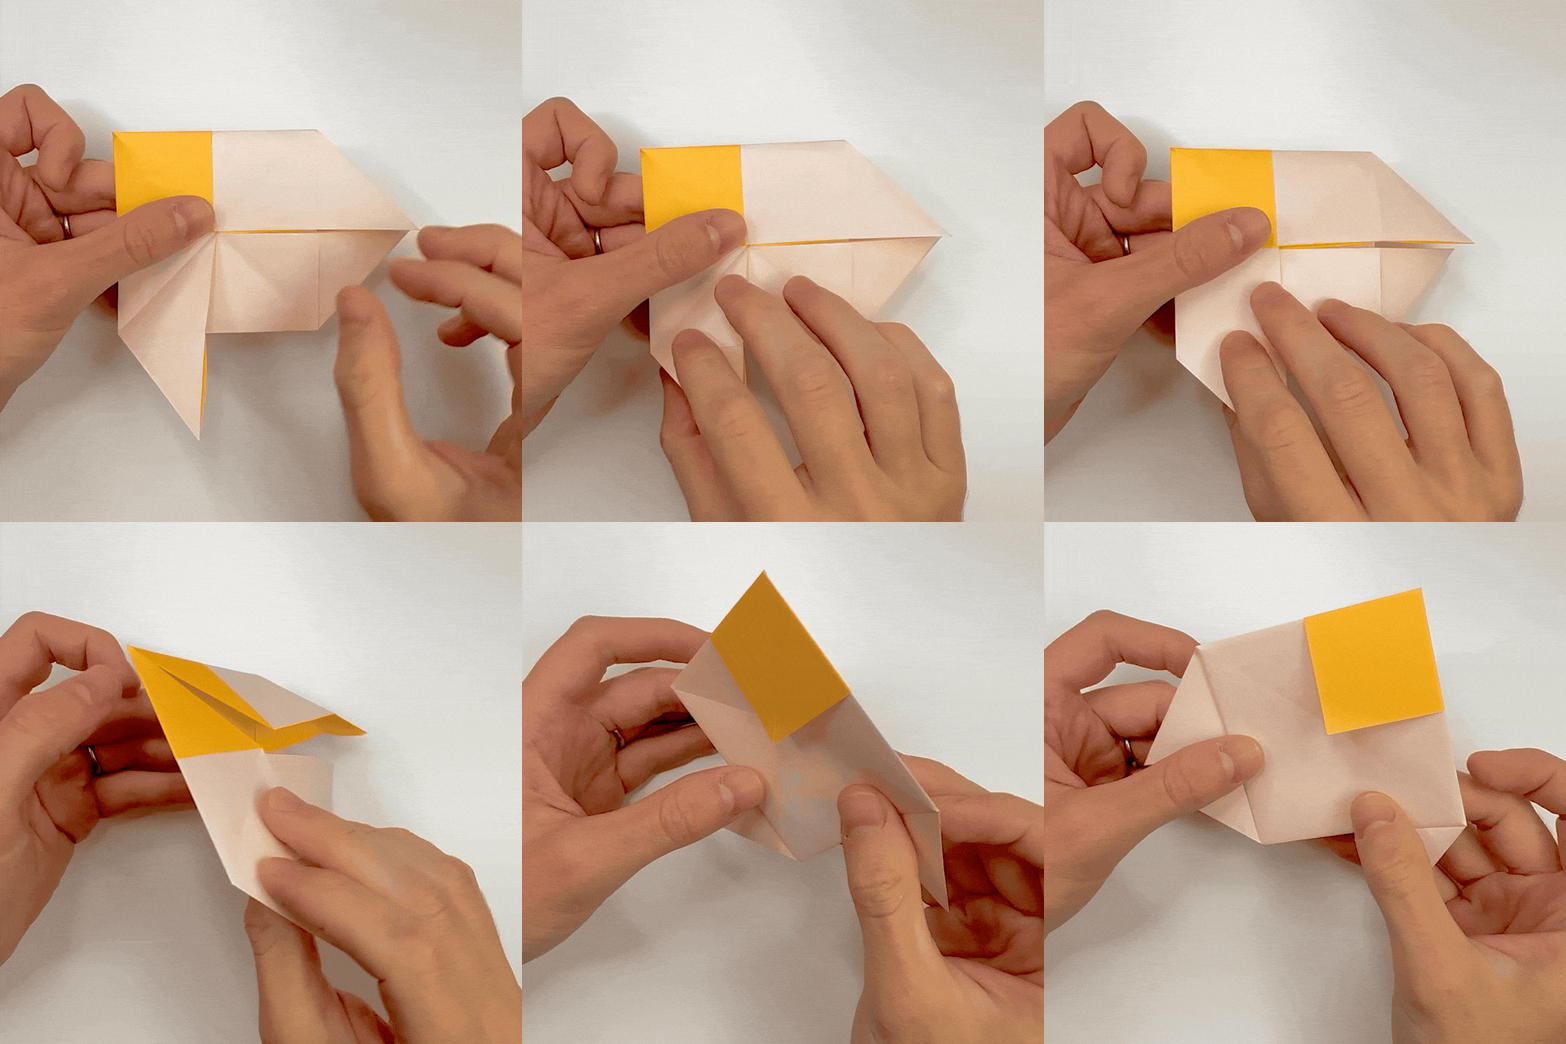
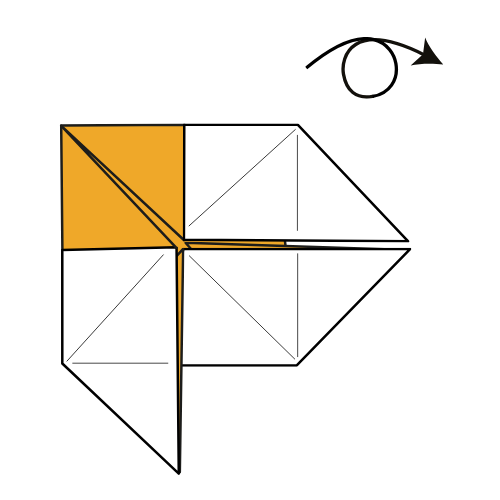
Turn the model over.
Step 13
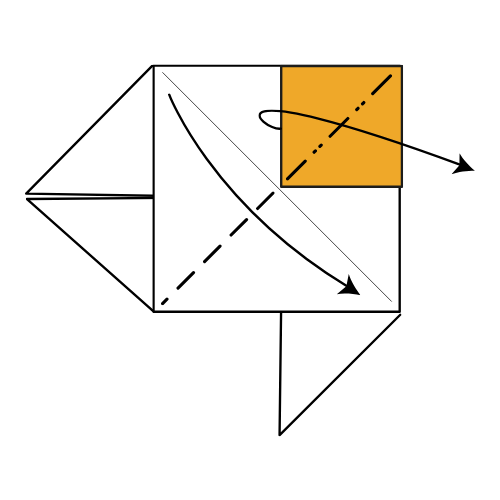
Slightly lift the colored square flap, then fold the top left corner to the bottom right corner along the diagonal.
Your Origami Pajarita Is Finished
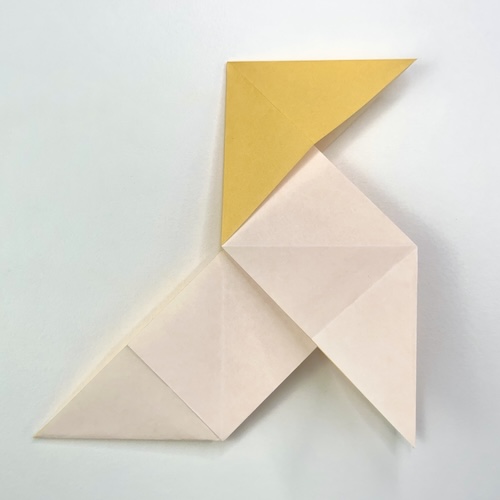
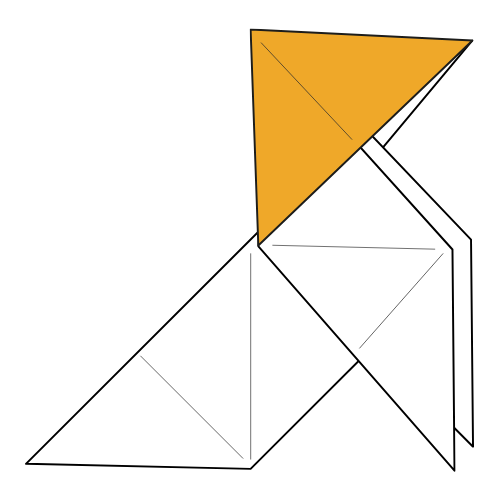
I hope you enjoyed folding this traditional pajarita. It’s a simple model, but it has a long history and is still one of the most popular paper birds in Europe.
If this was your first time folding a pajarita, try making another one. The folds become smoother each time, and it’s a great way to practice swivel folds.
If you fold one, feel free to share a photo in the comments. I’d love to see the papers and colors you choose.
If you’d like to keep folding, have a look at our easy origami tutorials or explore more origami birds on the site.
You can also get new tutorials and folding ideas in our newsletter. And if you’d like to fold along with videos, you can subscribe to our origami YouTube channel.

Fold the Pajarita from paper, not from your screen
Already a paid member? Get this PDF from the Origami Library →Educator? Get it from the Educator Library →