
How to Fold an Easy Origami Flapping Bird
This traditional origami flapping bird is an action‑model classic: one gentle tug on the tail and the wings flap. It’s built off the familiar bird base, so if you’ve folded an origami crane, this one will feel instantly comfortable but with a fun twist.
Though simple to fold, the model has a surprising history: the “flapping bird” effect first appeared in Western folding around the late 19th century, and it quickly became a favorite among educators and paper‑folders.
Because of that history, it isn’t just fun, it’s part of what helped origami spread beyond its roots.
The version you’re about to fold is beginner‑friendly (you can complete it in about 5 minutes), making it perfect for kids or anyone wanting a quick, interesting fold.
Origami Flapping Bird Step-by-Step Instructions
- Difficulty: Easy – Beginner Level 3
- Folding time: 5 to 10 minutes
Recommended Paper
15×15 cm (6×6 in) Kami
Step 1
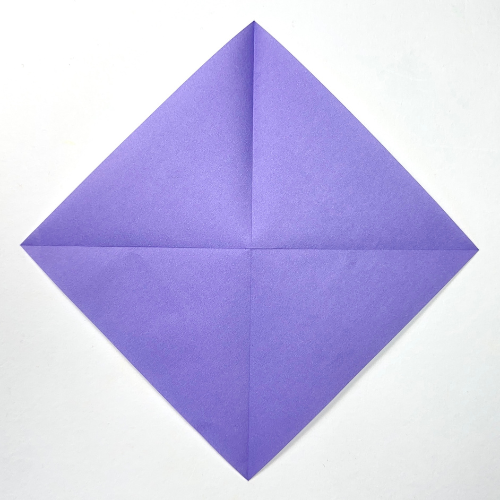

Start with the colored side of the paper facing up. Fold and unfold both diagonals.
Step 2


Turn the paper over.
Step 3

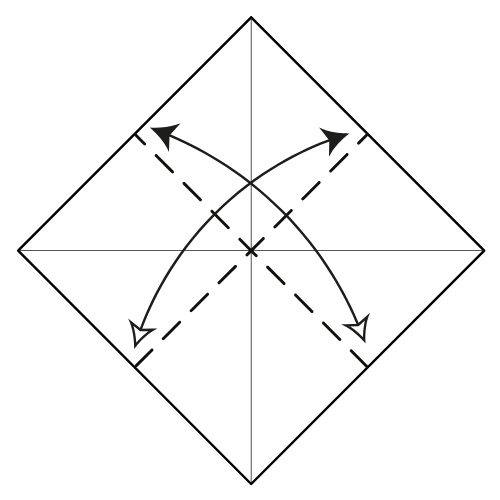
Fold and unfold from side to side, both ways.
Step 4
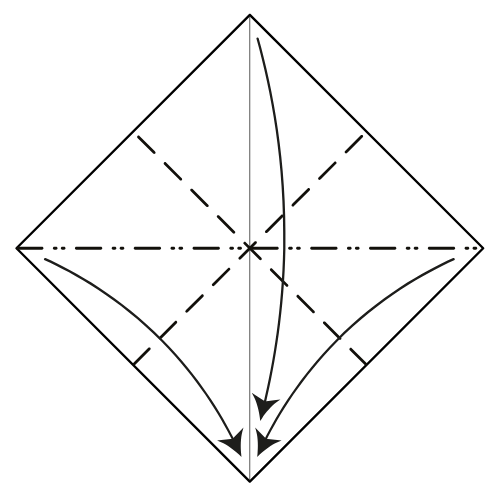
Collapse along the existing creases to form a Square Base.
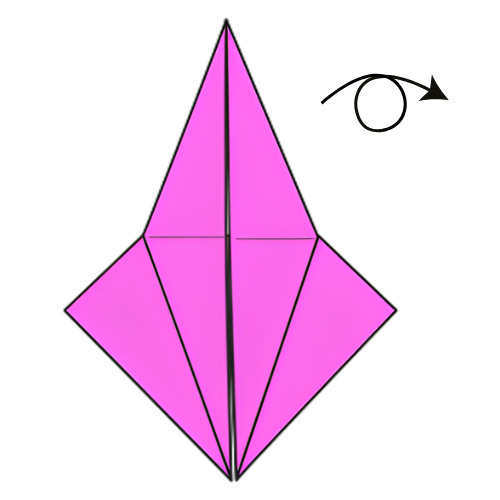
Step 5

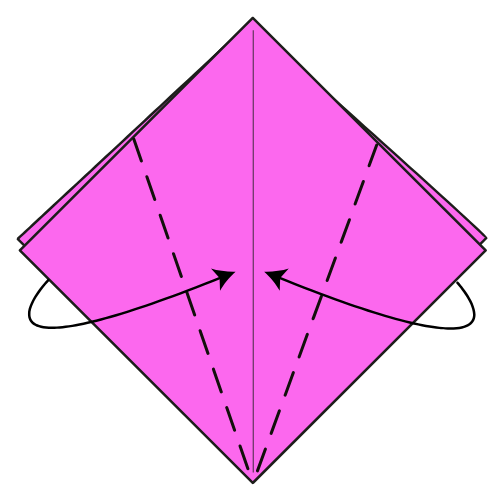
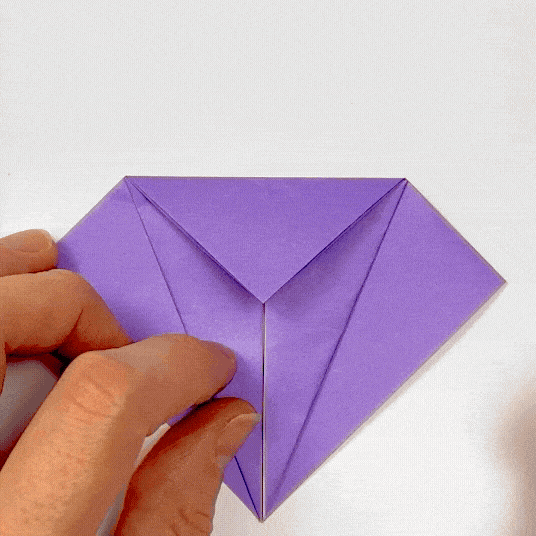
Fold the bottom edges of the top flaps to meet the centerline.
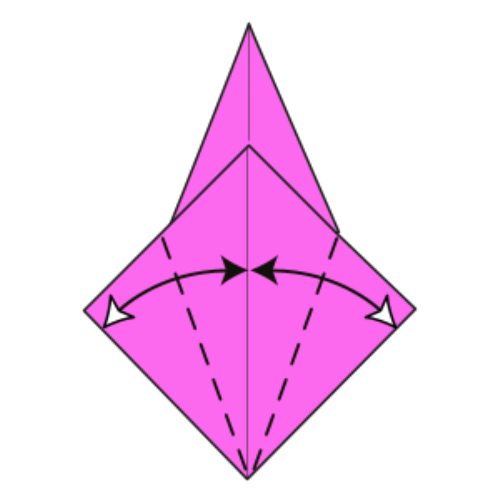
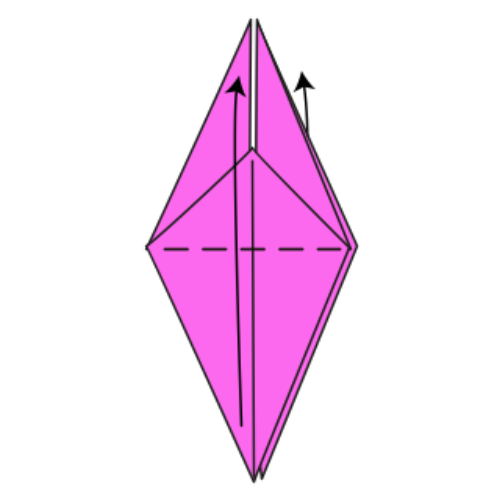
Step 6

Fold the top corner down along the dashed line where the flaps intersect.
Step 7
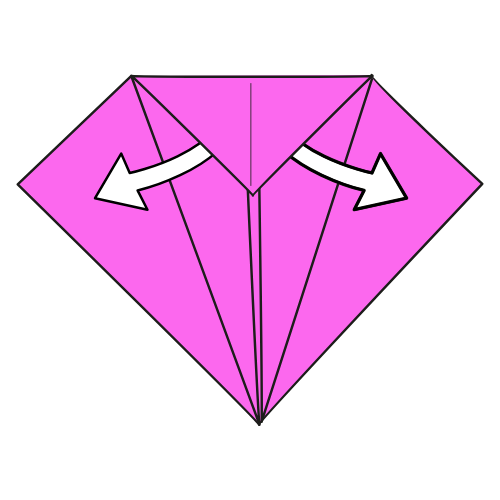
Unfold the folds you made in Step 5.
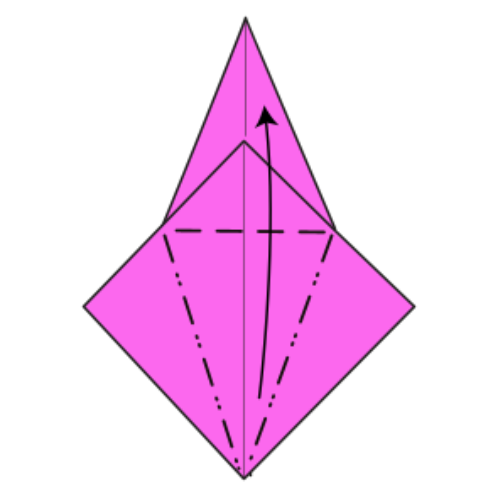
Step 8
Lift the bottom corner of the top layer and fold it up to create a Petal Fold.
Step 9
Turn the model over.
Step 10
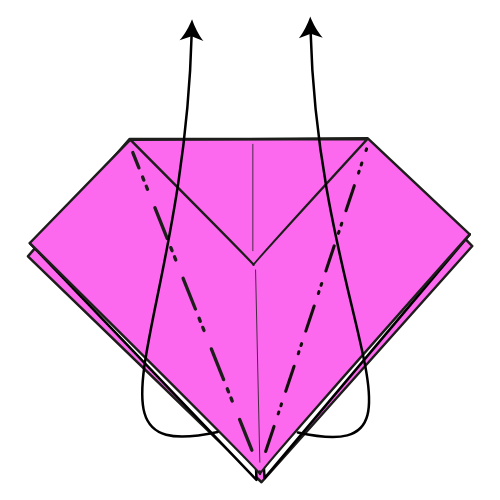
Fold and unfold the bottom edges to the centerline.
Step 11
Bring the bottom corner of the top layer up, creating another Petal Fold.
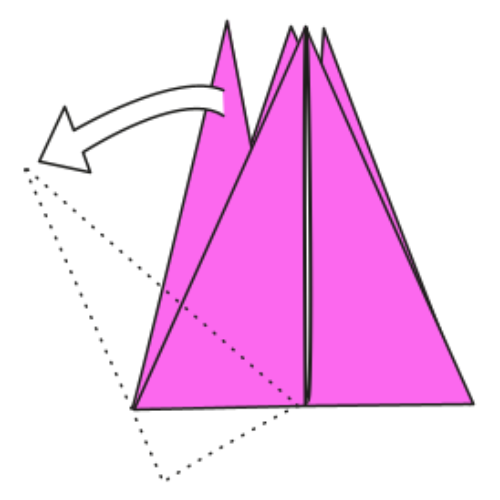
Step 12
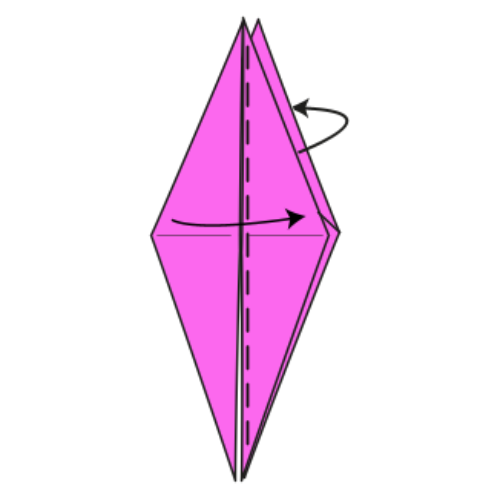
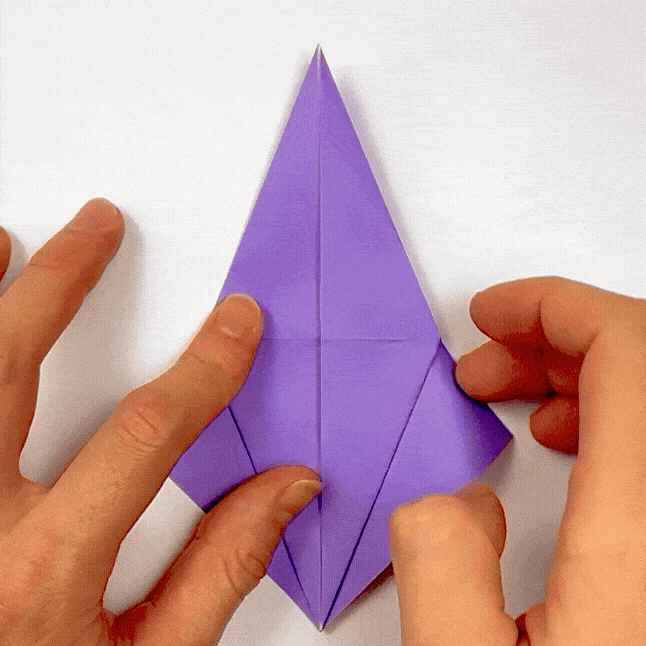
Flip the top left flap to the right. Then repeat the same on the other side.
Step 13
Fold the bottom flap upward. Repeat on the other side.
Step 14
On the left side, gently pull the center flap outward, then flatten it to form the tail. The bottom edges should line up.
Step 15

Repeat the same move on the right side.
Step 16

Fold the right tip down to form the bird’s head. Crease well and unfold.
🕊️ Folding Tip: There’s no exact reference point here, so just fold the head where it looks right to you.
Step 17
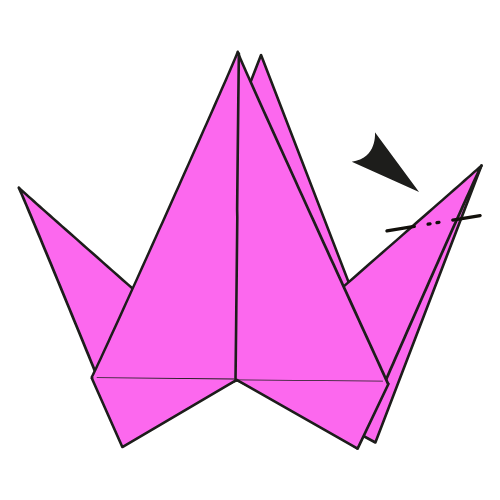
Inside reverse fold along the creases you just made.
Your Flapping Bird Is Ready to Fly!
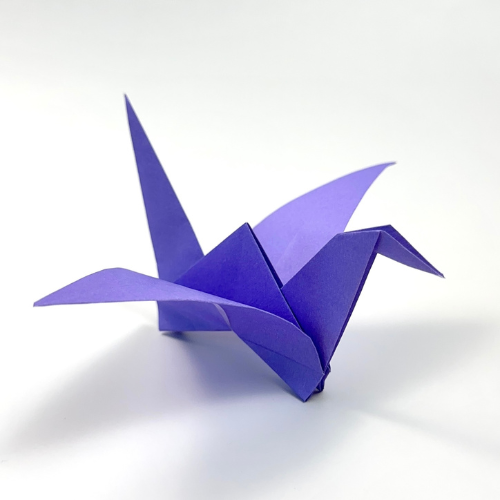
Flap the wings

Pinch the circled point on the right with your right hand. Gently pull the bird’s tail up and down (or side to side). Your origami bird will flap its wings!
I hope you had fun folding (and flapping!) your bird.
This model is a wonderful introduction to action origami and a great way to practice basic bases and folds.
Don’t forget to check out our YouTube channel for more easy origami tutorials, and sign up for our newsletter if you’d like seasonal ideas and origami inspiration delivered to your inbox.
Happy flapping! 🐦✨

Download the Full Origami Flapping Bird Printable PDF
Instructions
We’d love to keep you in the loop, so by sharing your email with us, you’ll be signed up for our mailing list. Don’t worry; we won’t bombard you with spammy emails, and your information is safe with us – we won’t share it with anyone else.


Hello! this turned out amazing. I learned from another friend to fold this but I got stunned because she was going super fast. But this, you can go your own pace and I can understand this very well. I can fold a normal paper crane very well and This should be easy for you if you know how to fold an paper crane. thank you for posting this!!! :)))
Hi Emily! Thank you for your lovely comment. Don’t hesitate to share your folds with us.