How to Fold an Origami Hydrangea

 Traditional/Unknow
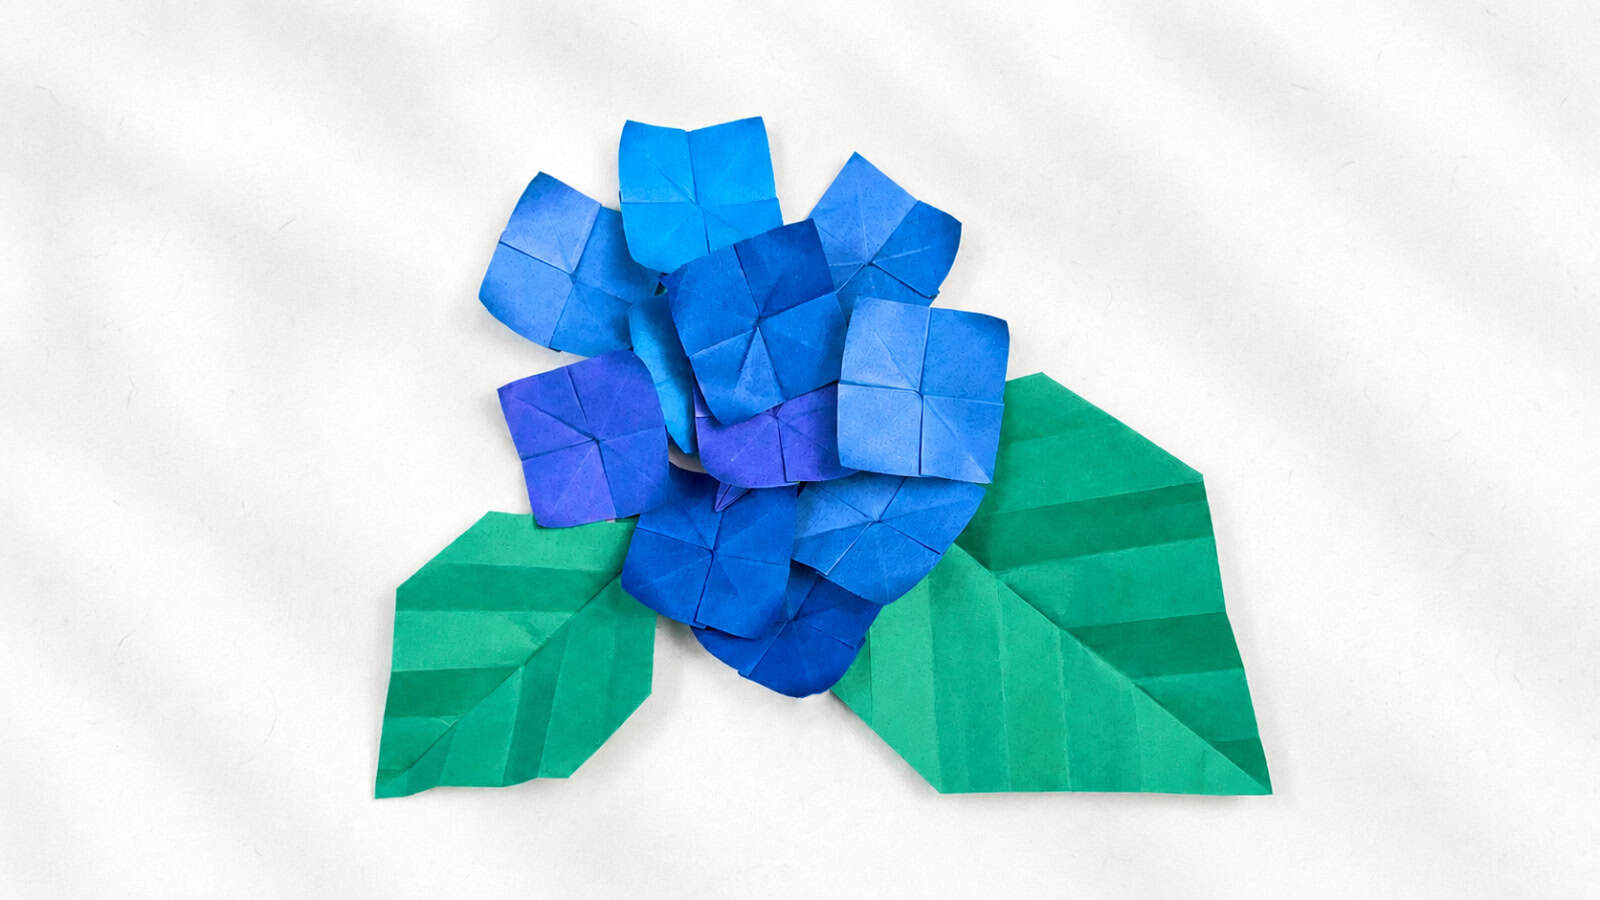
 Let’s learn how to fold an origami hydrangea, a simple flower project made from several small paper blossoms assembled together.
Each individual flower is very easy to fold, making this a relaxing project even for beginners. When grouped together, the flowers create the full, rounded look of a hydrangea.
One of the nicest parts of this model is experimenting with color. By mixing different shades of blue, purple, pink, or white, you can create a much more natural and realistic-looking flower arrangement.
The flowers can be glued together directly or attached to a paper ball to build a fuller hydrangea shape. Paired with a few folded leaves, the finished result works beautifully as a decoration or display piece.
Origami Hydrangea Step-by-Step Instructions
- Difficulty: Easy – Beginner level 3
- Folding time: Around 2 to 3 minutes for each flower, and about 30 minutes for the complete hydrangea flower ball with leaves.
Recommended Paper
For the flowers, use 2 x 2 in (5 x 5 cm) to 3 x 3 in (7.5 x 7.5 cm) Tant origami paper or origami paper (Kami). Plan to fold around 10 to 15 flowers to create one full hydrangea flower ball. Here, I used different shades of blue to give the bloom a more natural look.
For the leaves, I used one 6 x 6 in (15 x 15 cm) sheet of Tant origami paper for the large leaf and one 3 x 3 in (7.5 x 7.5 cm) sheet for the smaller leaf.
Step 1
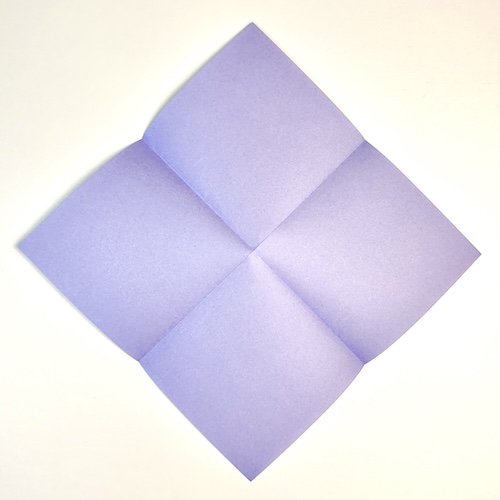
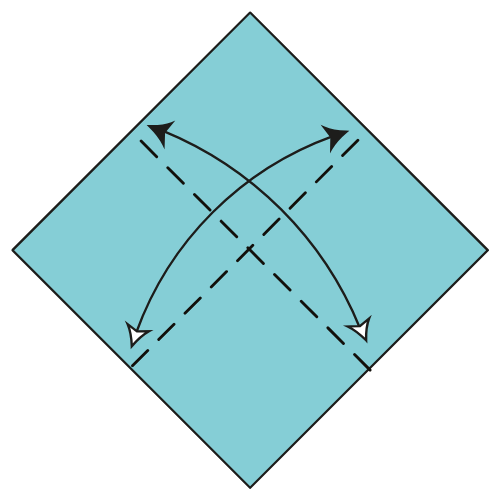
Start with the colored side facing up, with the paper positioned like a diamond. Fold and unfold the paper side to side in both directions.
Step 2
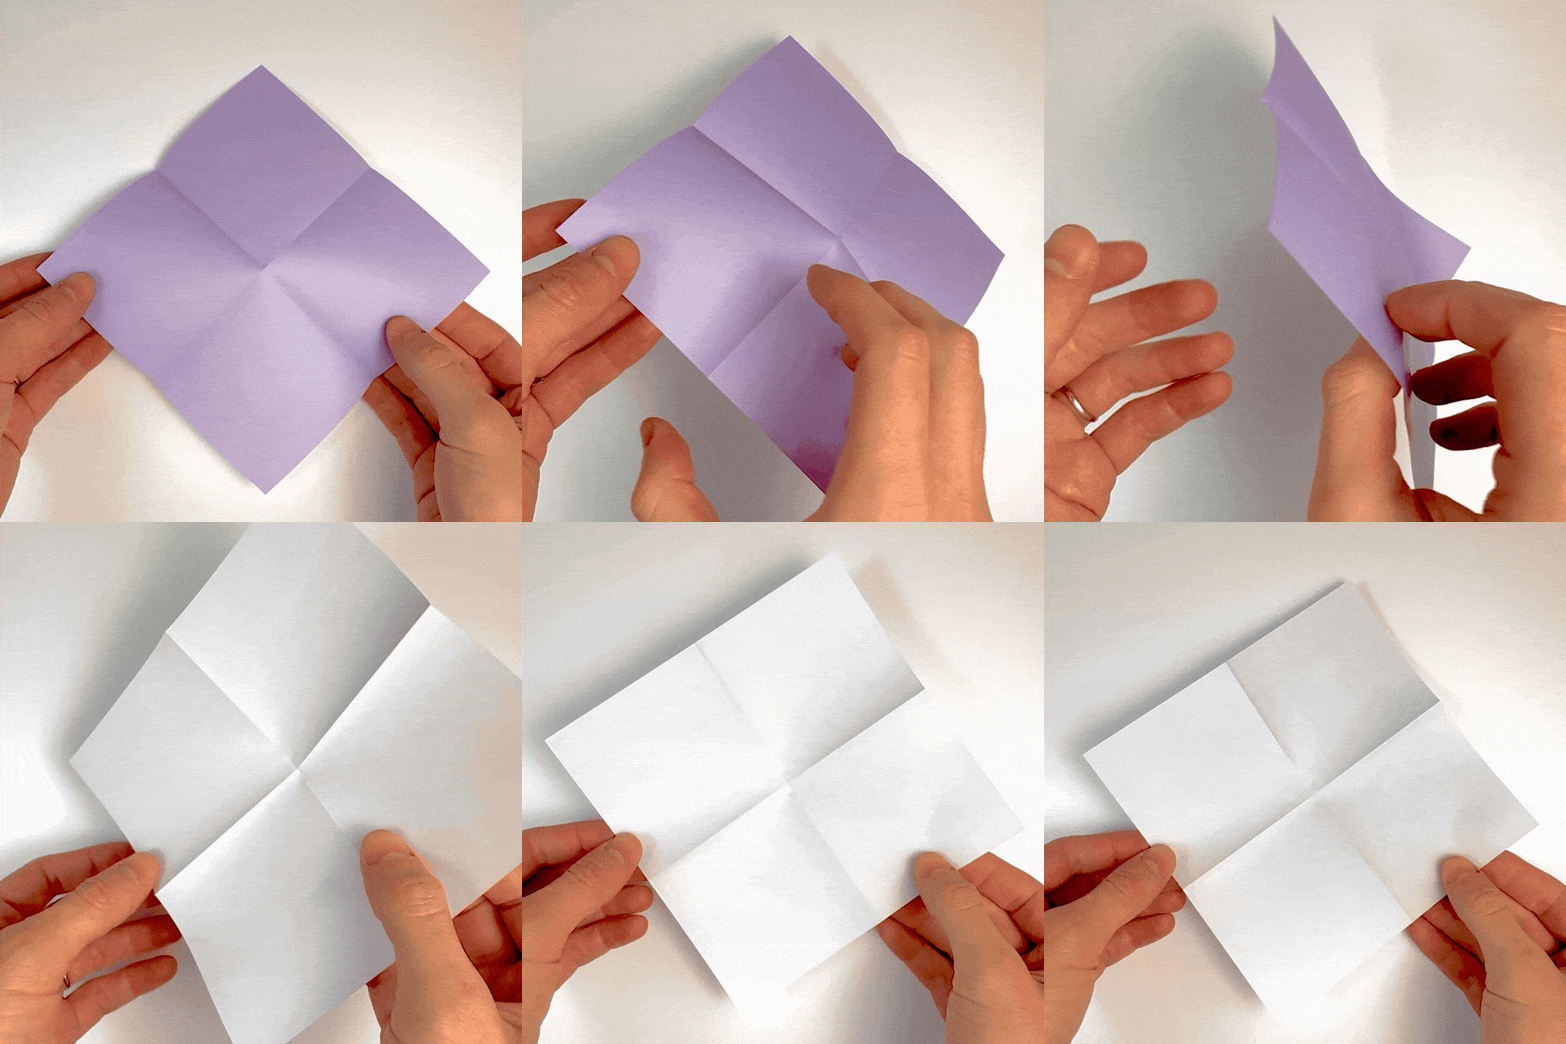
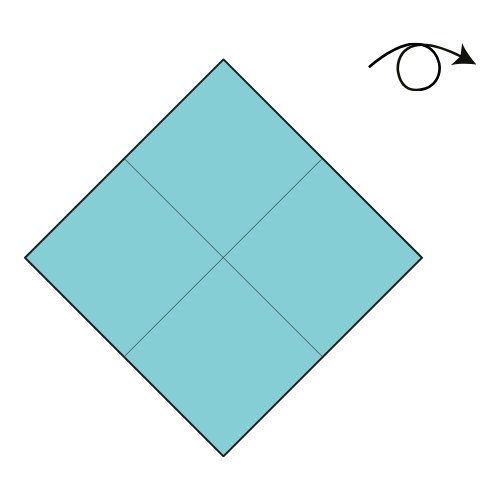
Turn the paper over.
Step 3
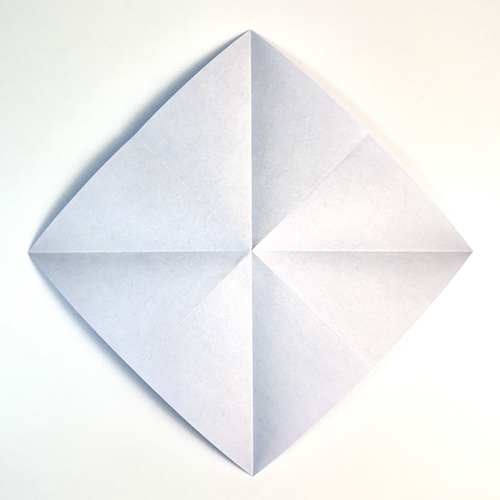
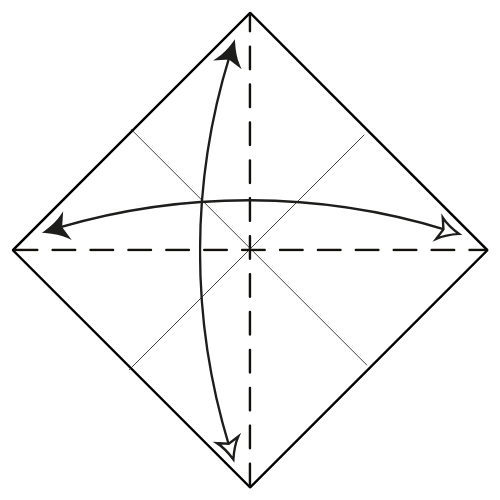
Fold and unfold along both diagonals.
Step 4
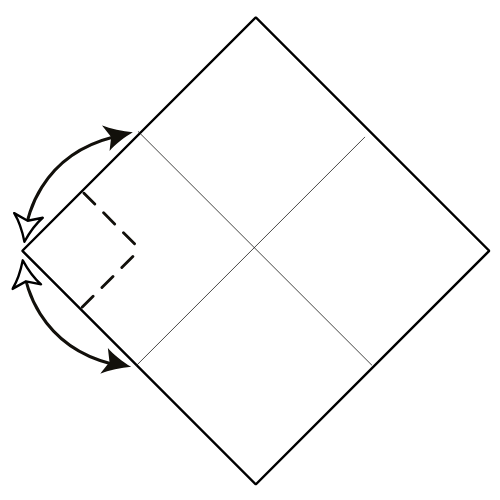
On the left side, fold and unfold each edge to the nearest crease line. Only crease from the edge to the nearest crease.
Step 5
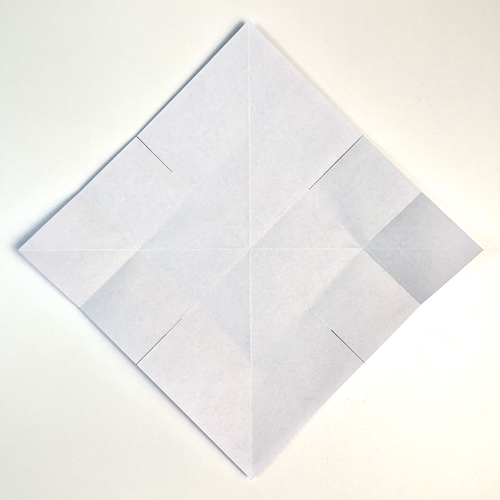
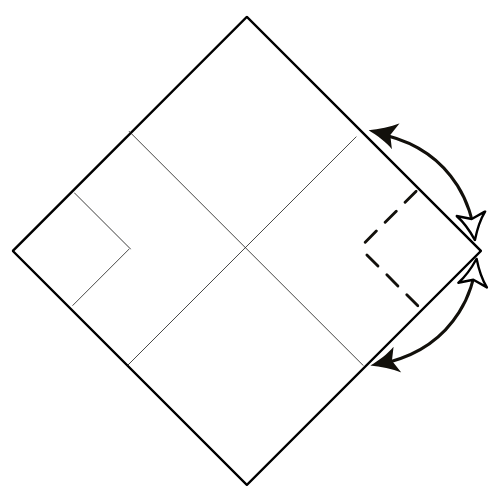
Repeat Step 4 on the right side.
Step 6

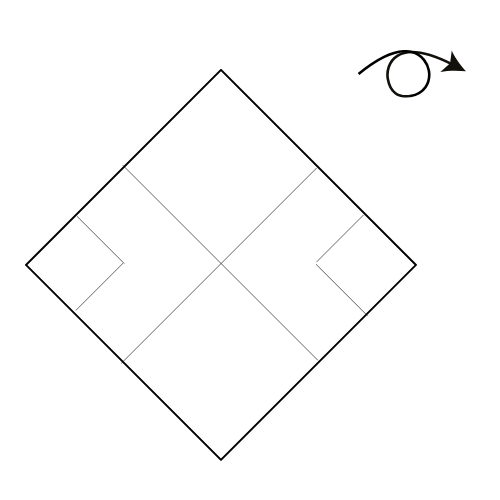
Turn the paper over.
Step 7
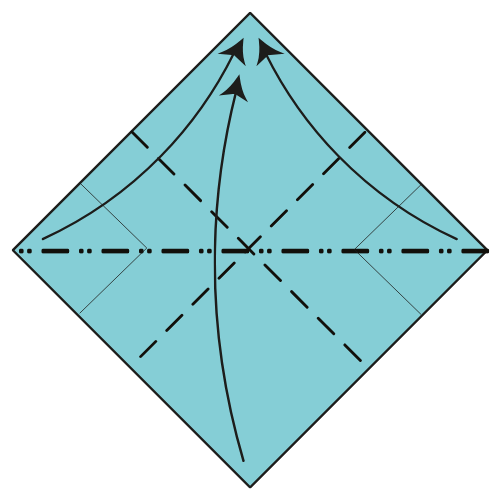
Collapse along the existing creases to form a Square Base by bringing the left and right corners up to meet the top corner.
Step 8
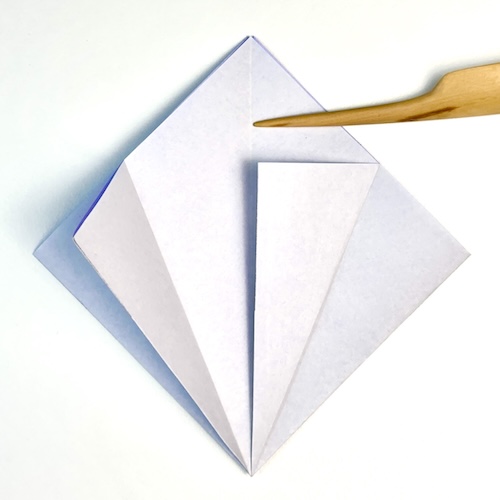
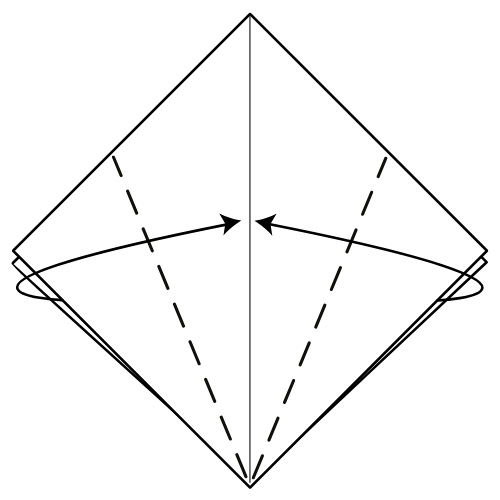
Fold the left and right edges to the vertical centerline, top flaps only.
Step 9
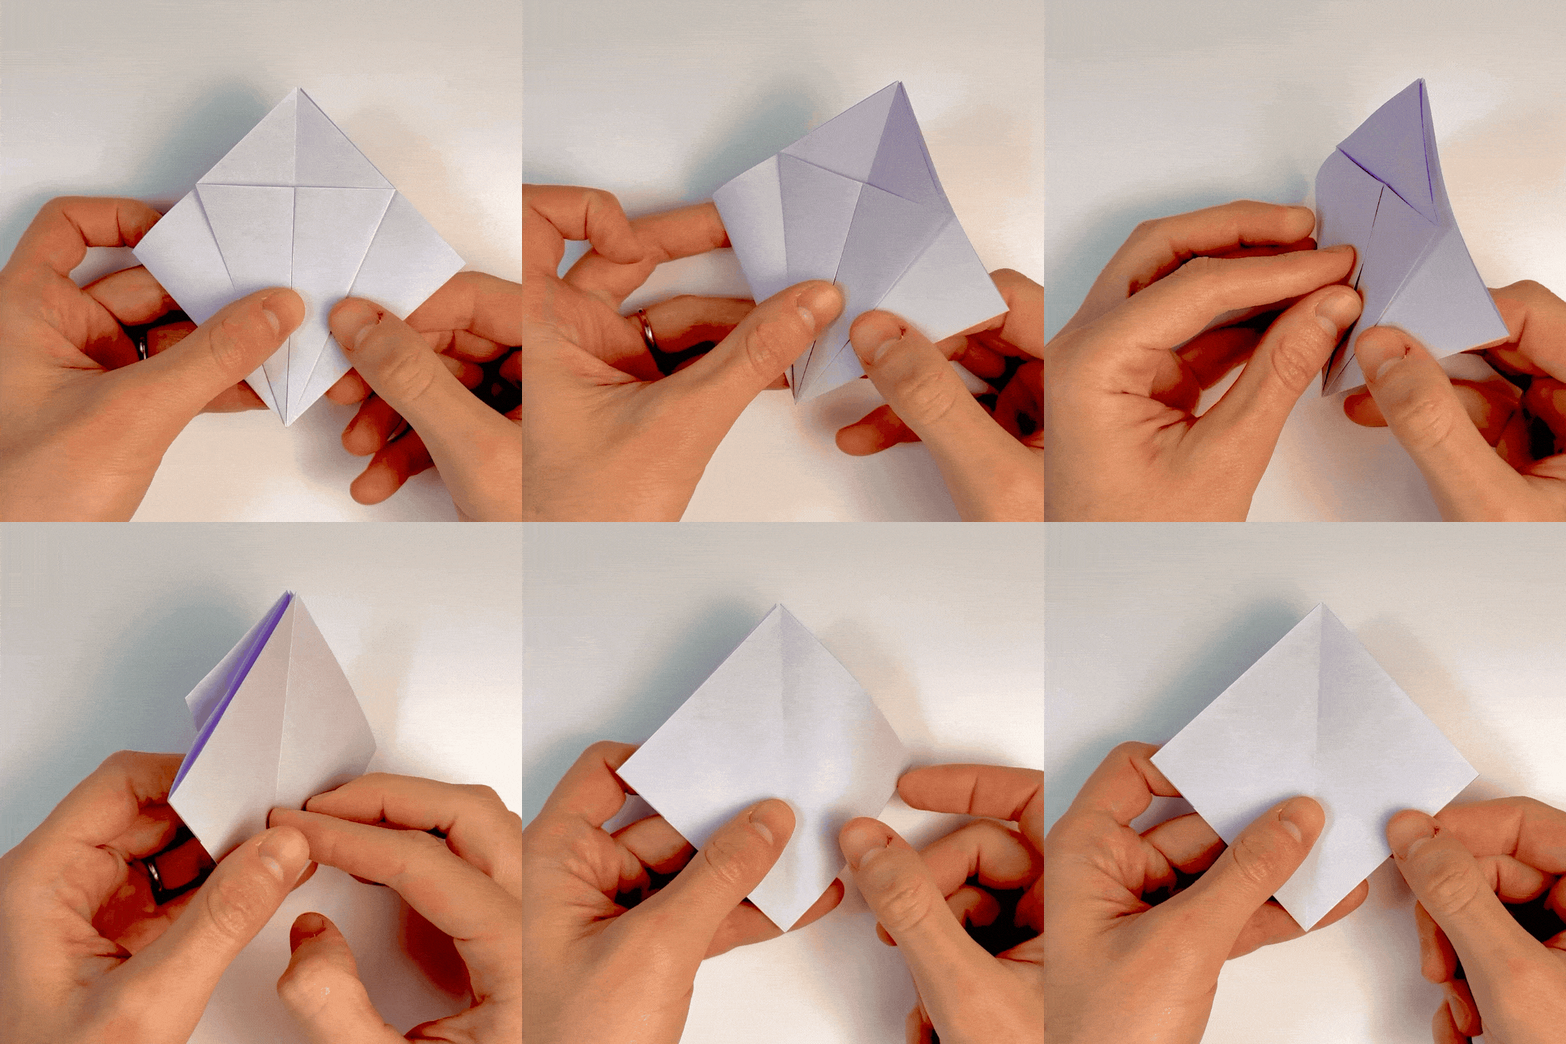
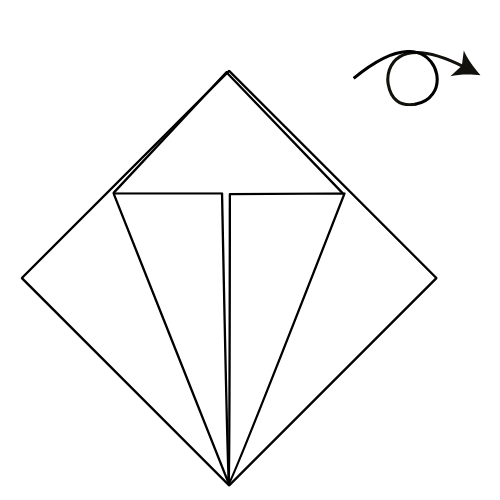
Turn the model over.
Step 10
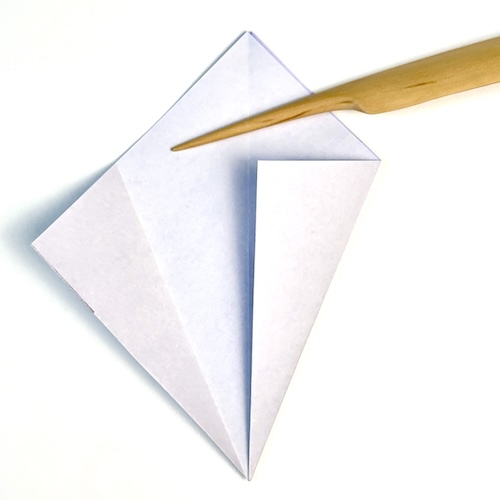
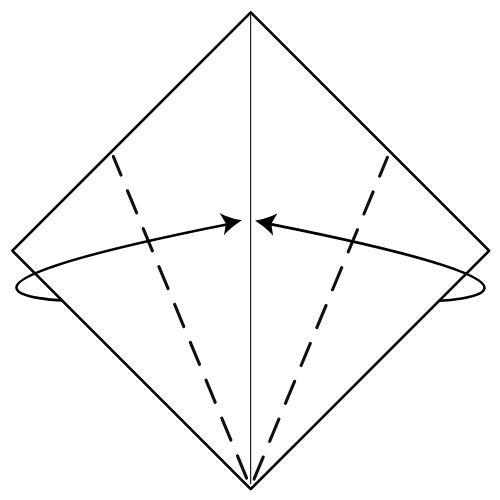
Again, fold the left and right edges to the vertical centerline.
Step 11
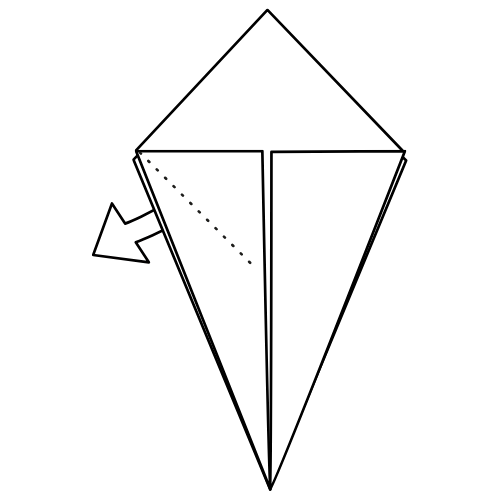
On the left side, open the layers and bring the corner downward by reverse folding along the existing creases from Step 4.
Step 12
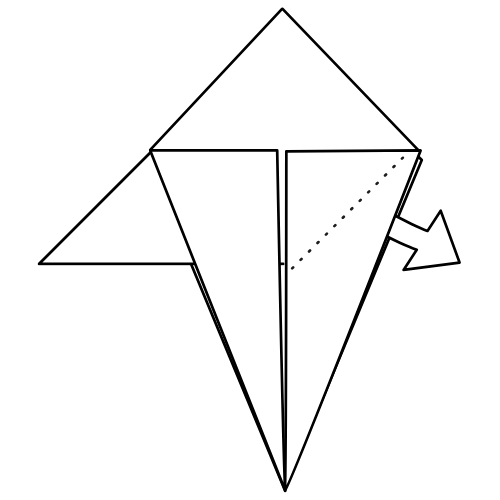
Repeat Step 11 on the right side.
Step 13
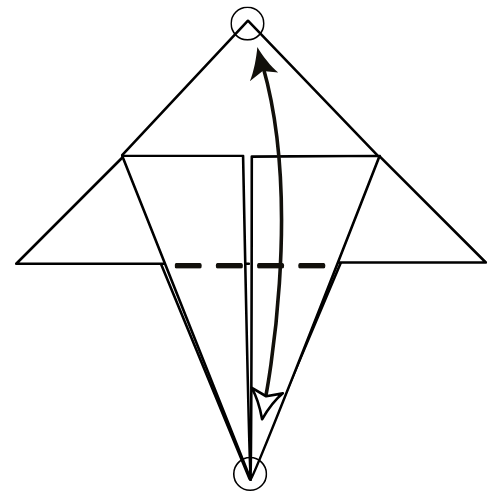
Fold the bottom corner up to meet the top corner. Crease well, then unfold.
💠 Folding tip: This step is optional. It simply creates a reference crease to help guide the fold in the next step.
Step 14
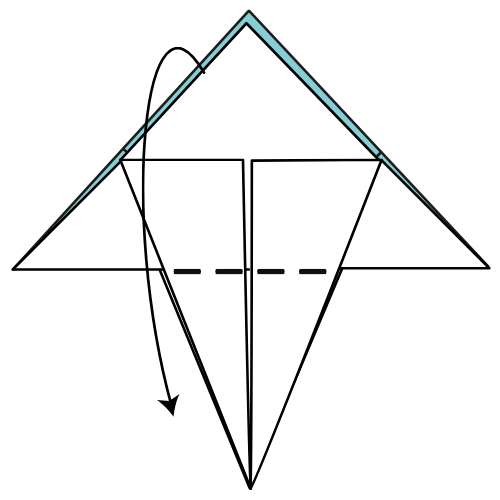
Fold the top corner of the top layer downward along the crease you just made.
Your Origami Hydrangea Unit Is Complete!
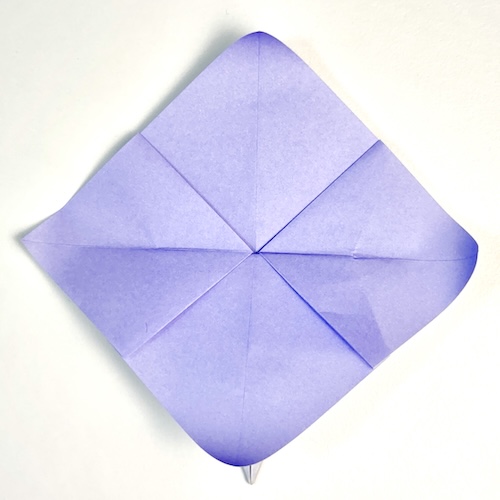
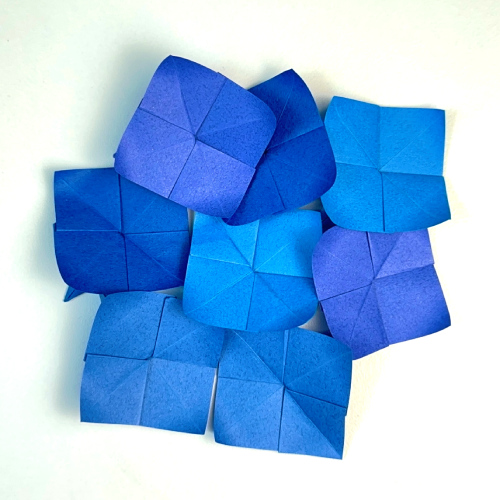
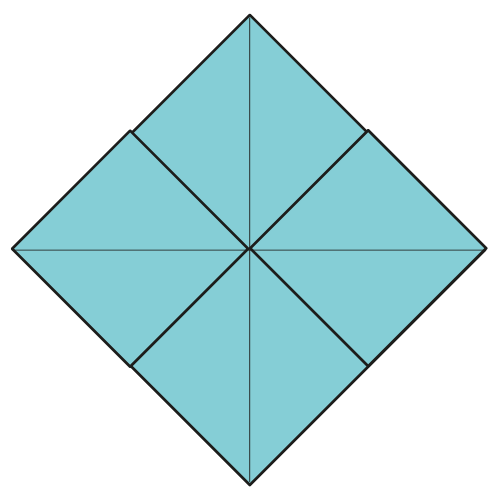
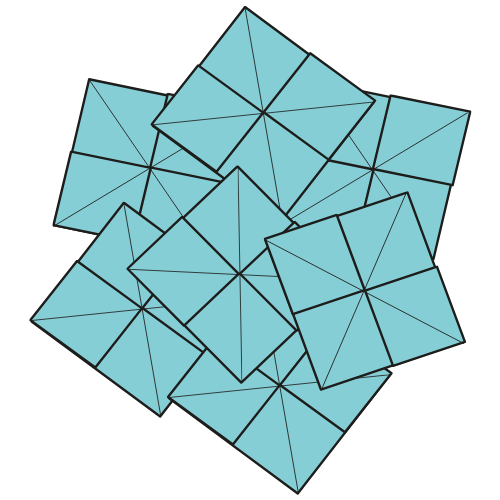
Fold several units and glue them together, or attach them to a paper ball to create a full hydrangea flower ball. You can also add origami leaves for a more natural look.
I hope you enjoyed folding this origami hydrangea. Even though each flower is simple, assembling them together creates a very satisfying final result.
This is also the kind of project that becomes more relaxing as you go. After folding a few flowers, the process starts to feel very natural and repetitive in a nice way.
If you fold one, feel free to share a photo in the comments. It’s always nice to see the different color combinations and arrangements you create.
If you’d like to keep folding, you can explore more easy origami tutorials or browse our collection of origami flowers on the site.
You can also get new tutorials and folding ideas in our newsletter here. And if you prefer video instructions, you can follow along on our YouTube channel.
Download the Complete Origami Hydrangea Printable PDF Instructions
This printable PDF is part of our Origami Friends membership on Patreon. As a member, you get access to these diagrams, our full library of 120+ printable PDFs, and member-only content.
🎓 Need printables licensed for classroom or group use? See the Educator Library →