
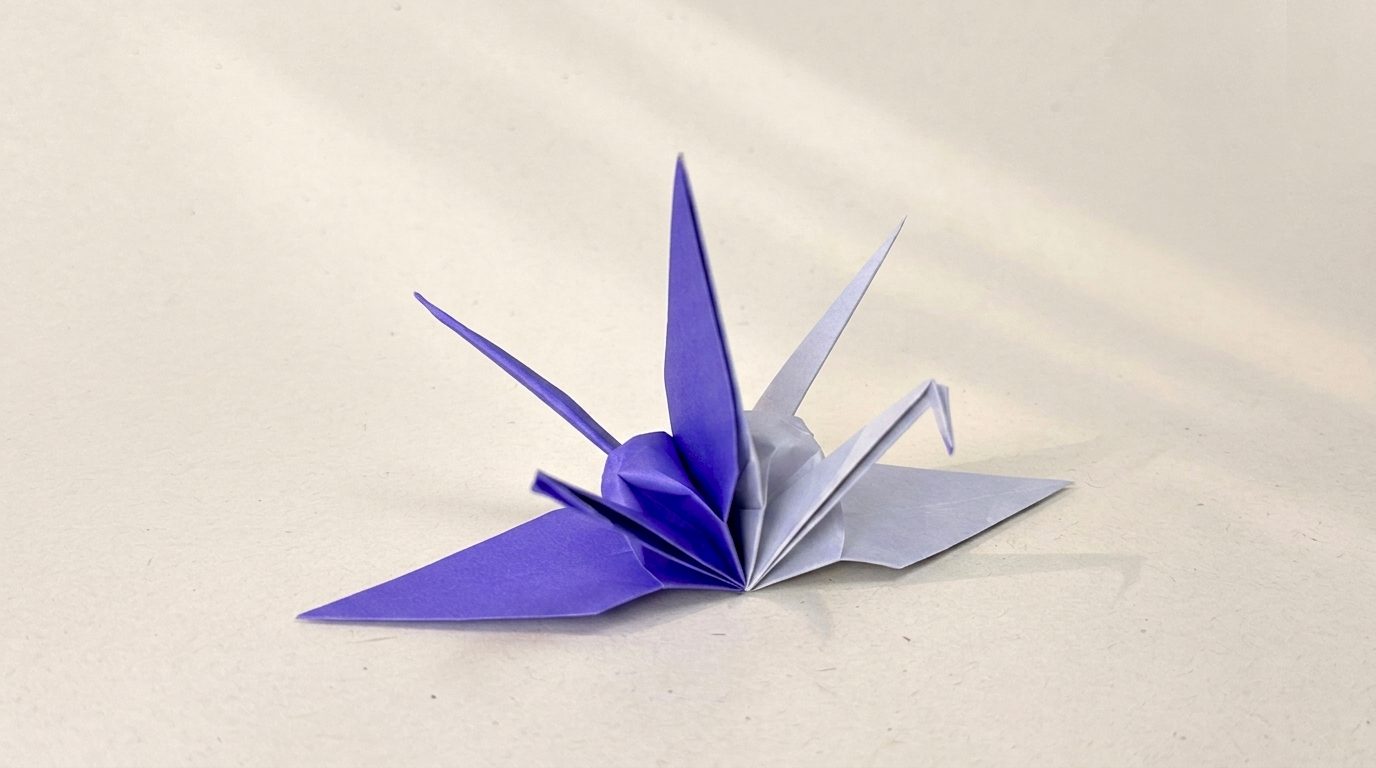
How to Make an Origami Imoseyama Cranes

 Traditional/Unknow
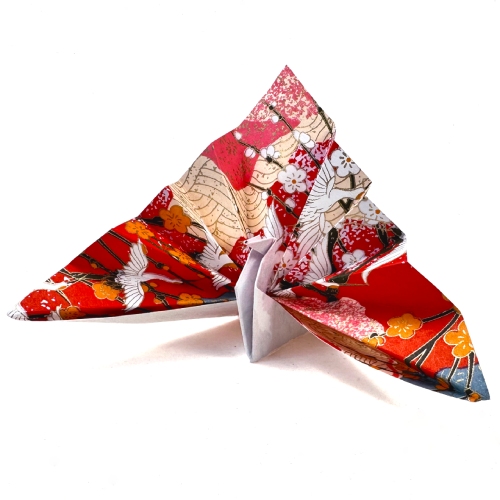
 The origami Imoseyama cranes are two birds that share one sheet of paper, joined wing to wing and never meant to come apart.
Folders in Japan have been making connected cranes, or renzuru, for well over two centuries. The oldest instructions we have for them sit in a book from 1797 called Hiden Senbazuru Orikata, the earliest known book about origami as a pastime rather than ceremony. Some of its models chain a dozen birds together or more.
Imose is an old word for a couple in love, and Imoseyama are two mountains that appear in classical Japanese poetry as a man and a woman standing side by side. The original book set the diagram alongside a short poem about two cranes that stay joined, and the model has carried that meaning ever since.
The model sits a step or two past the traditional crane, so fold it first if you have not yet. The new territory is all at the beginning: a little work with scissors, then a crease pattern that collapses into two bird bases at once. Take that part slowly, and the rest will feel like ground you have already covered.
Origami Imoseyama Cranes Step-by-Step Instructions
- Difficulty: Easy – Beginner level 5
- Folding time: 20 minutes
Recommended Paper
Half of a 9.5 x 9.5 in (24 x 24 cm) sheet of origami paper.
You will also need scissors. The paper is cut in half in Step 2 and given a short slit in Step 13, so keep them within reach before you begin.
Step 1
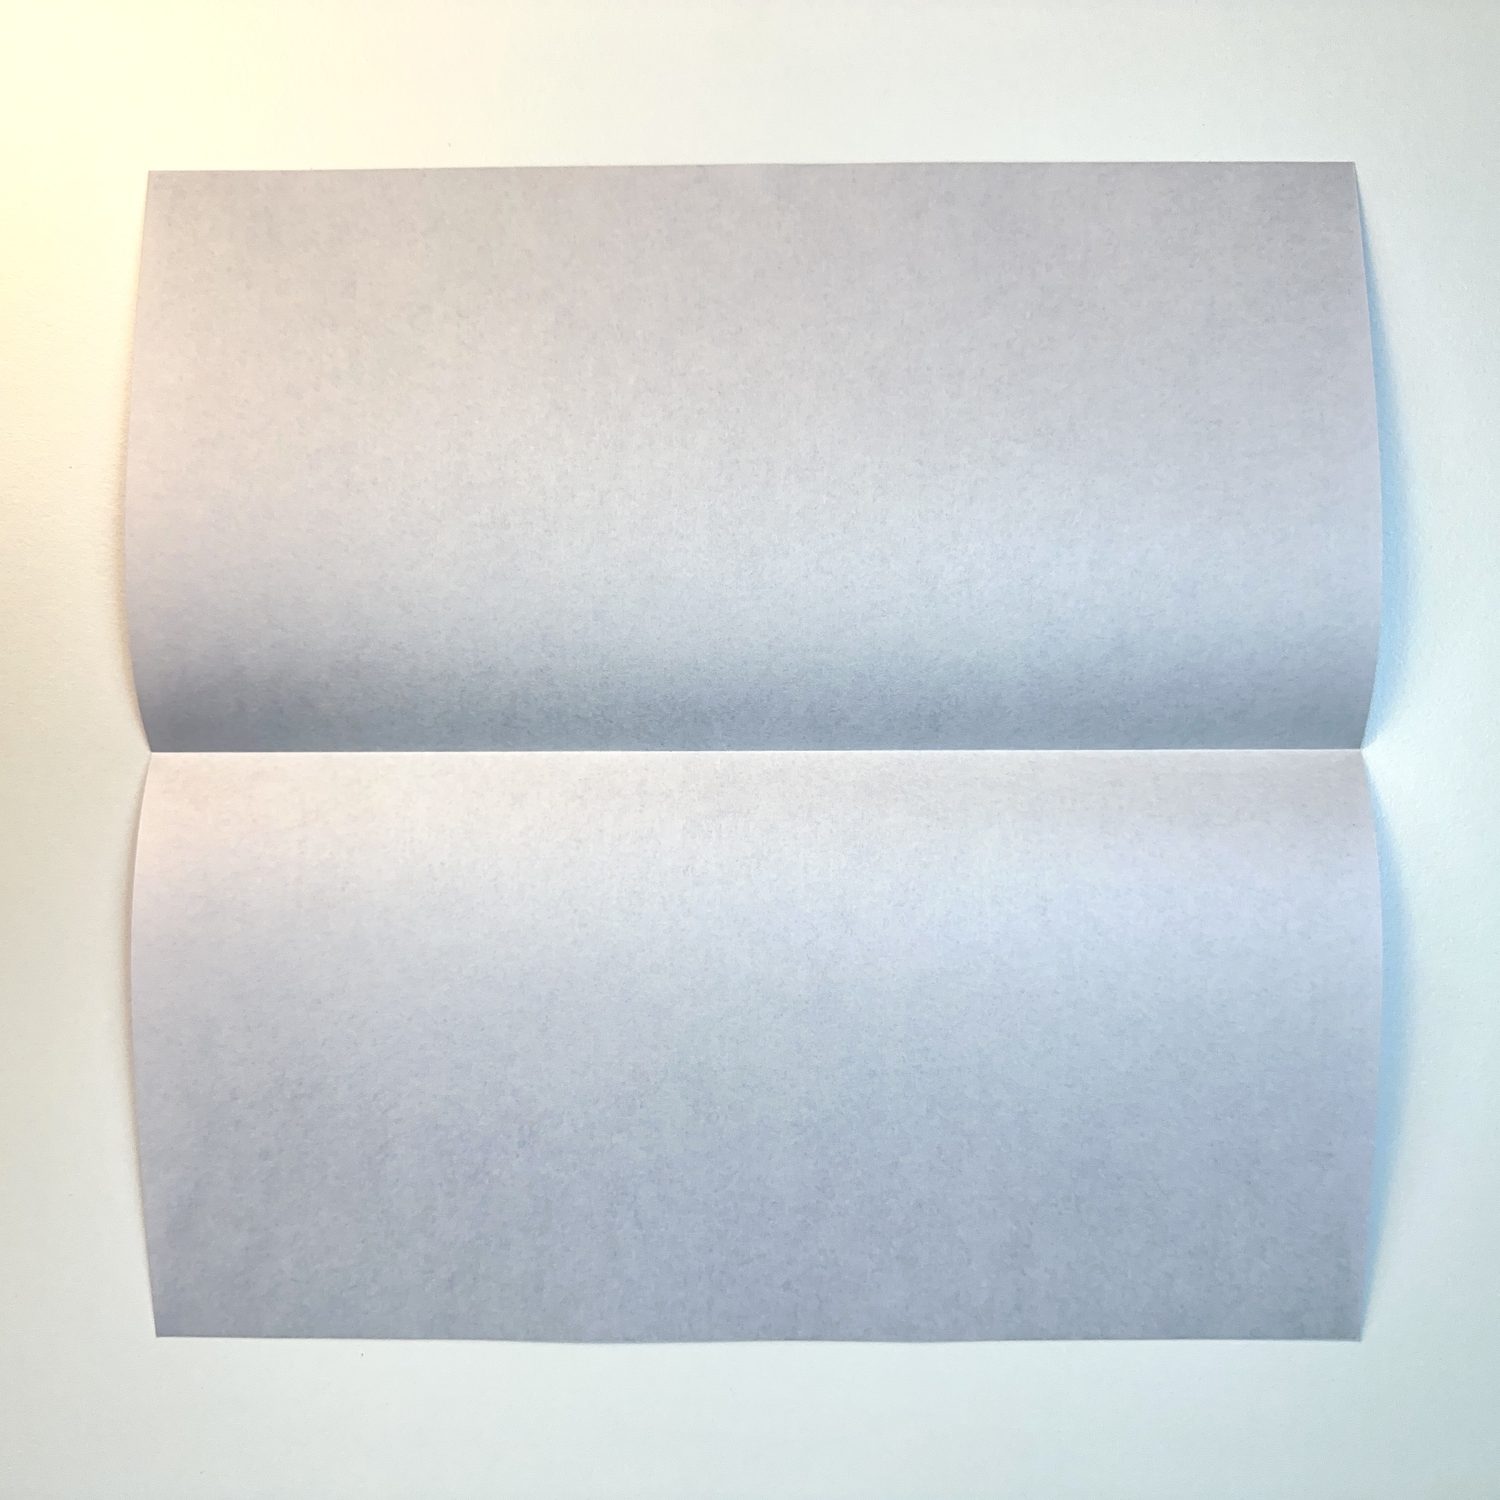
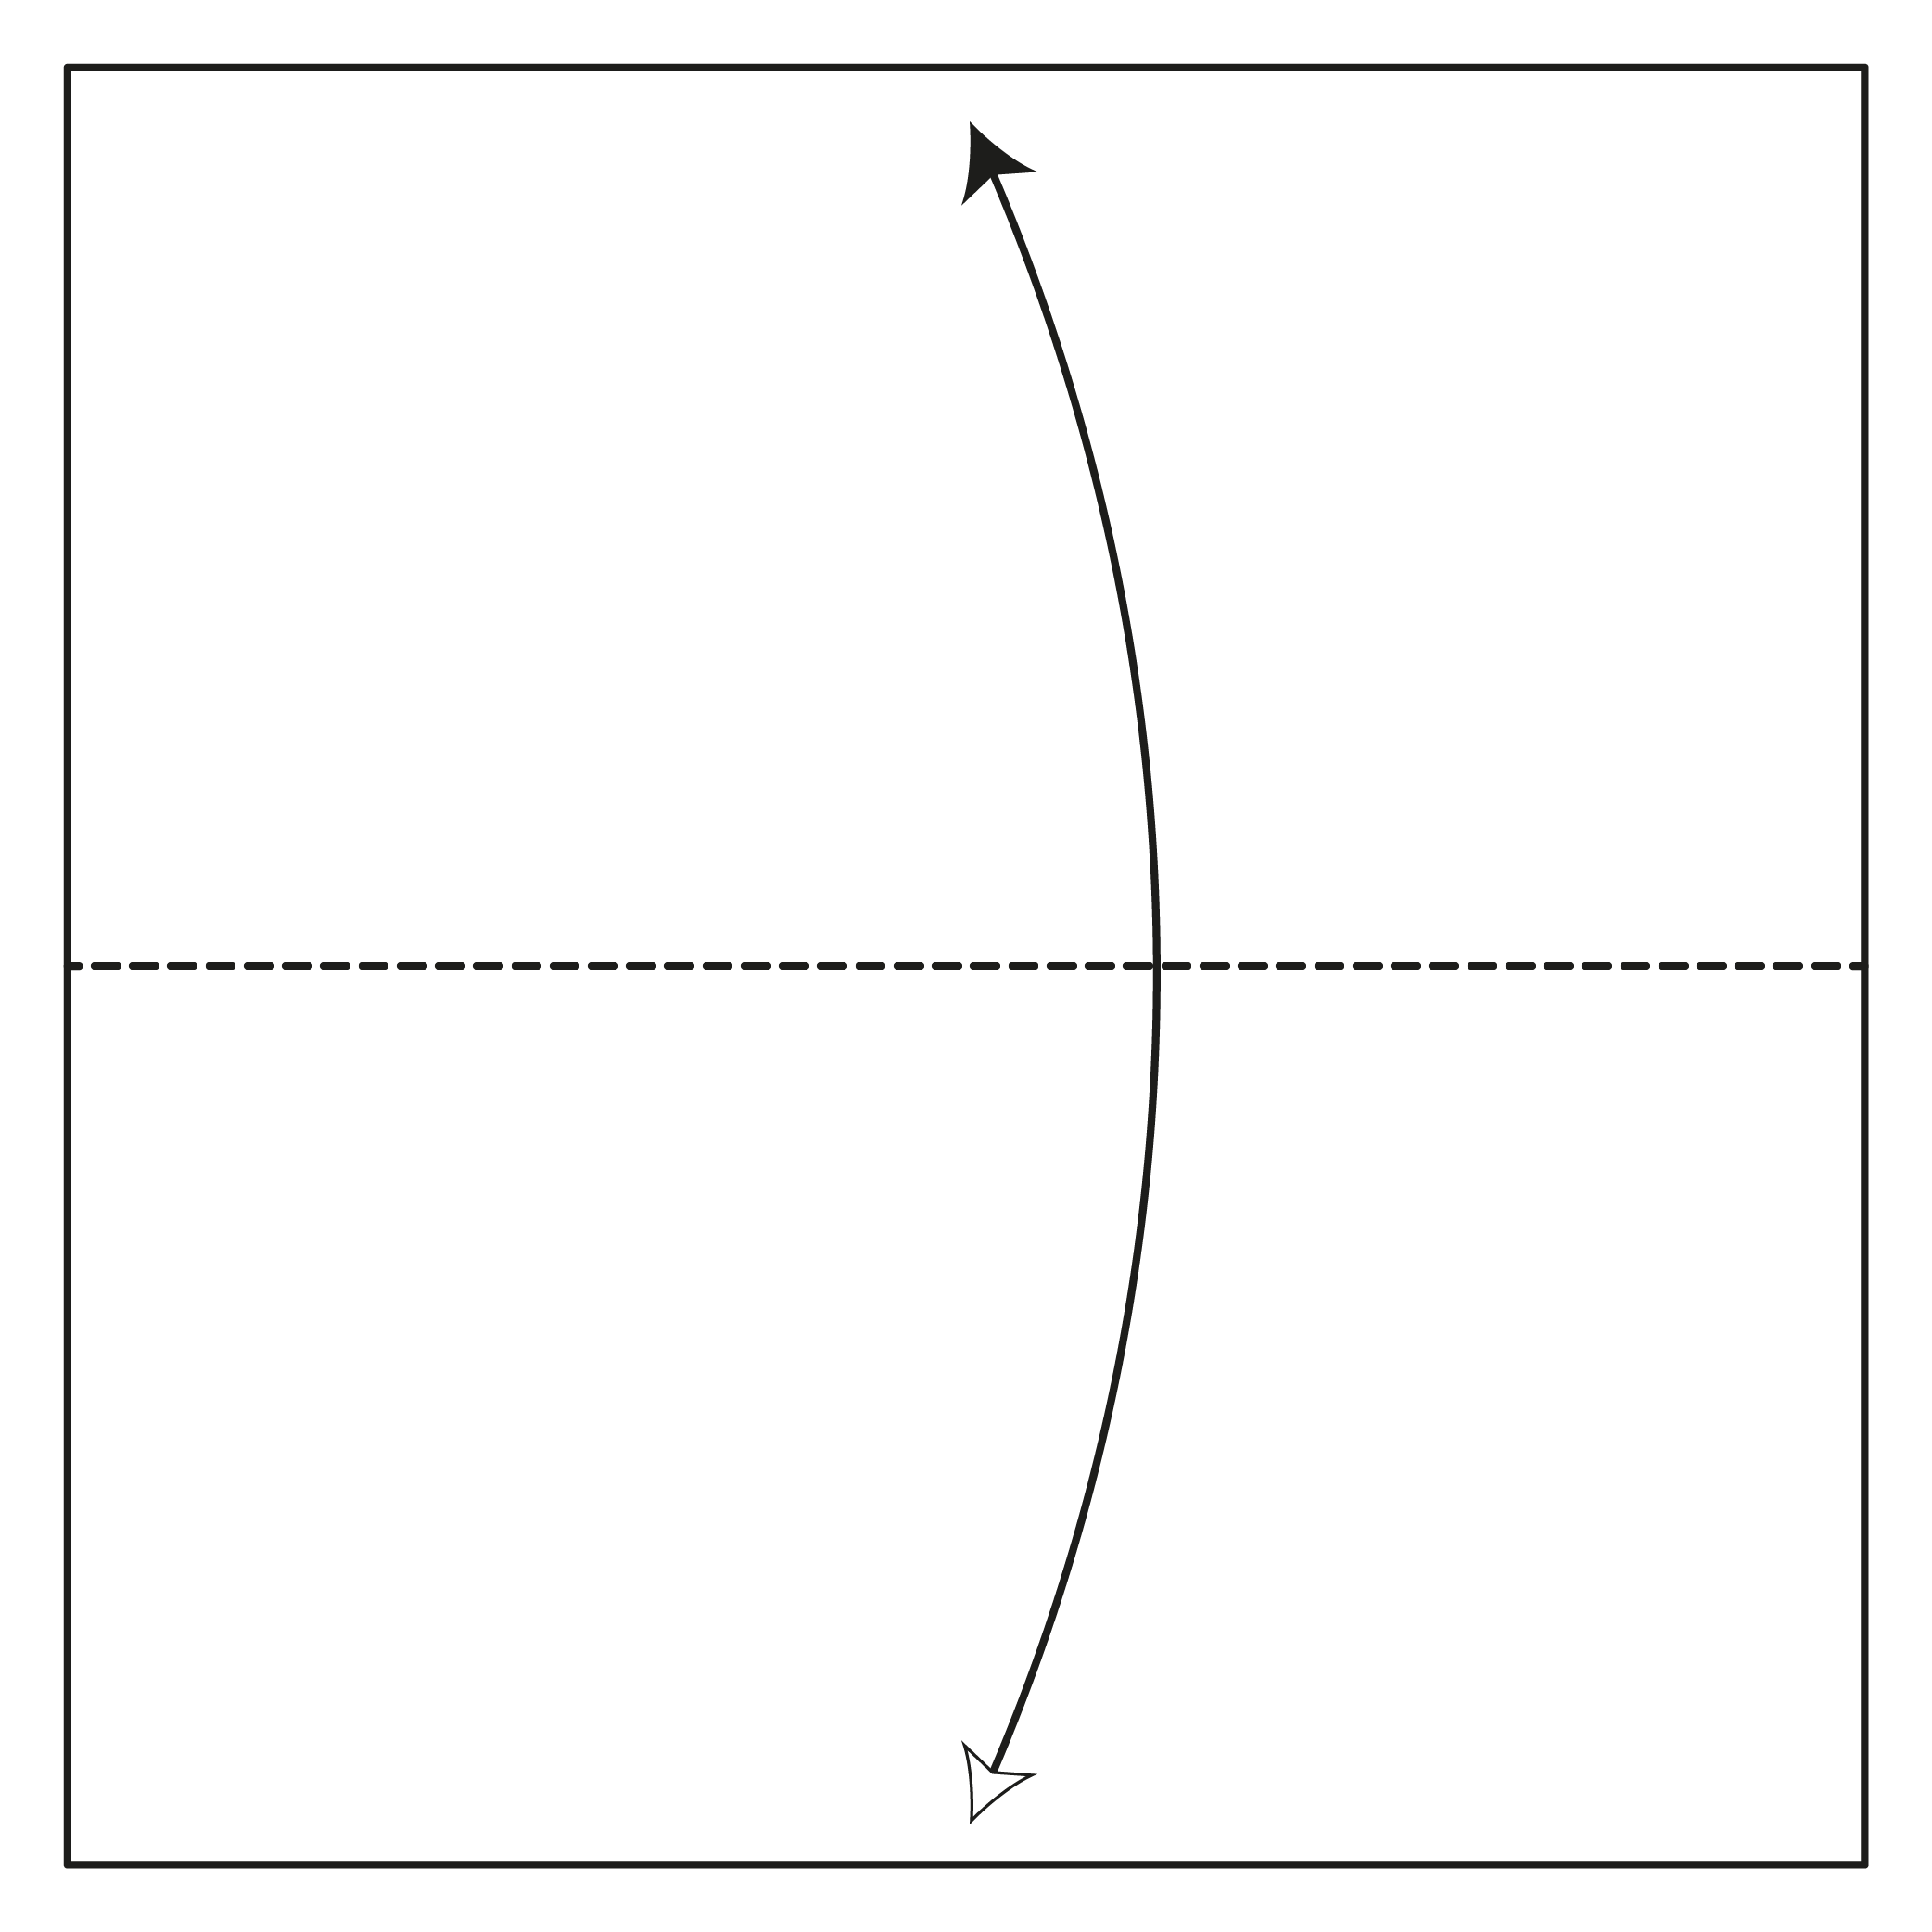
Start with the white side of the paper facing up. Fold the paper in half horizontally, then unfold.
Step 2
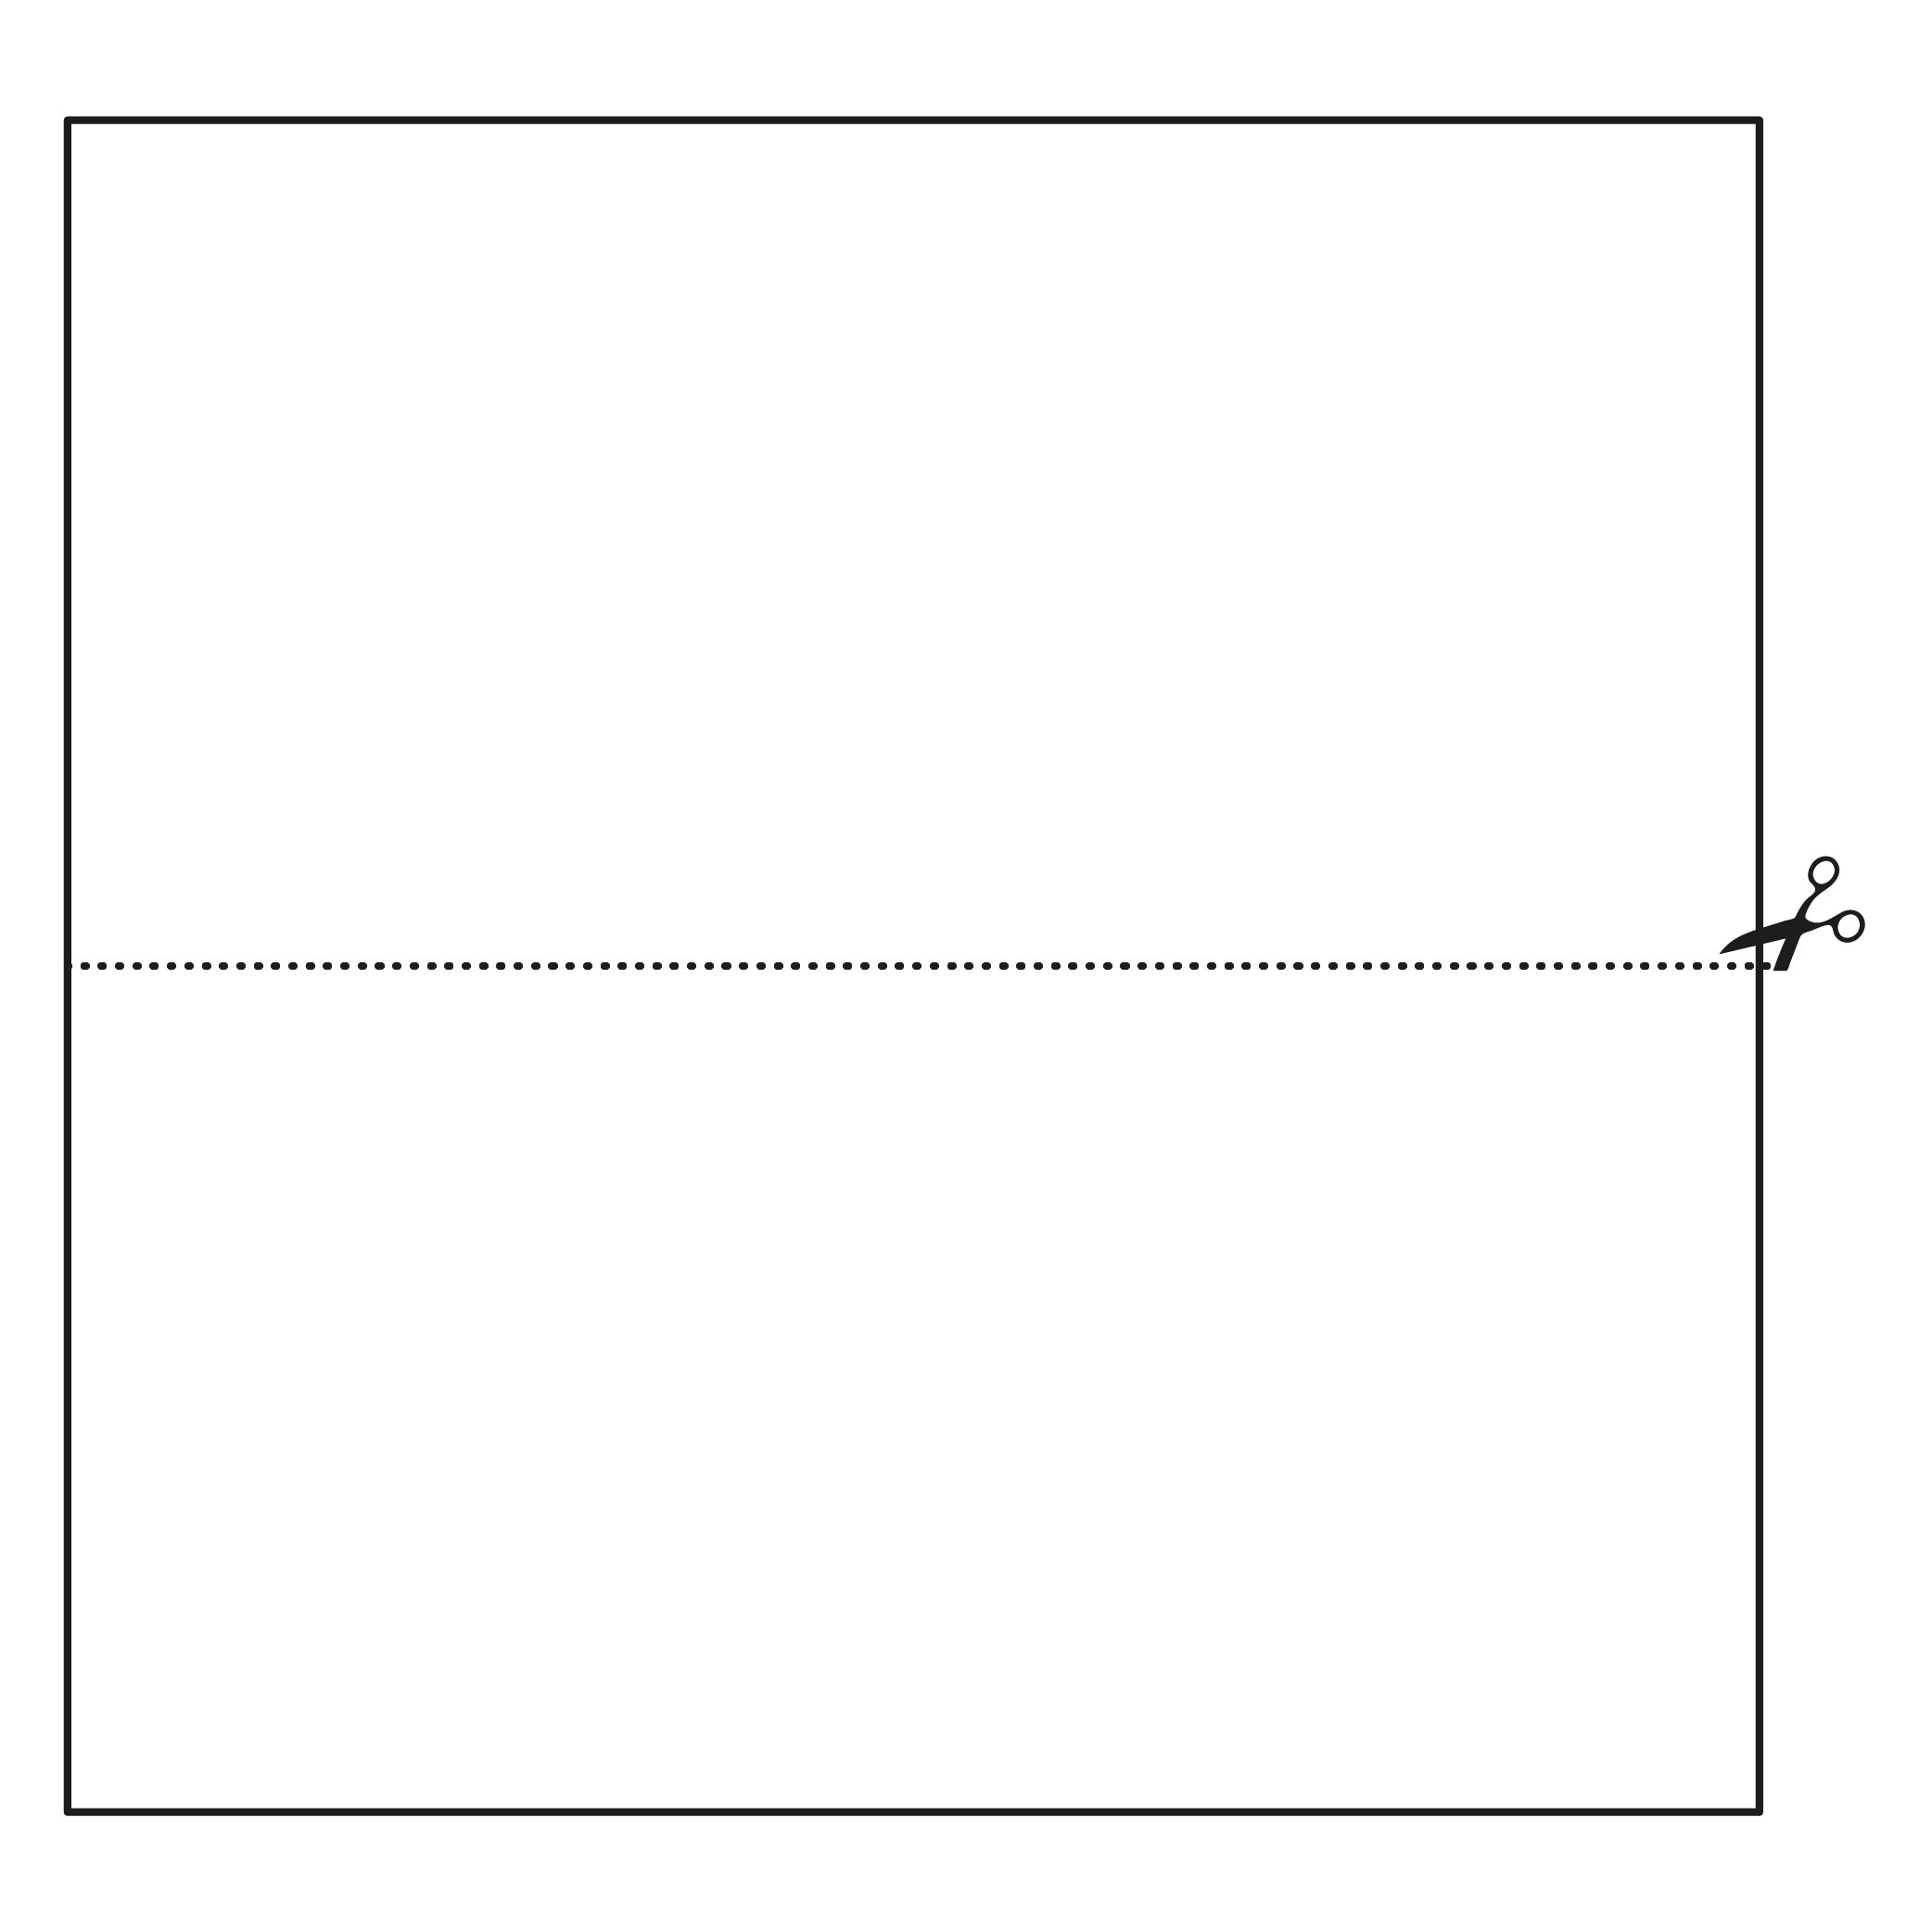
Cut the paper in half along the crease you just made. We’ll use one rectangle for this project.
Step 3
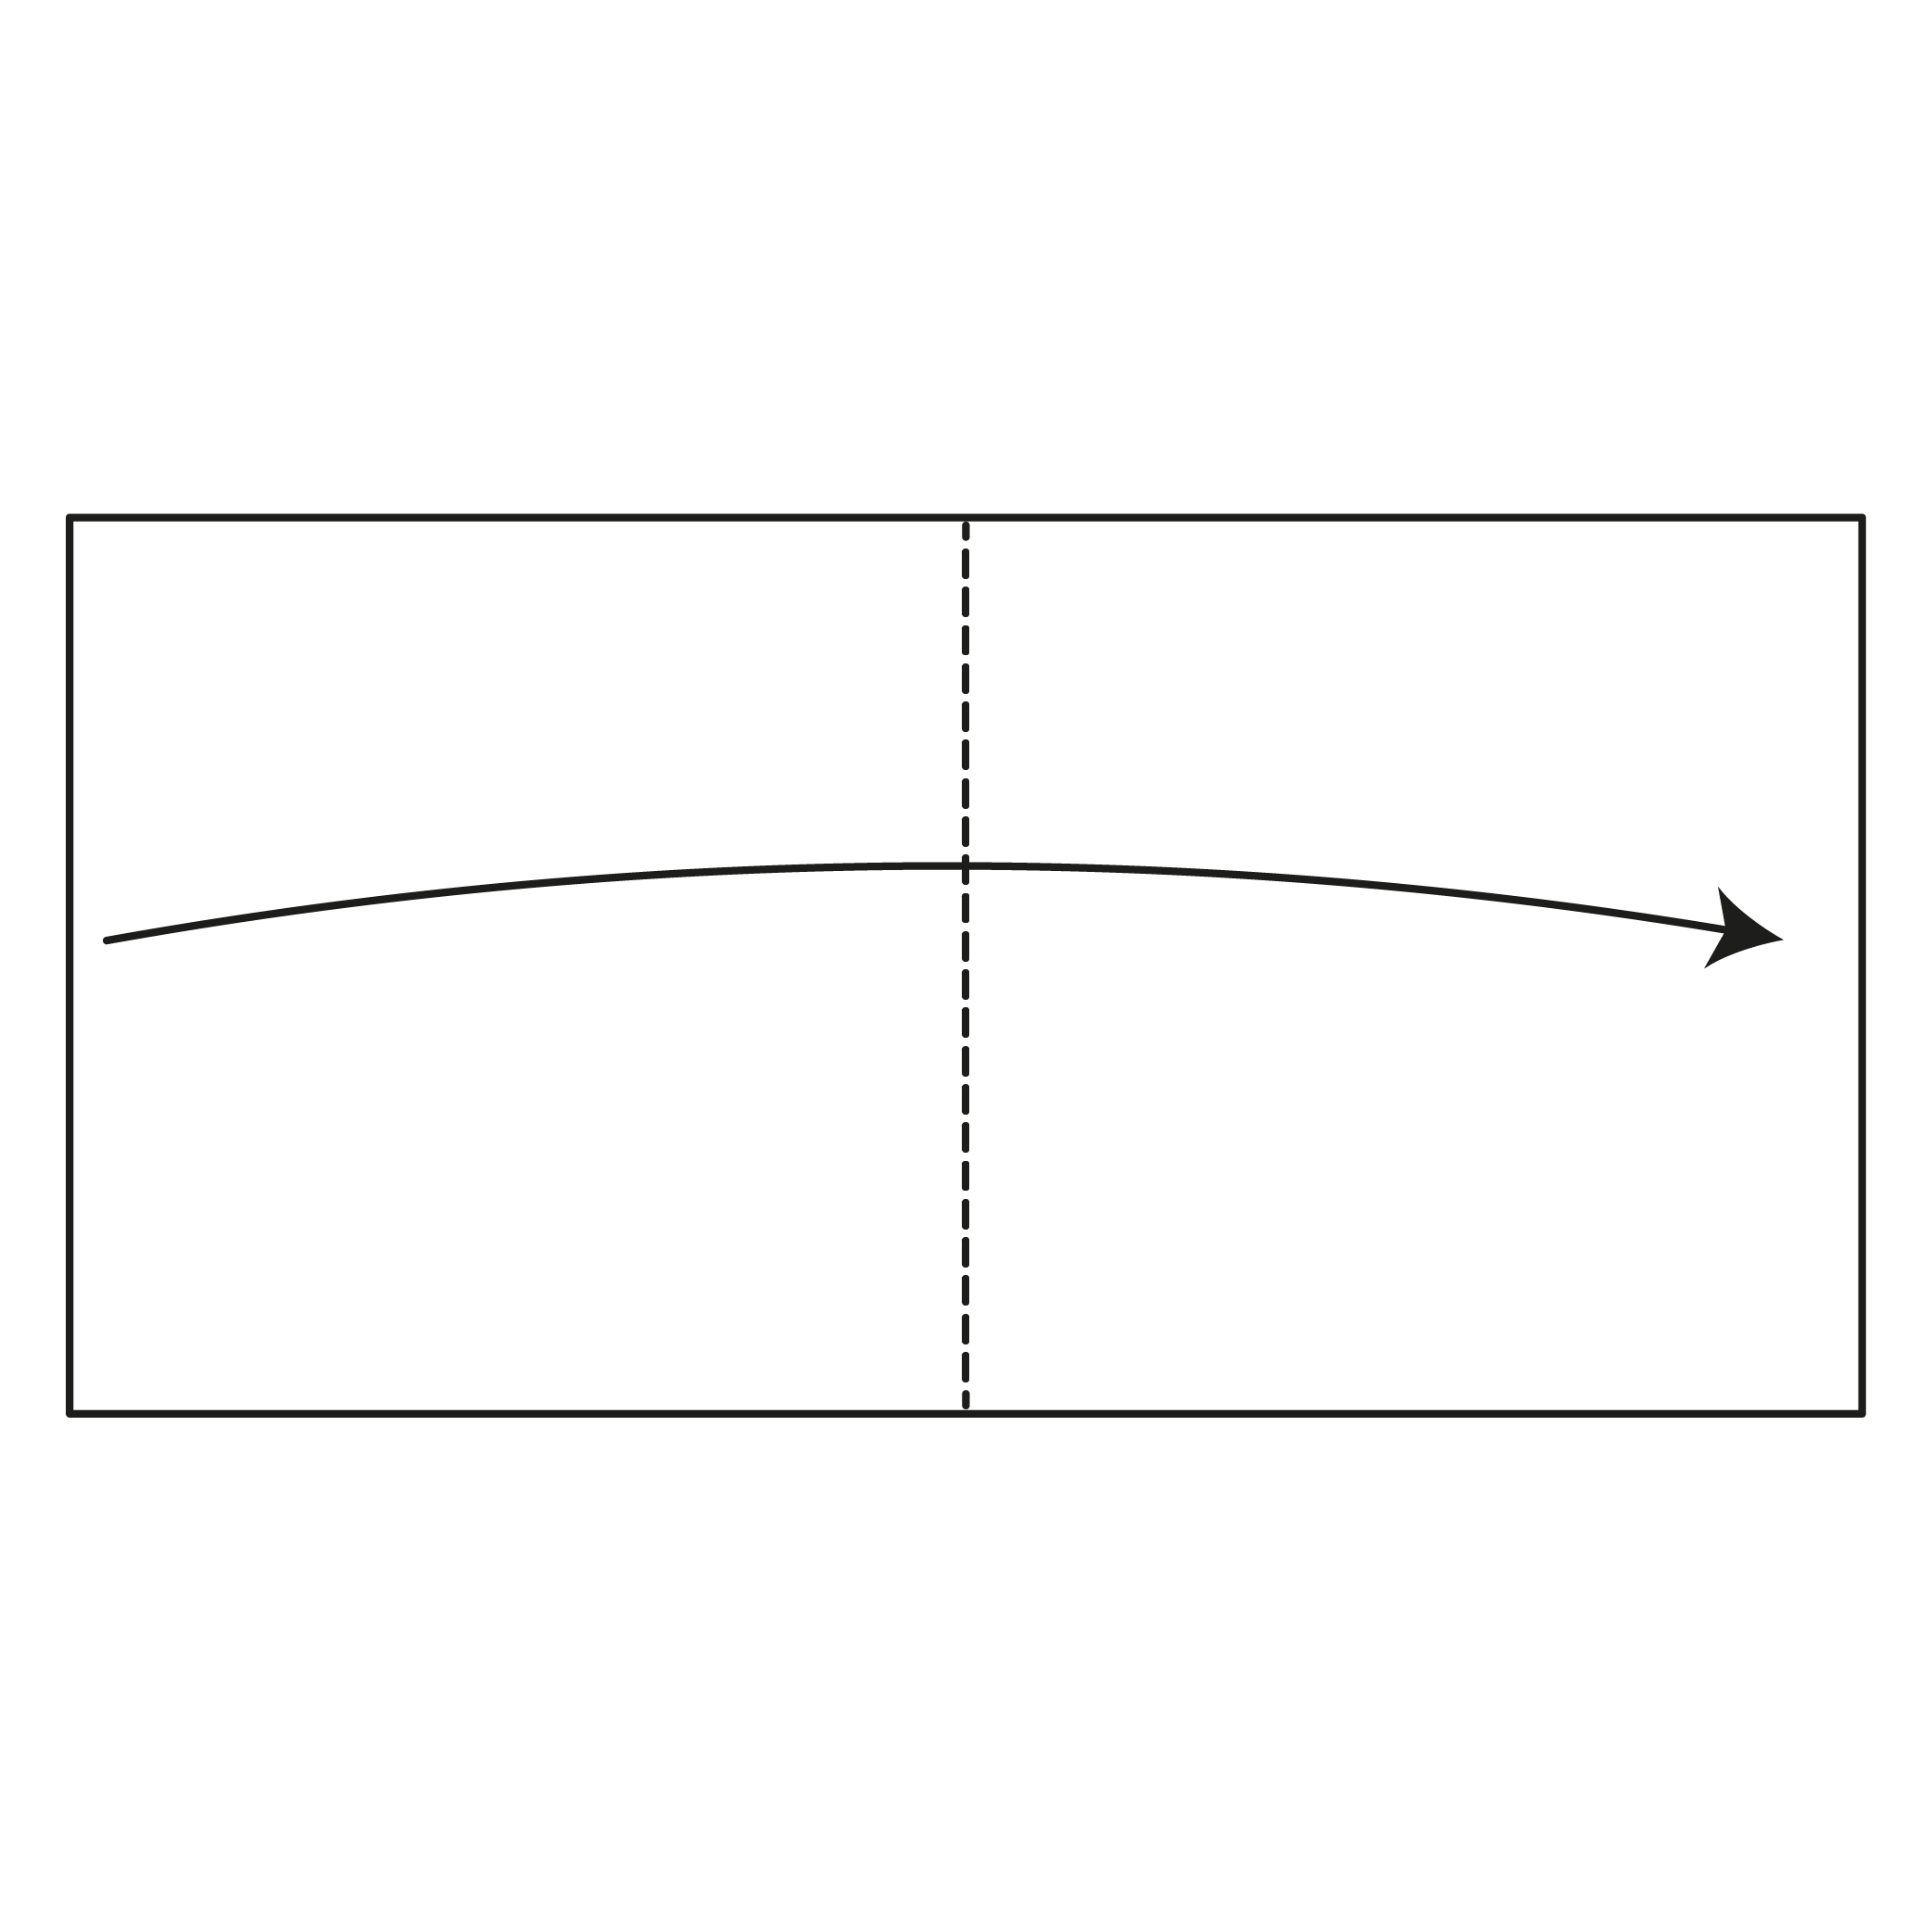
Fold the rectangle in half from left to right.
Step 4
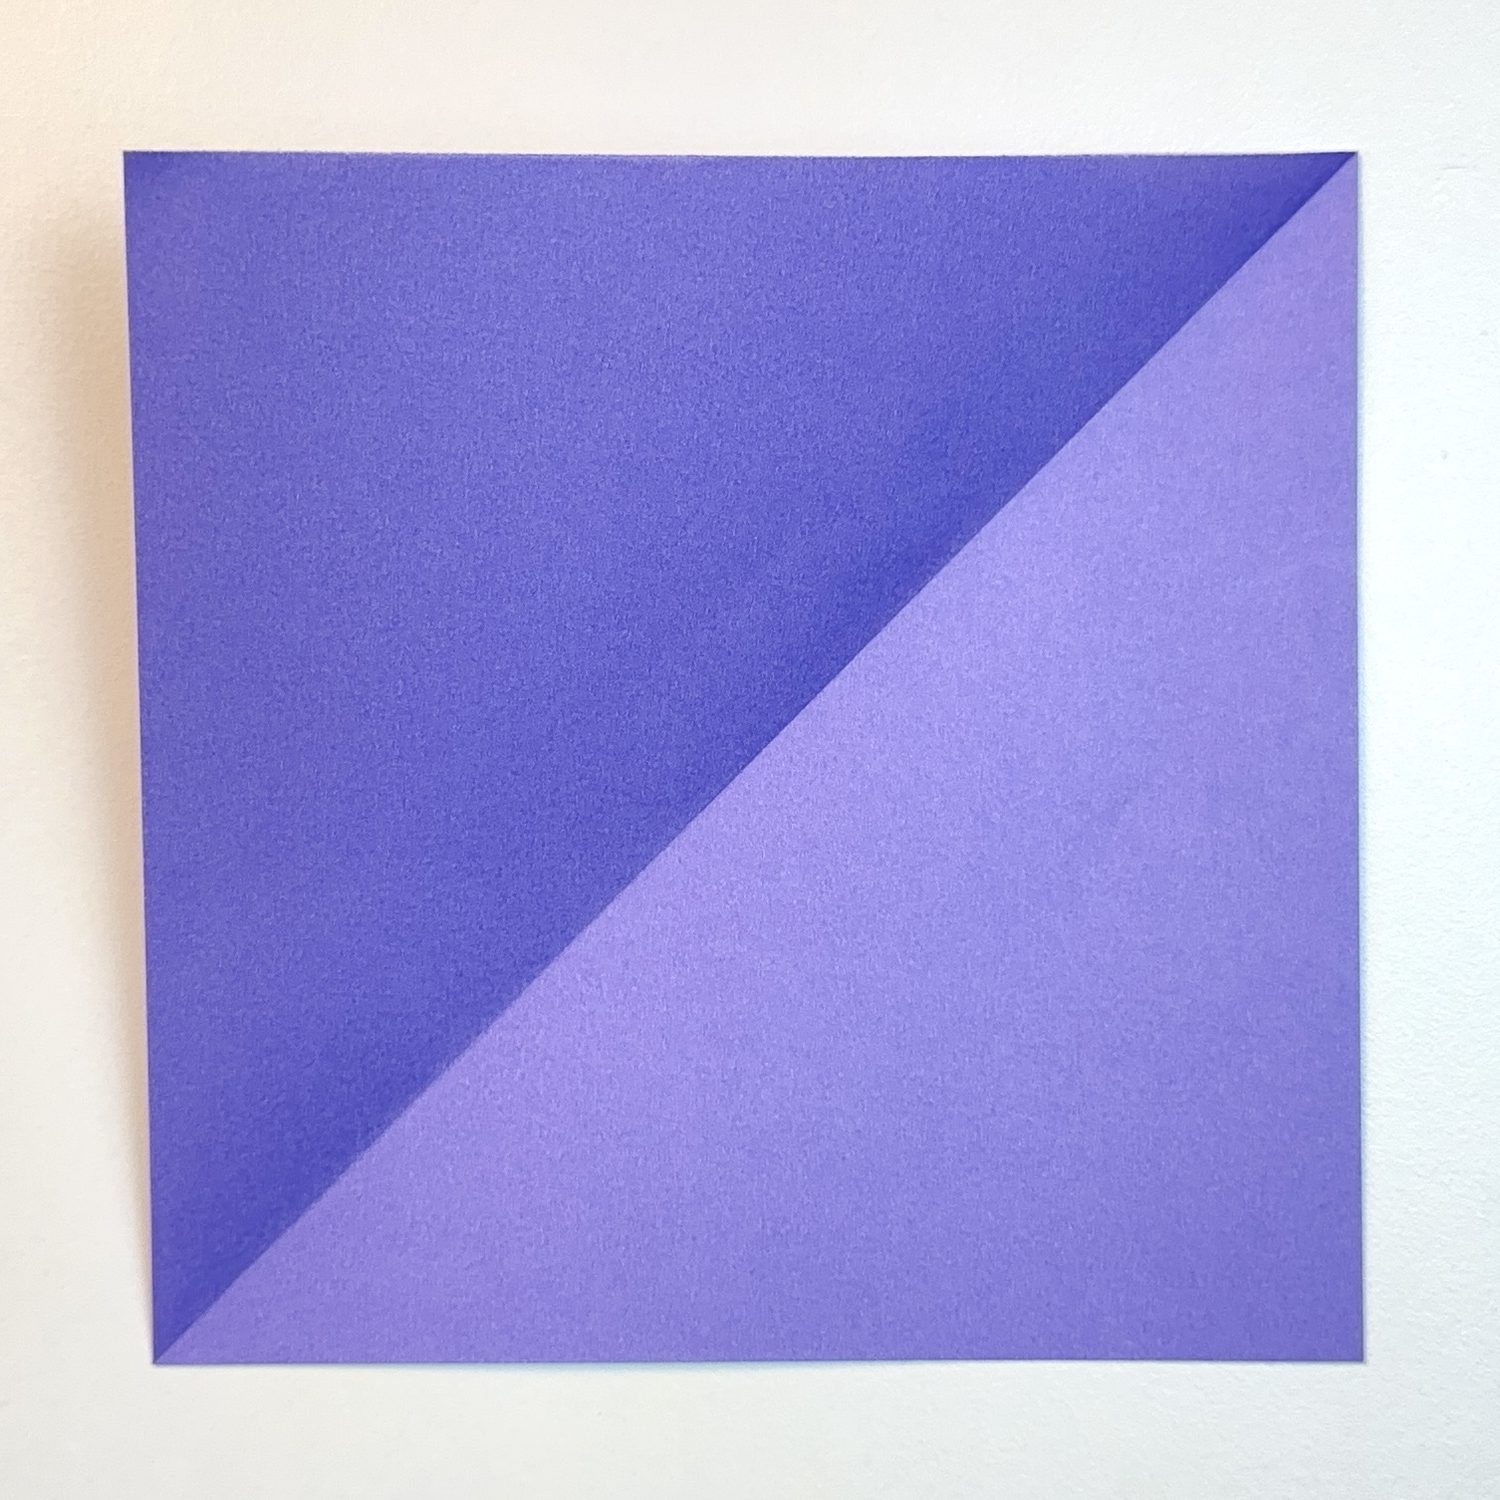
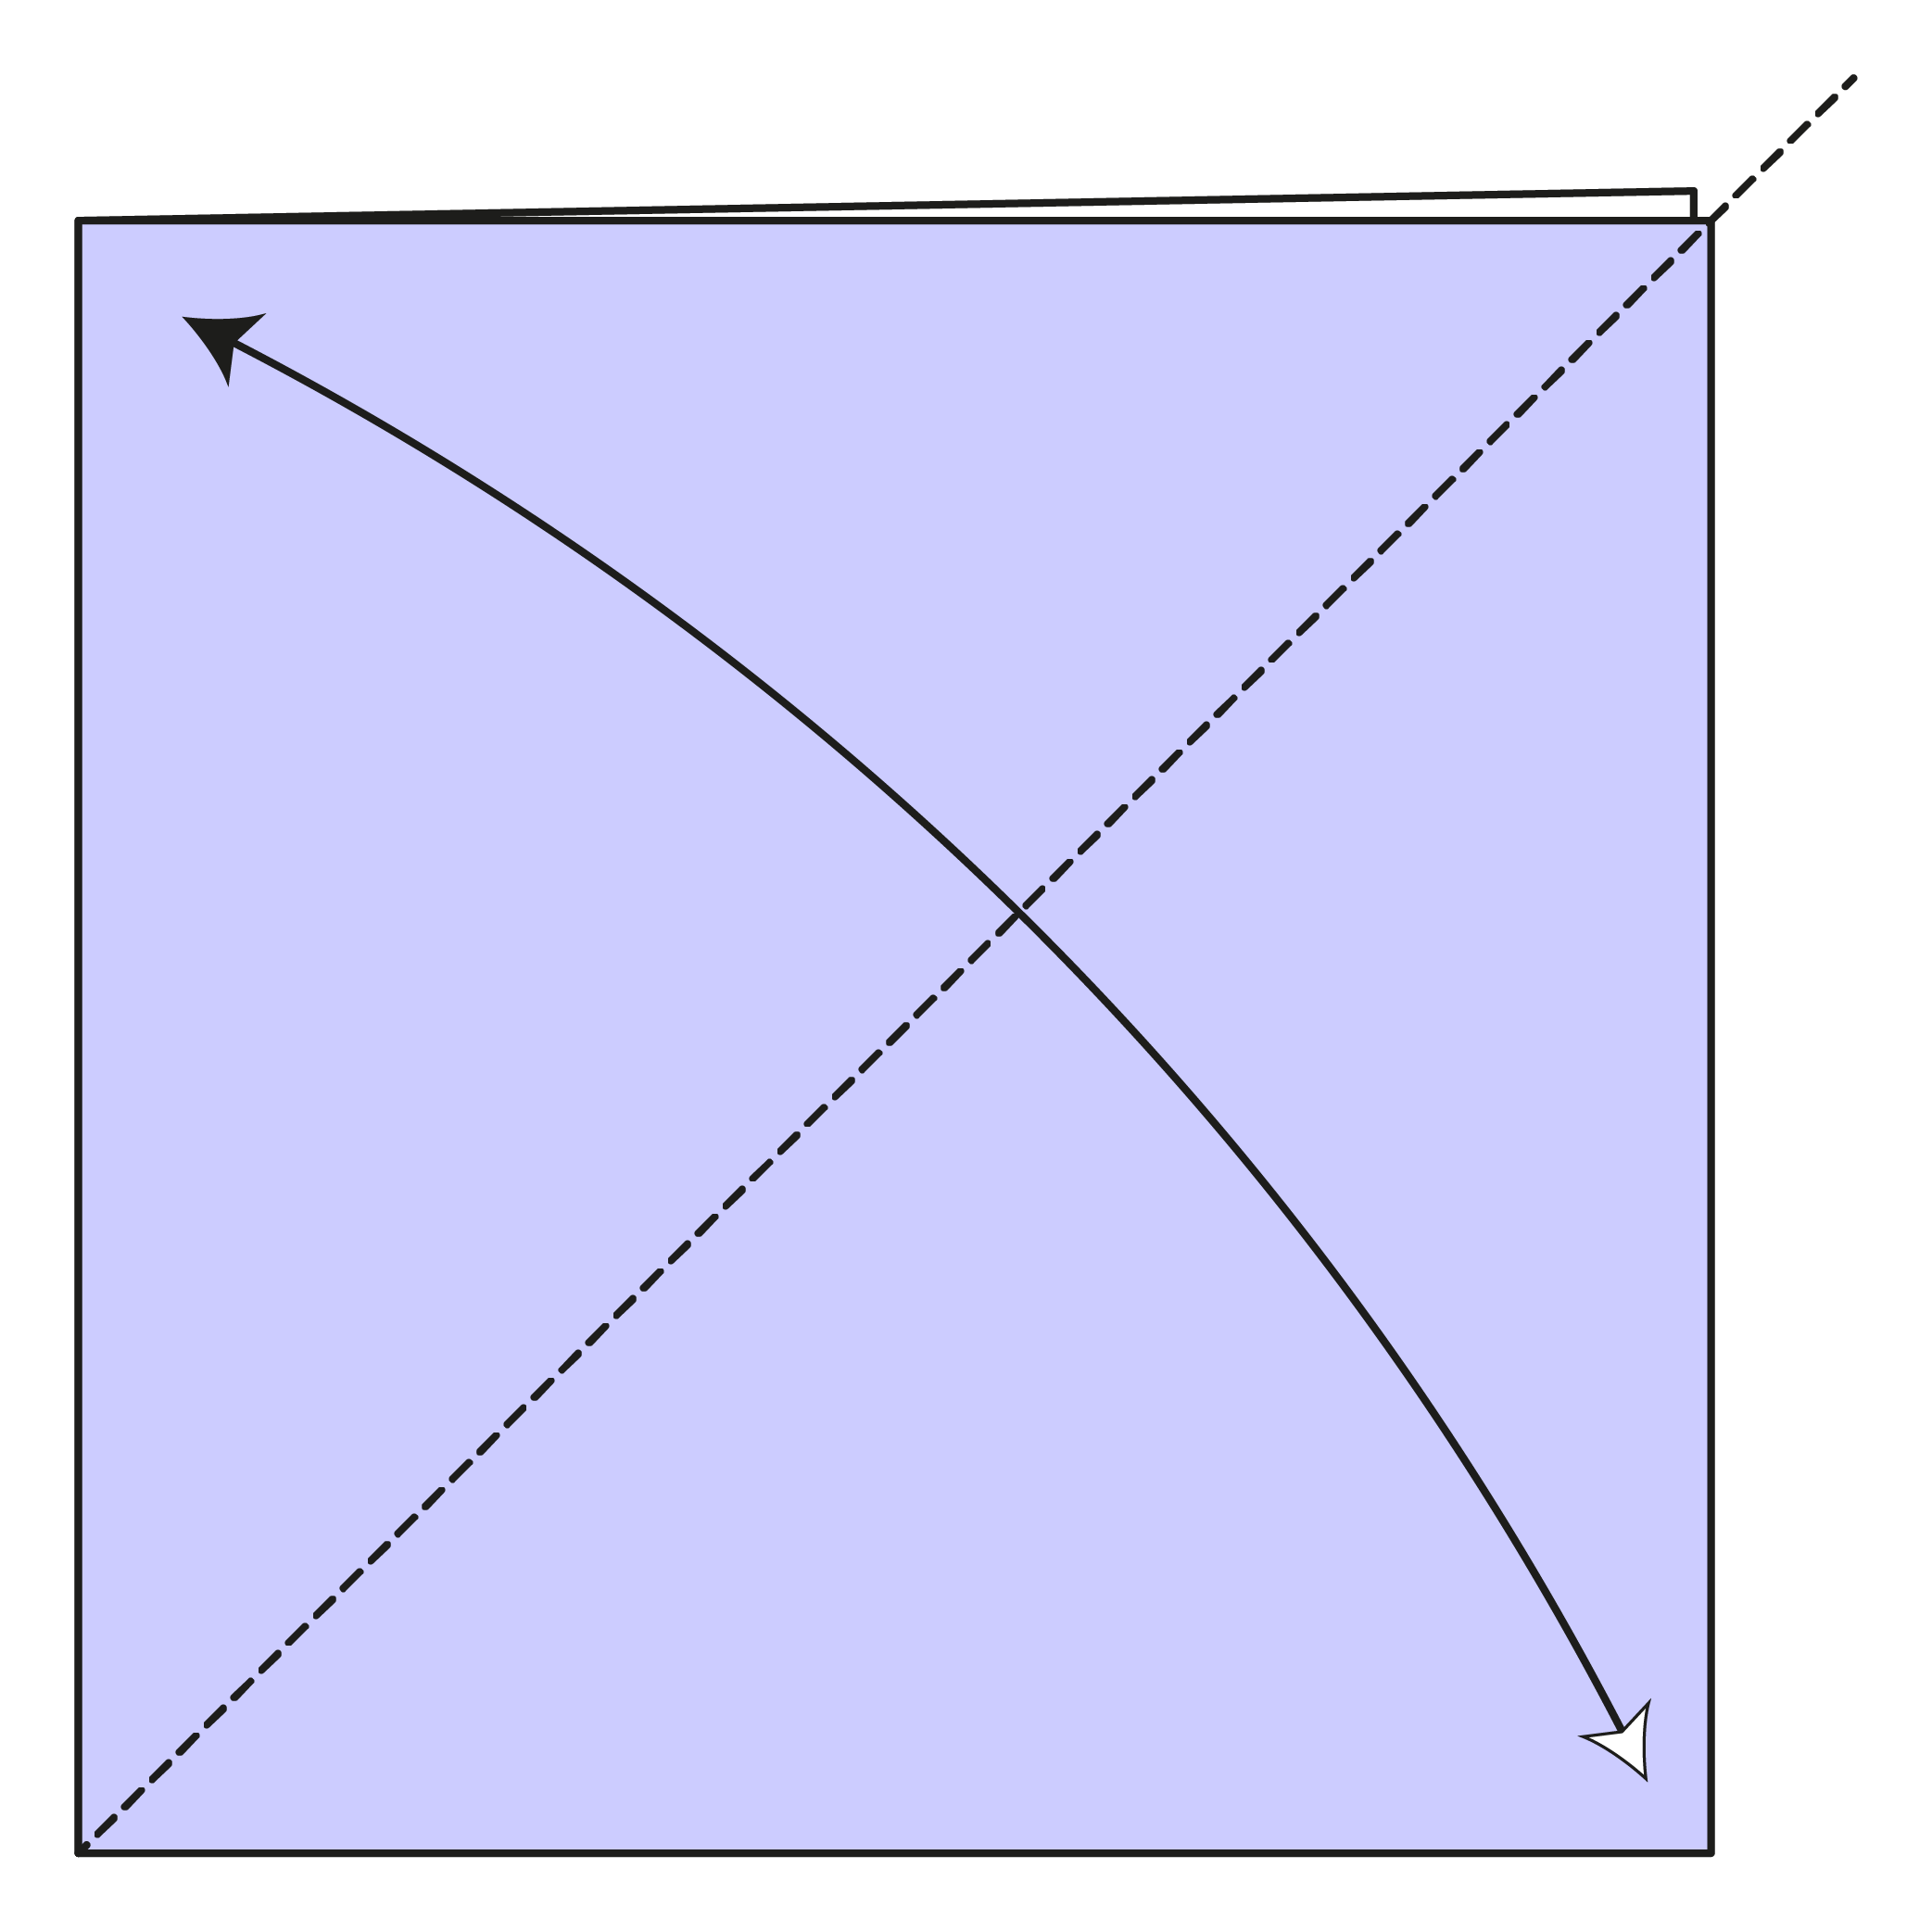
Fold and unfold along one diagonal.
🕊️ Folding tip: Hold the layers firmly while folding so the paper doesn’t slip.
Step 5
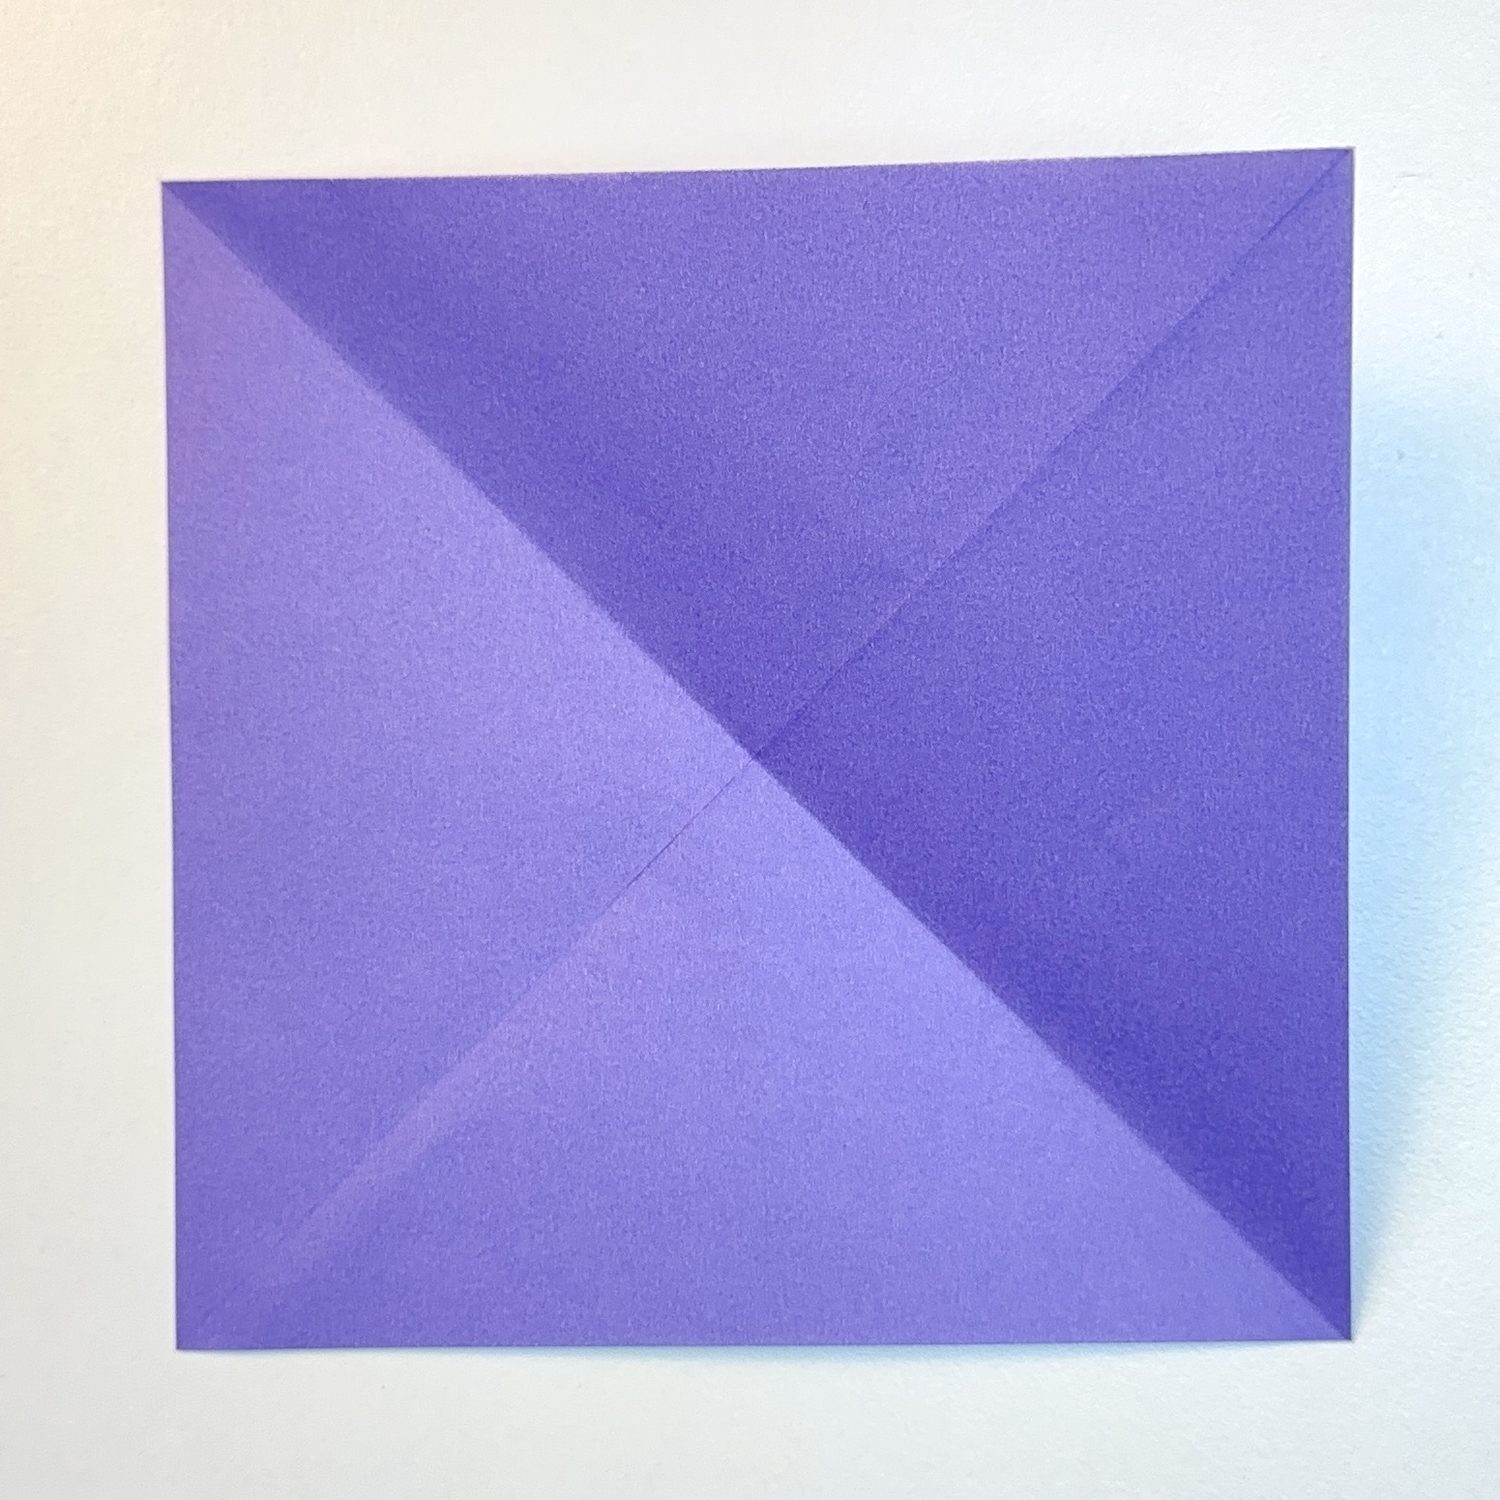
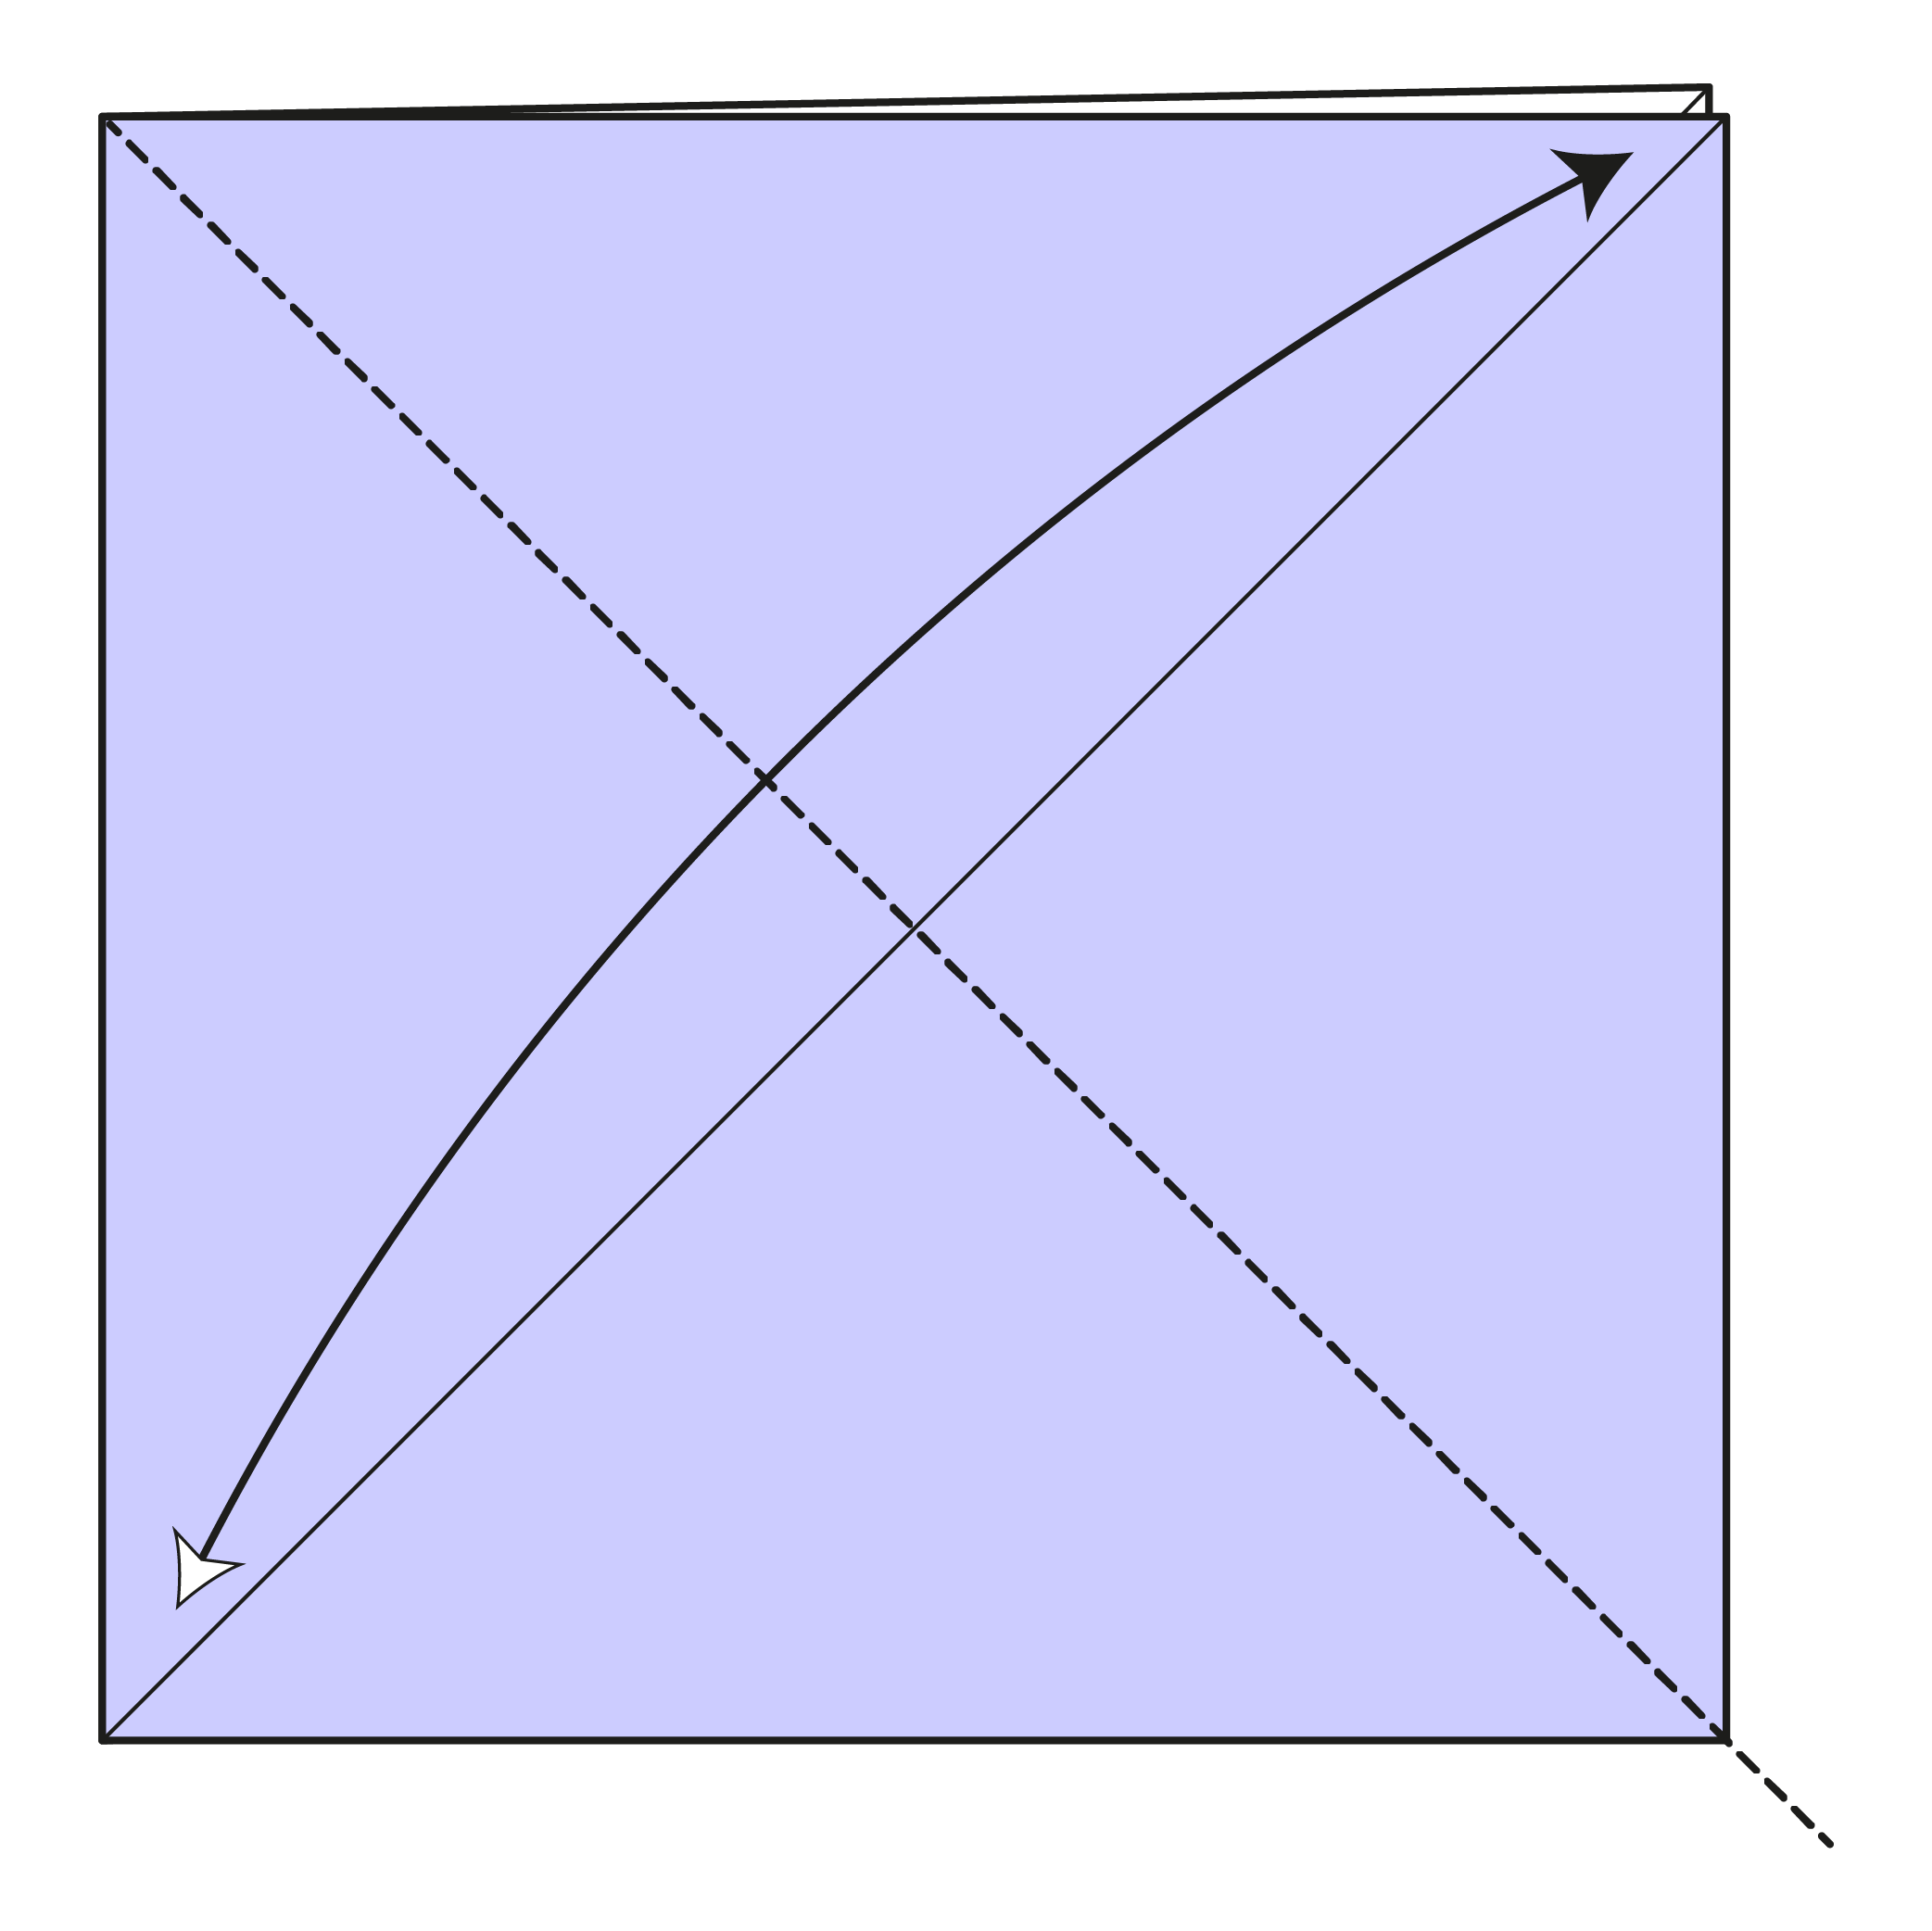
Fold and unfold along the other diagonal.
Step 6
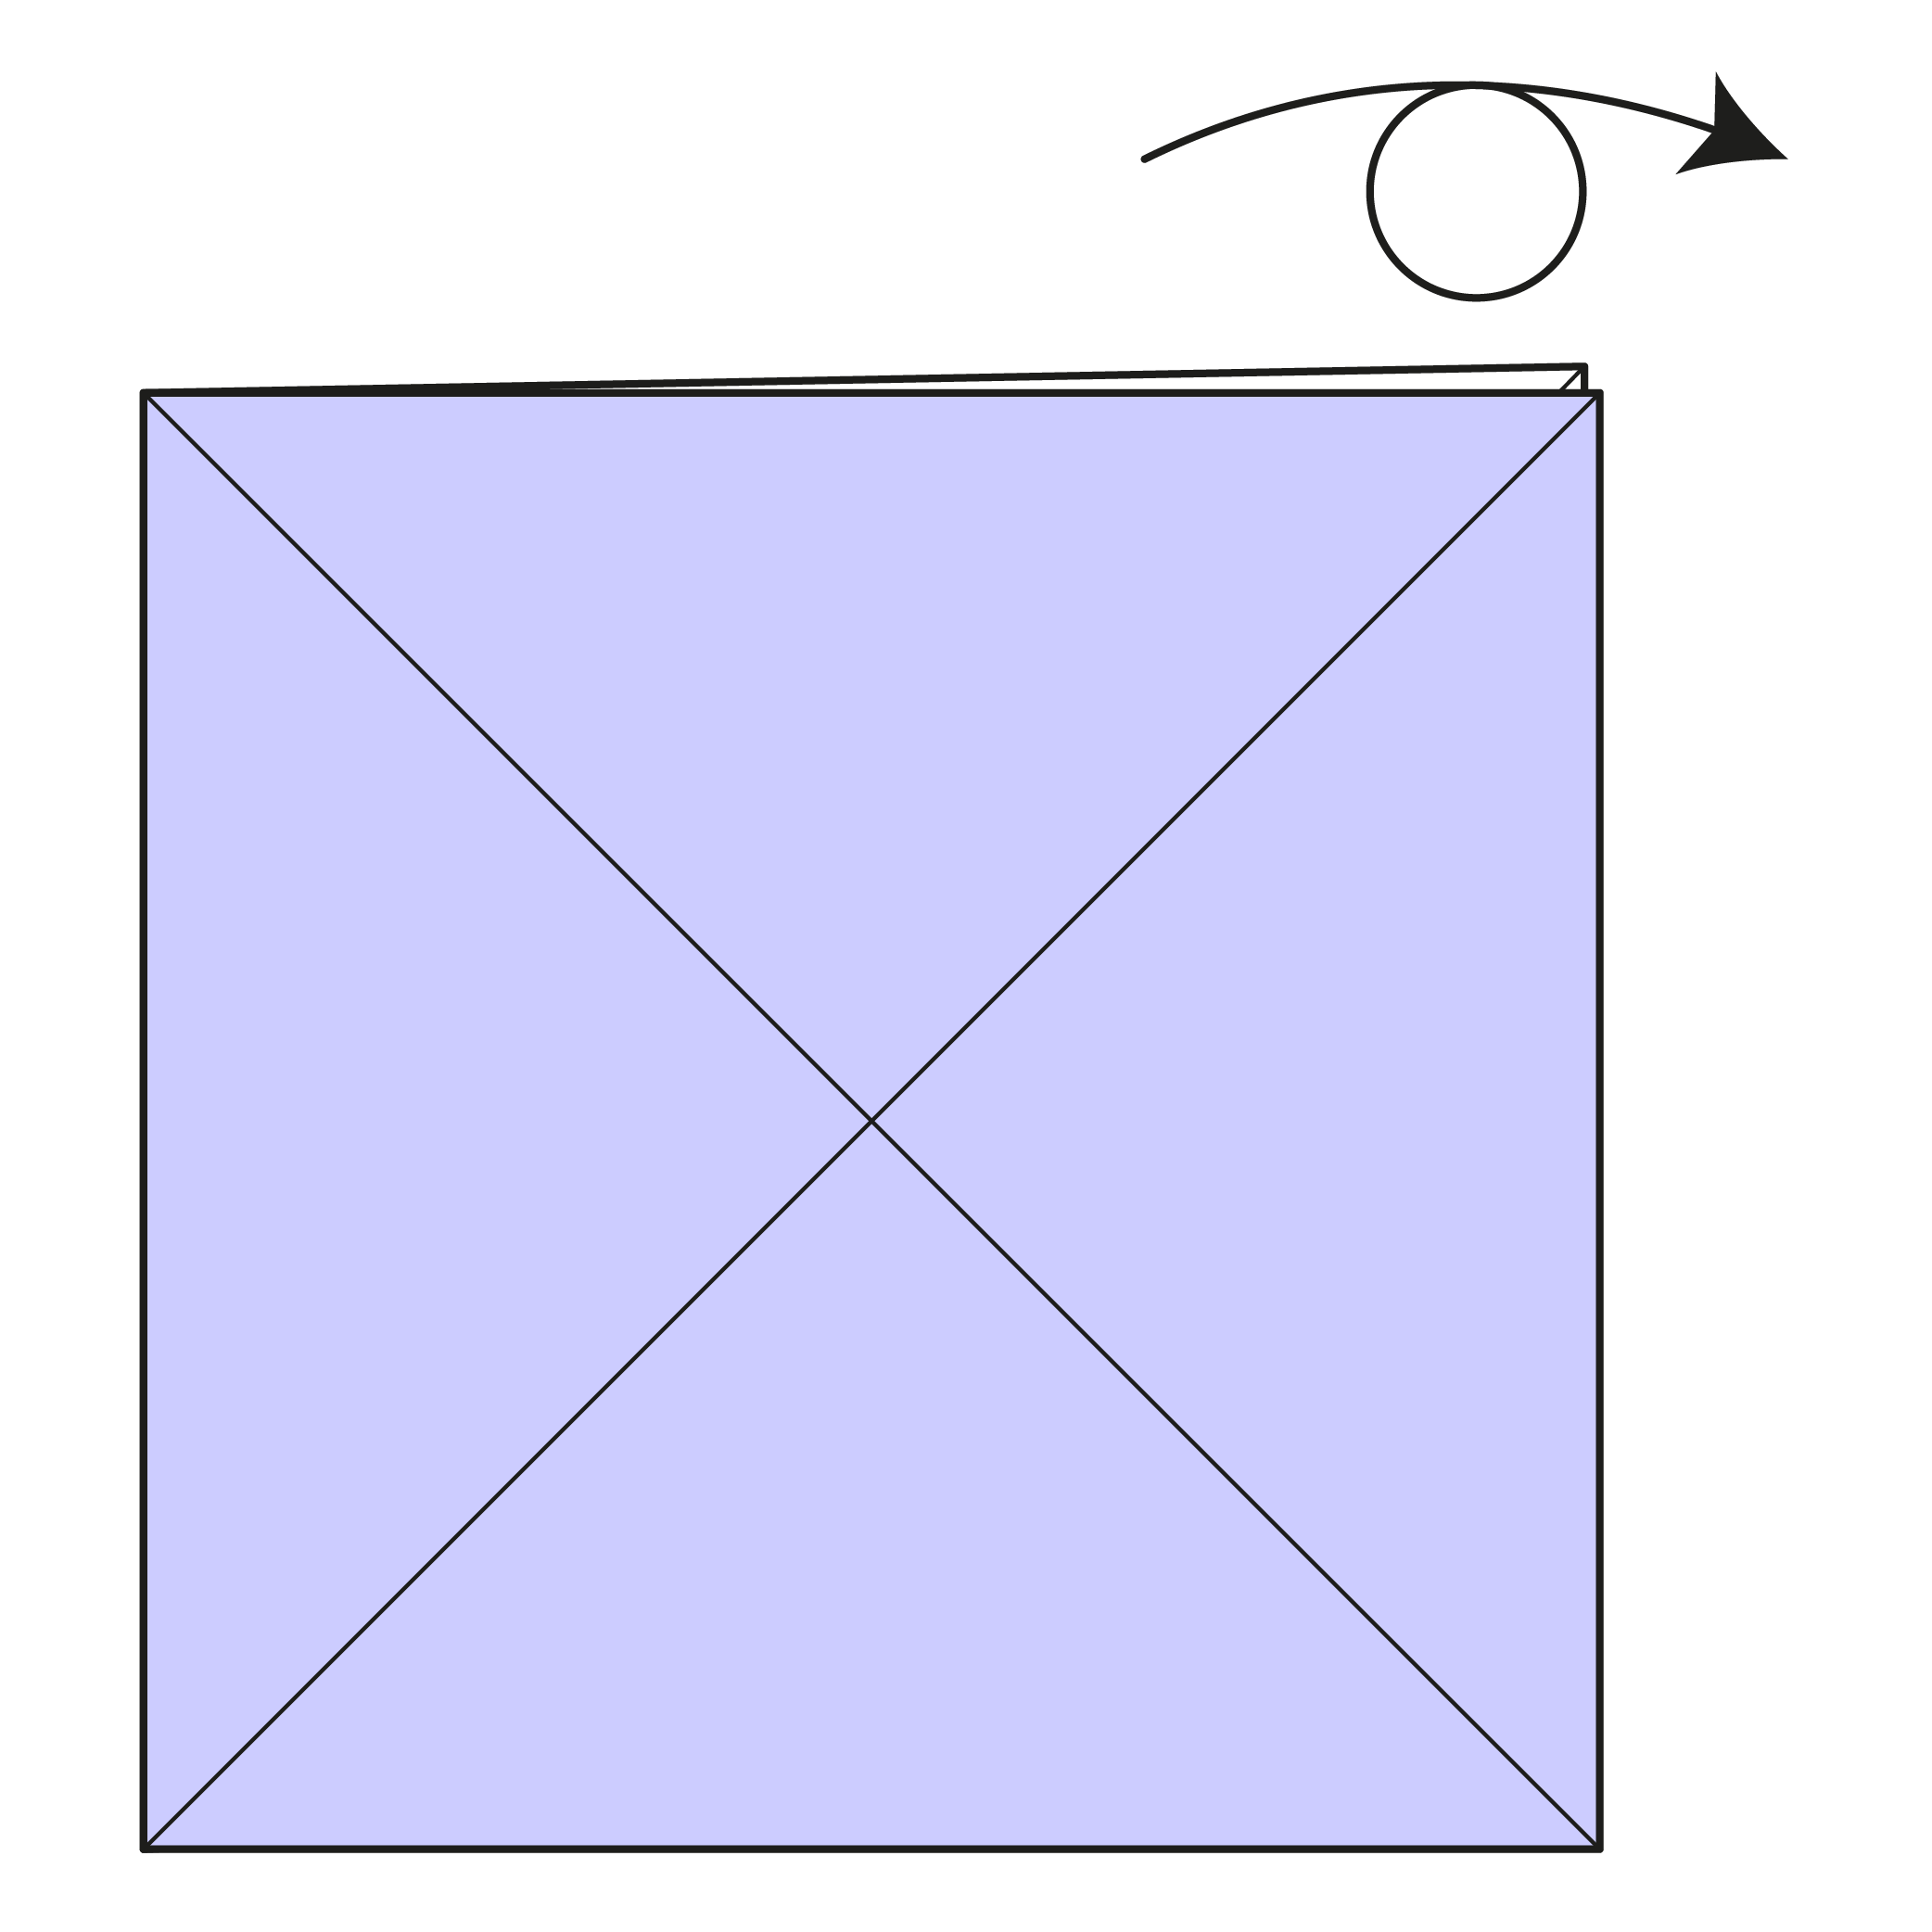
Turn the paper over.
Step 7
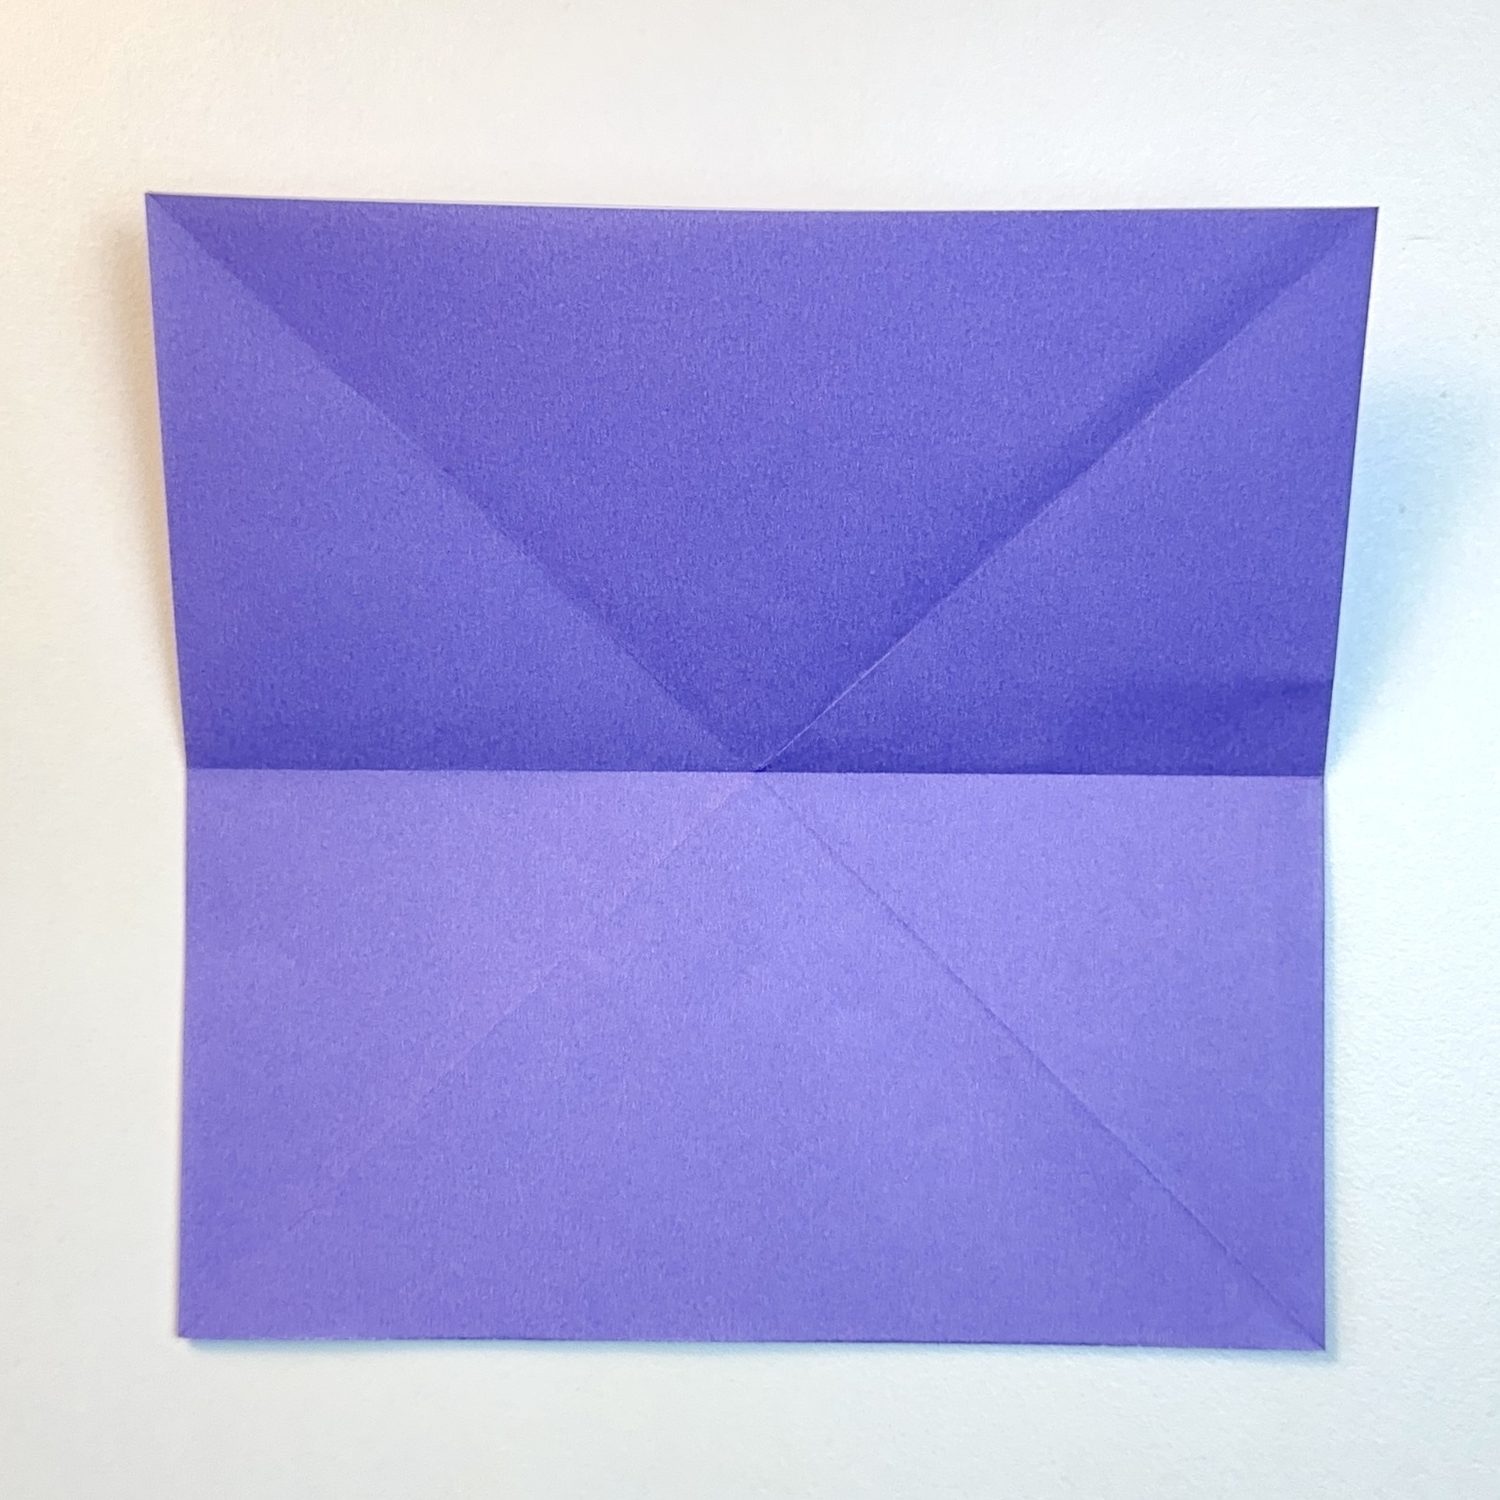
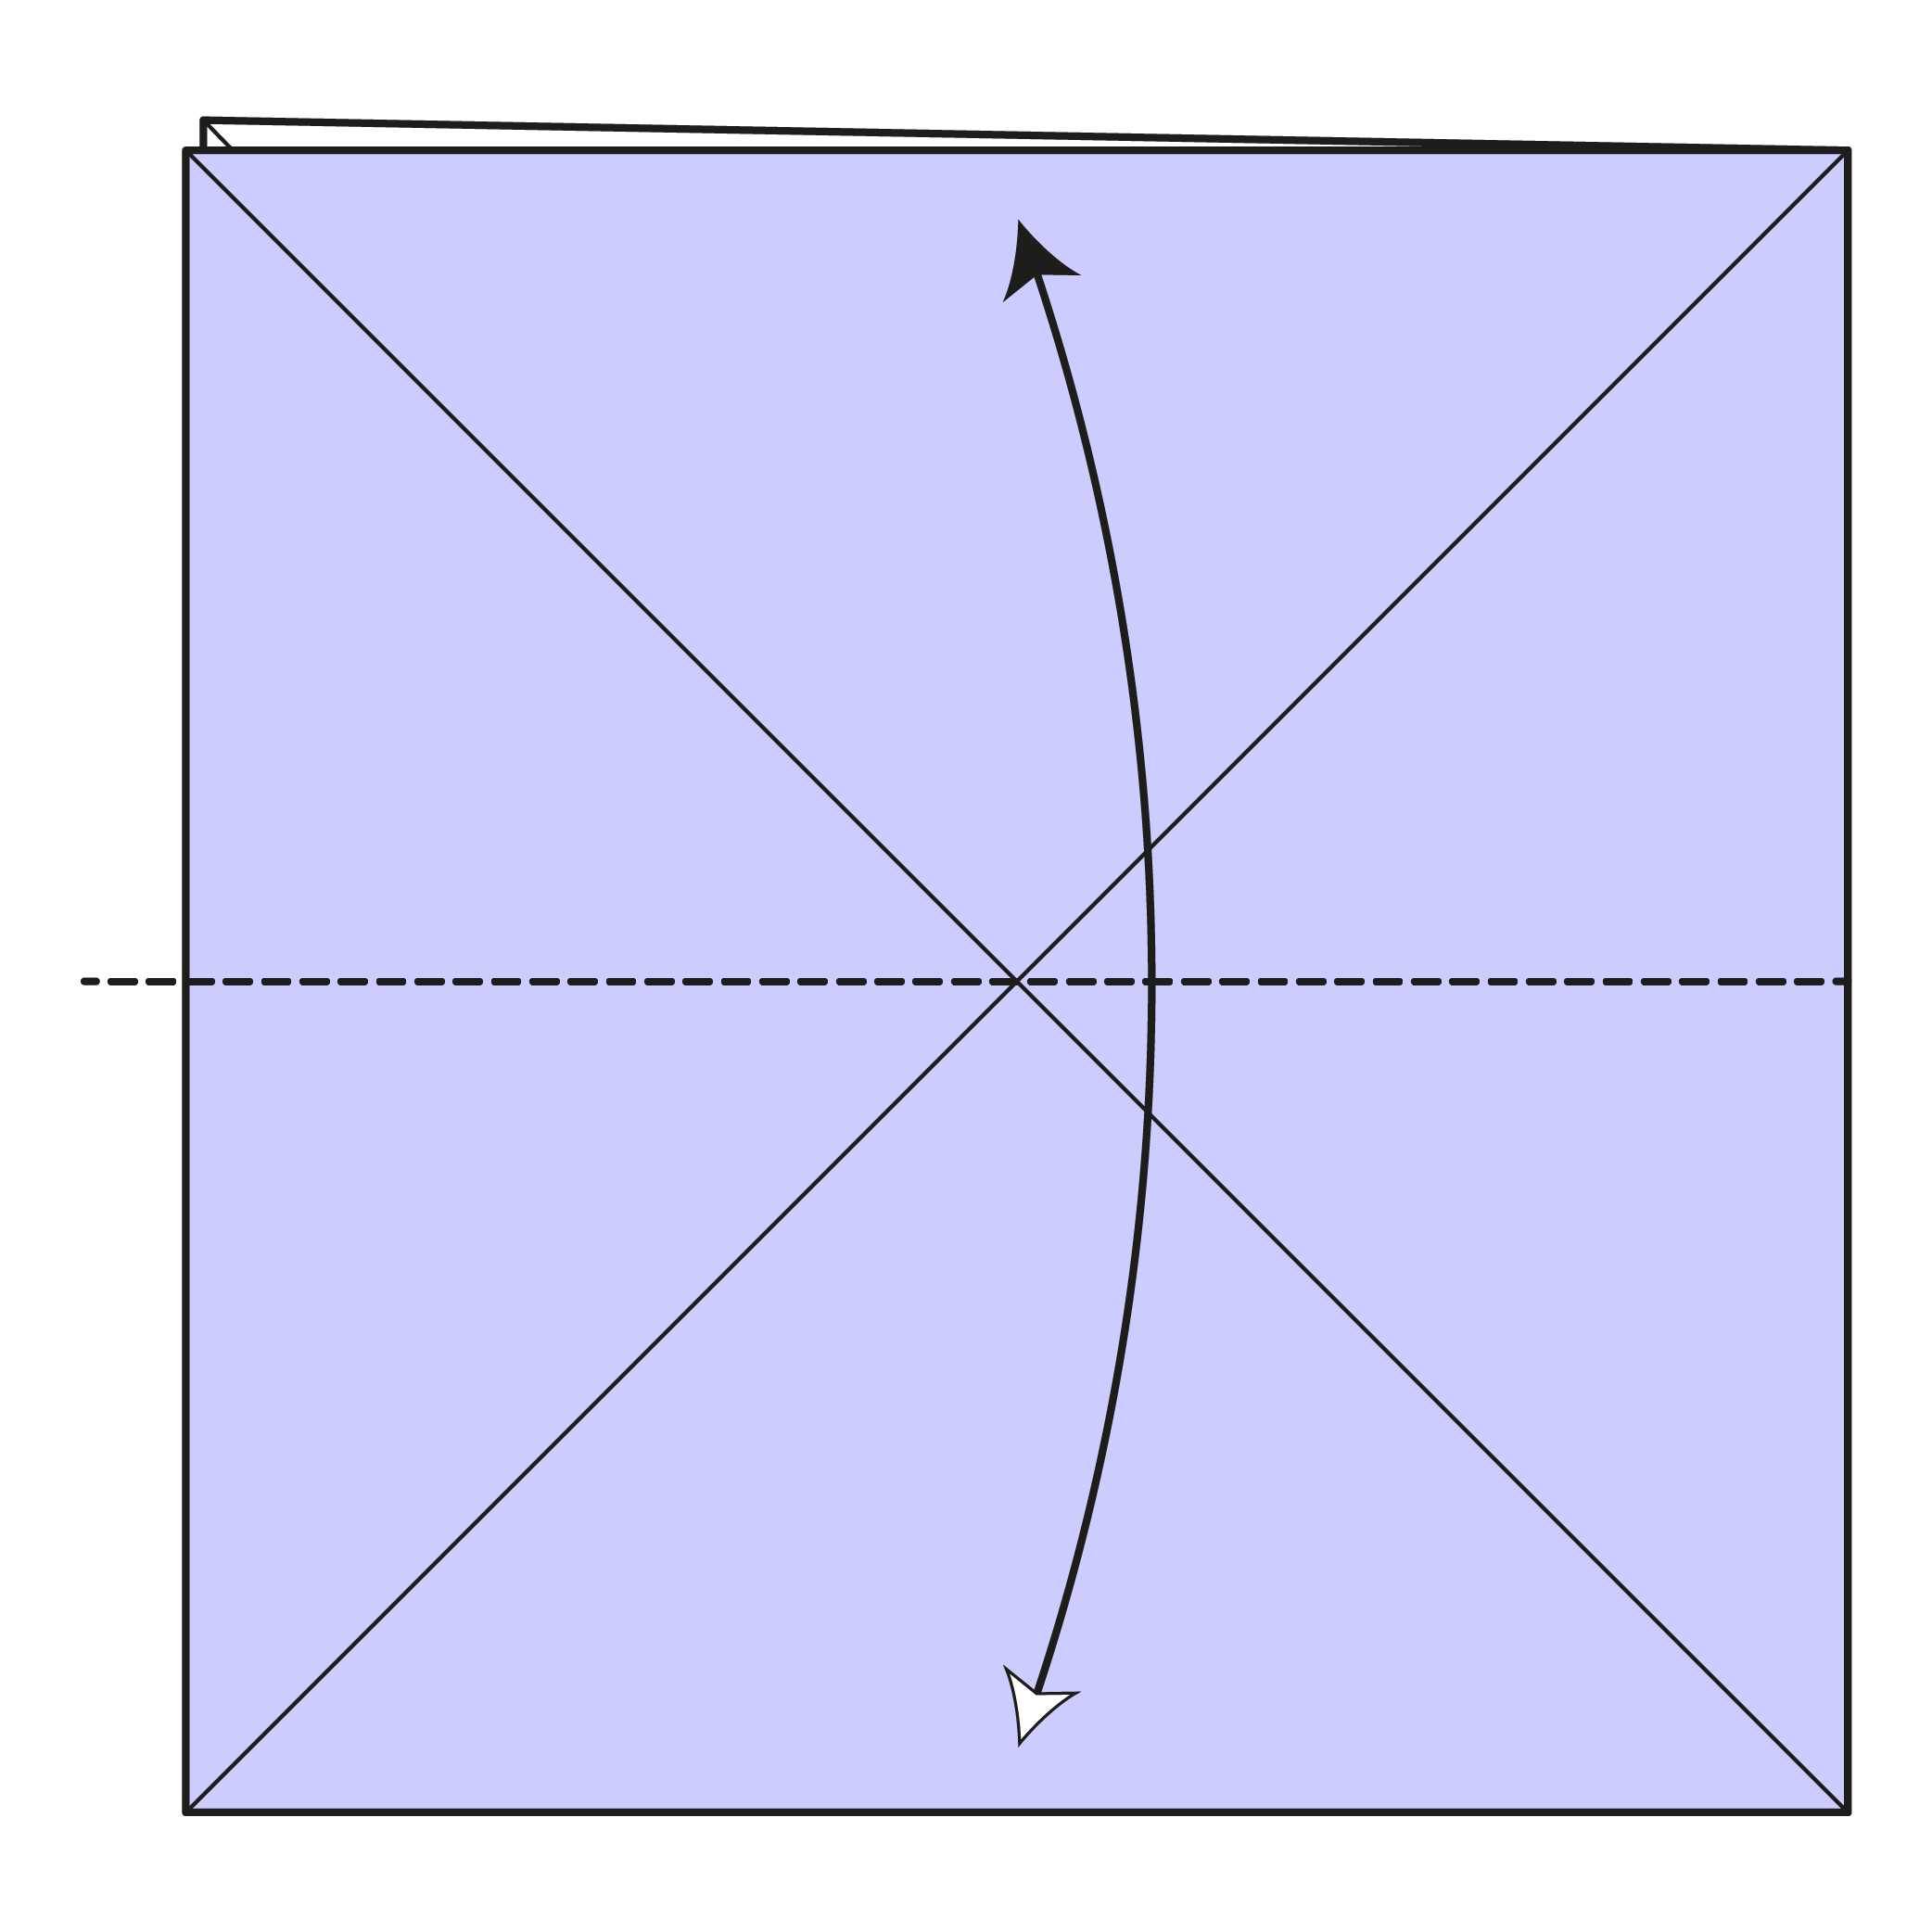
Fold the paper in half horizontally, then unfold.
Step 8
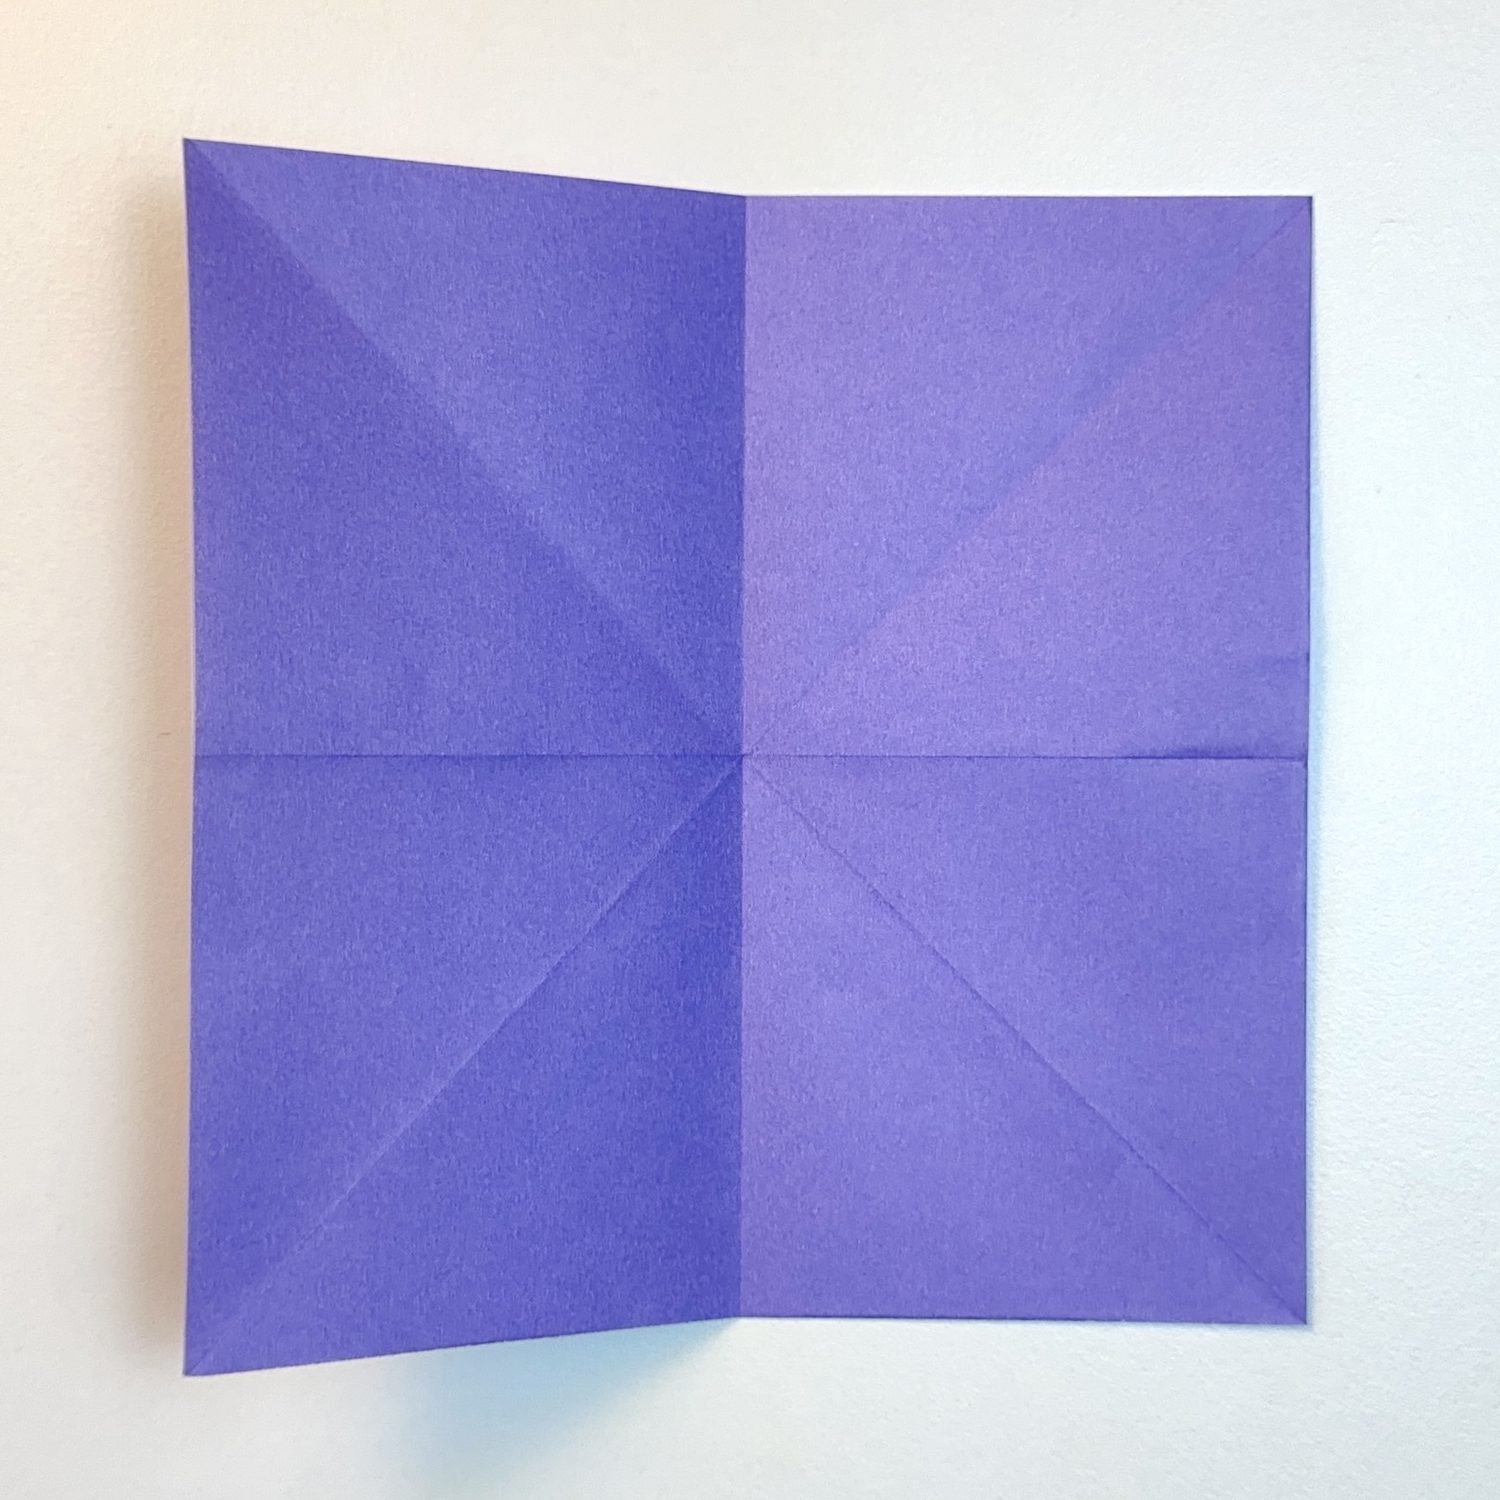
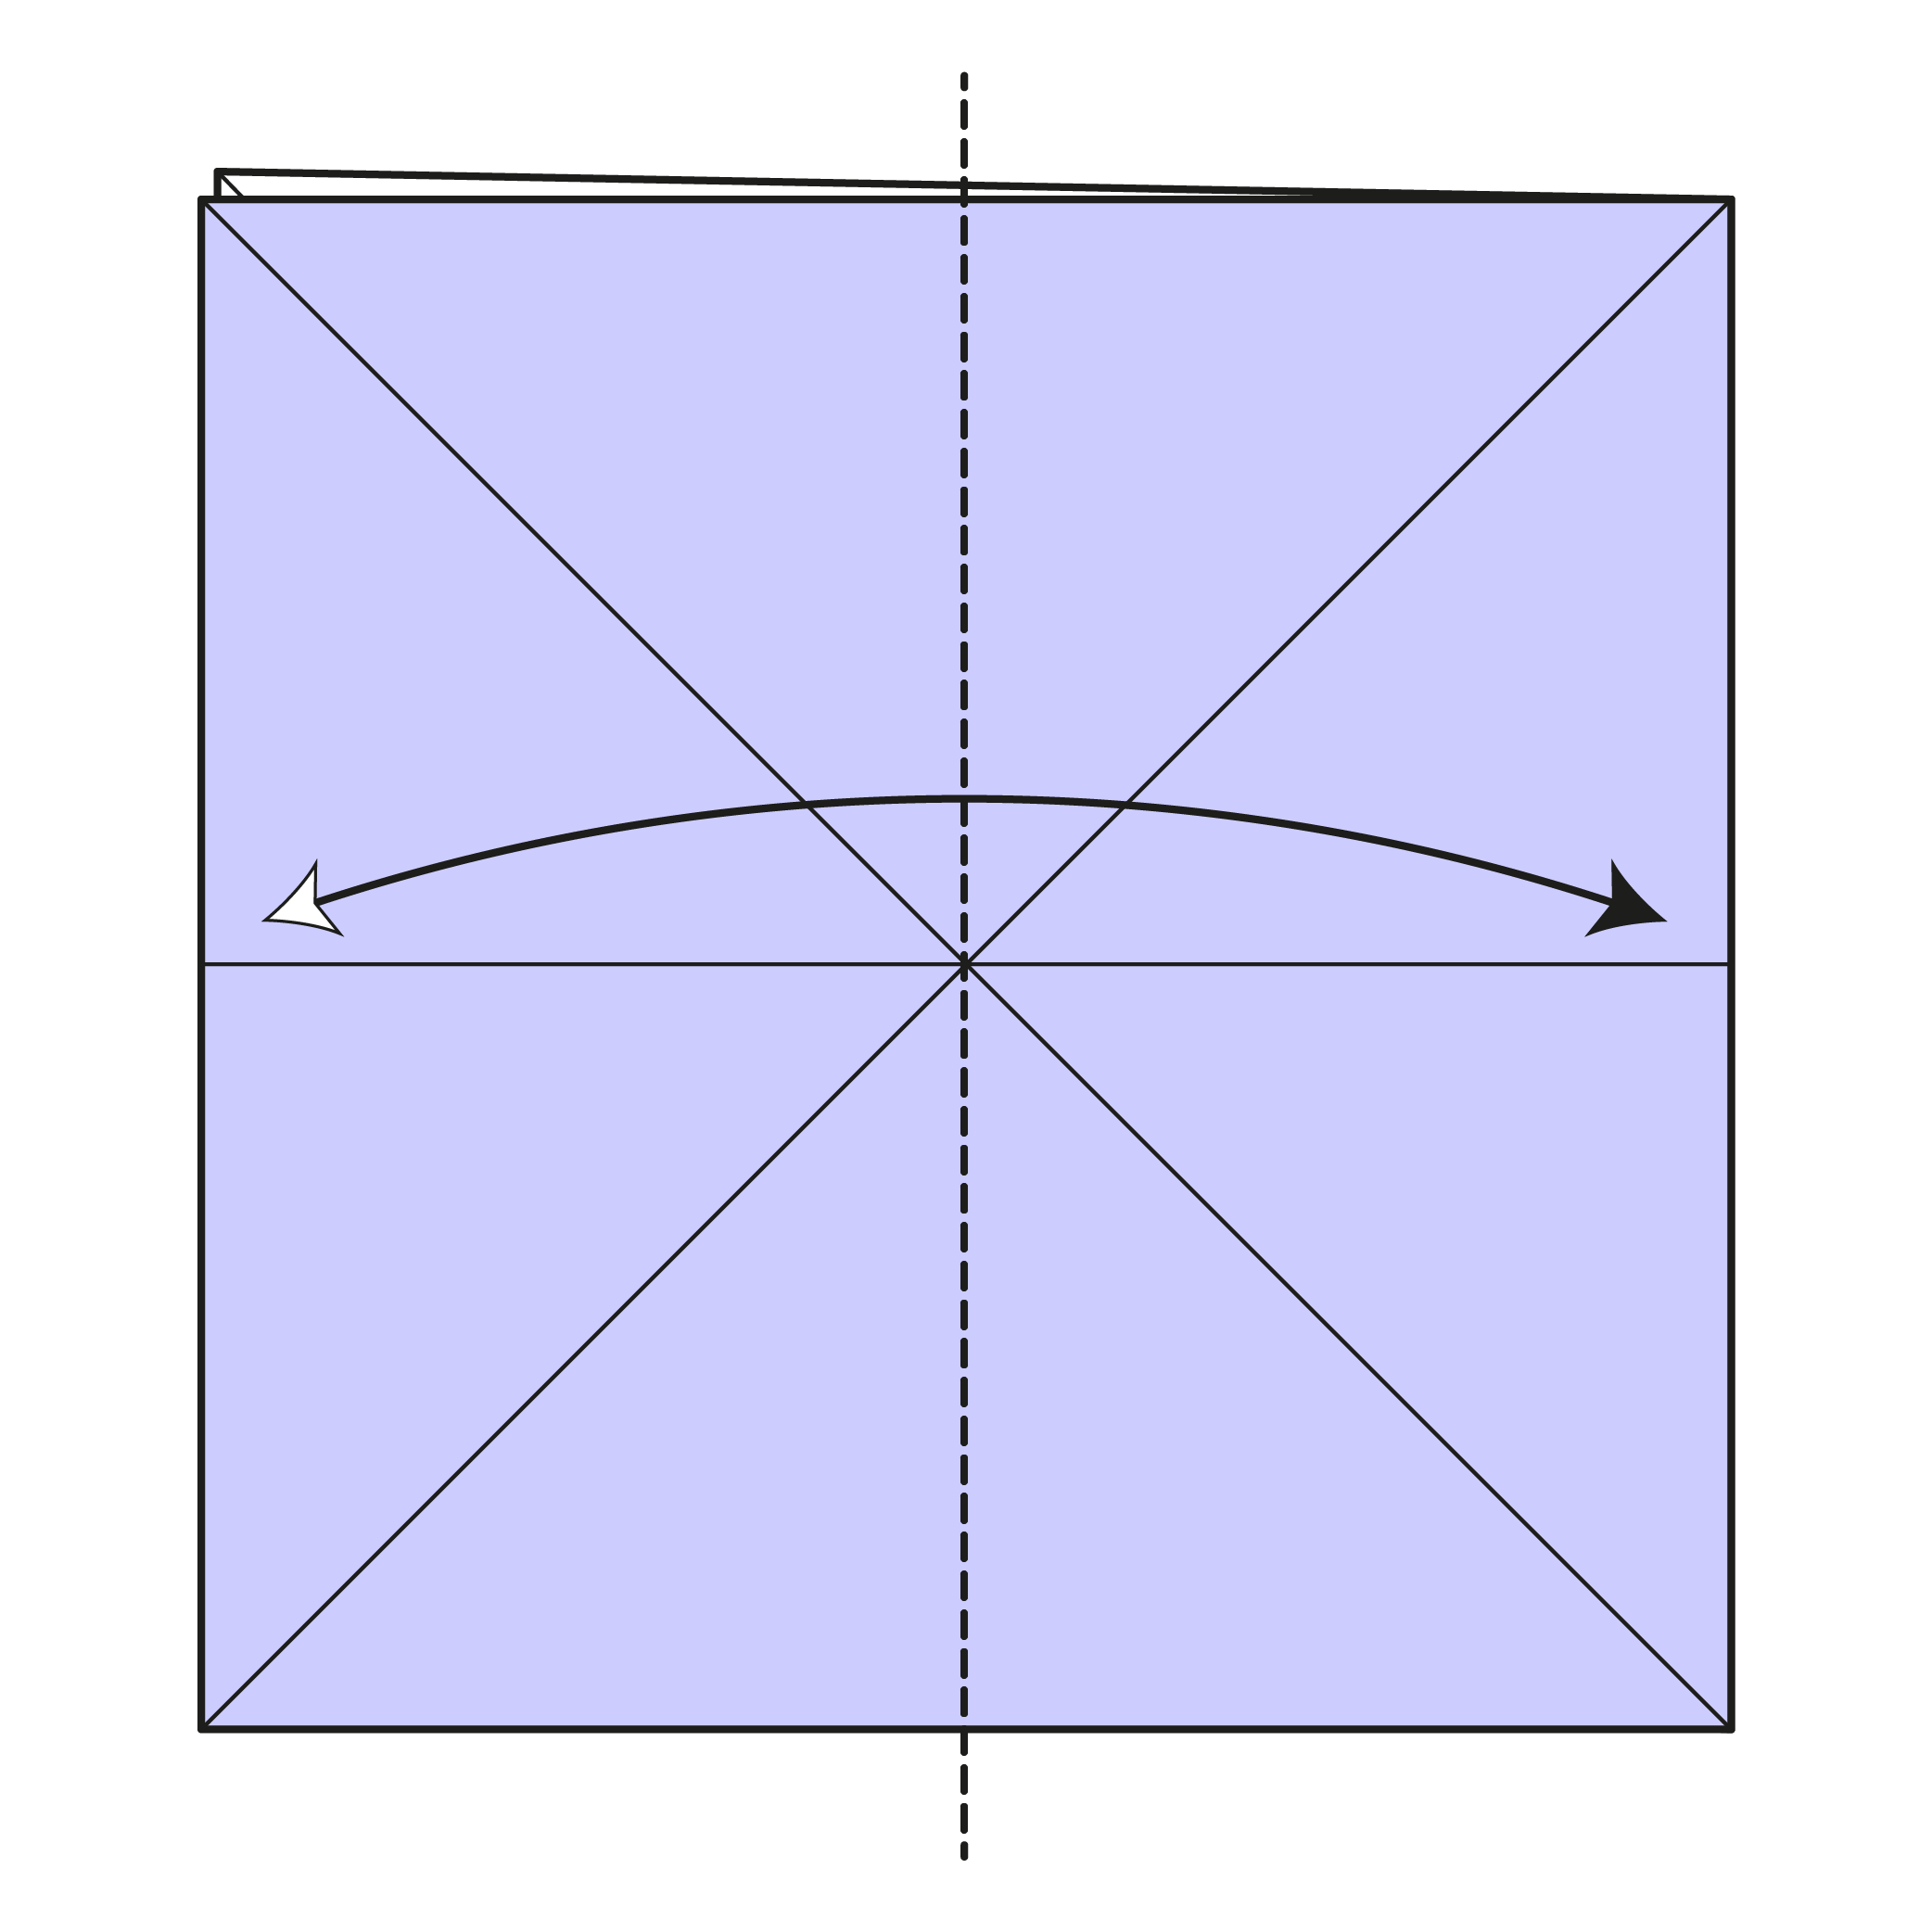
Fold the paper in half vertically, then unfold.
Step 9
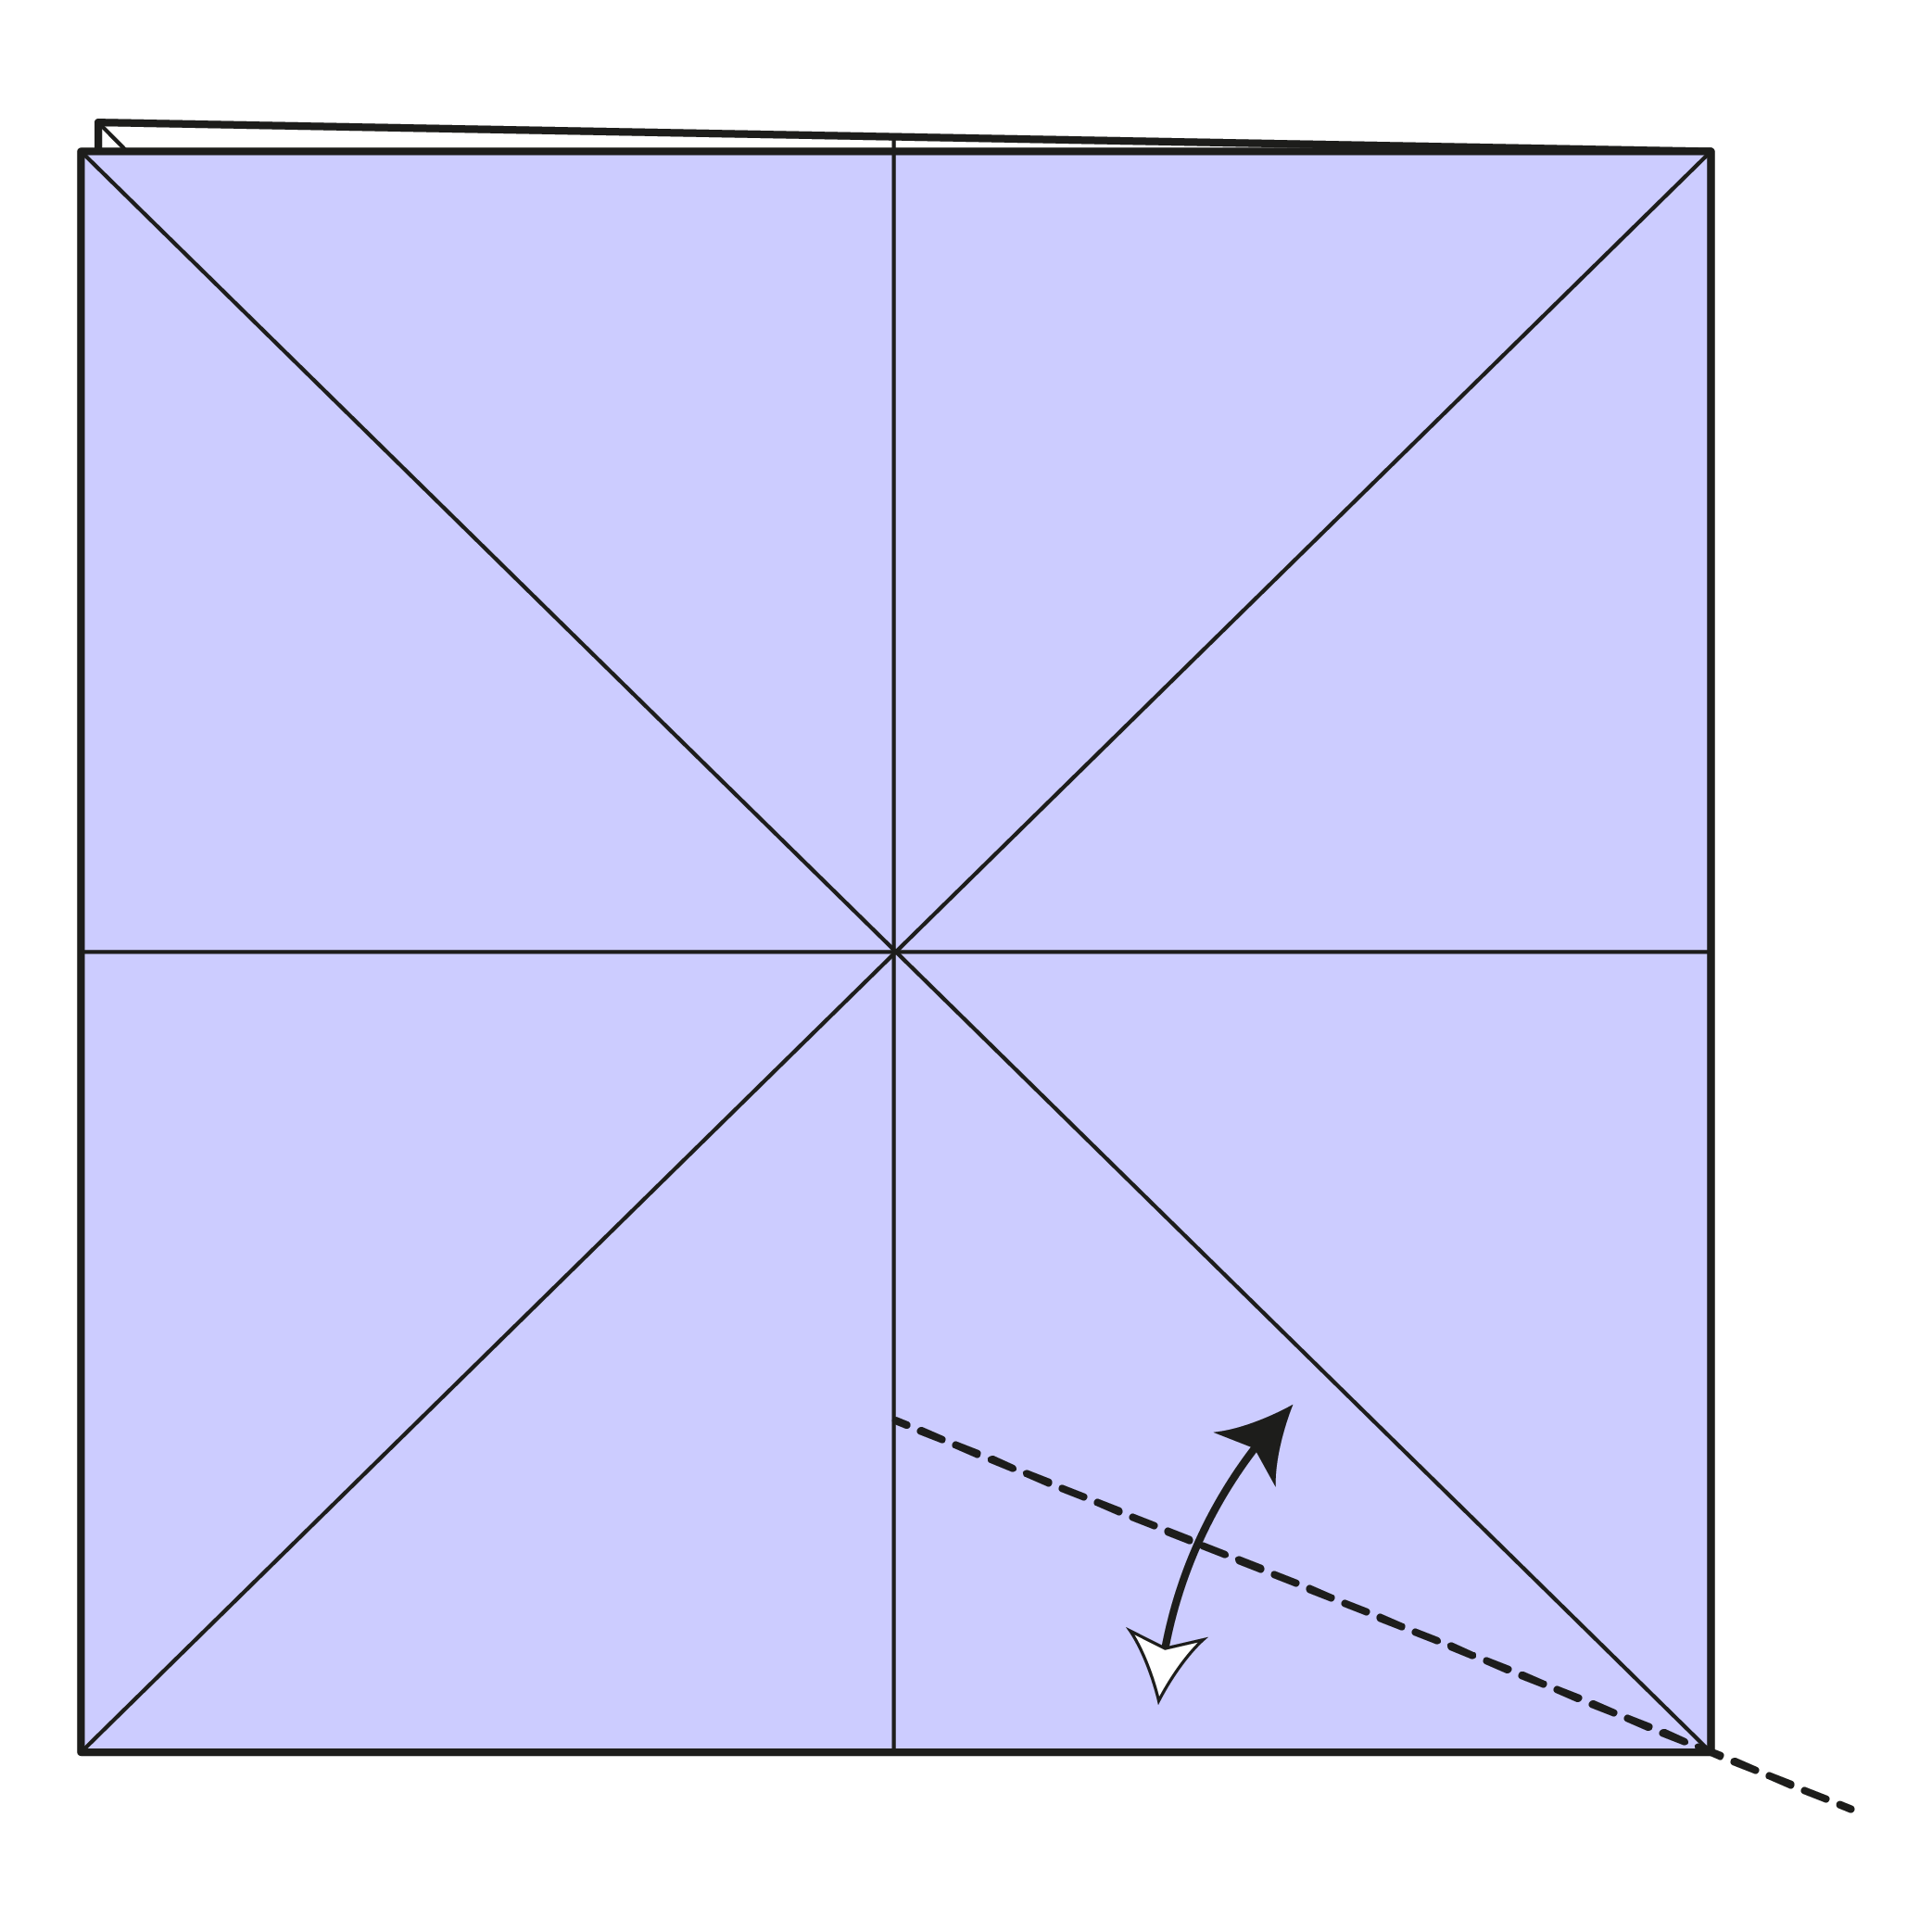
Fold the bottom right edge to the nearest crease line. Crease only from the corner to the vertical center crease.
Step 10
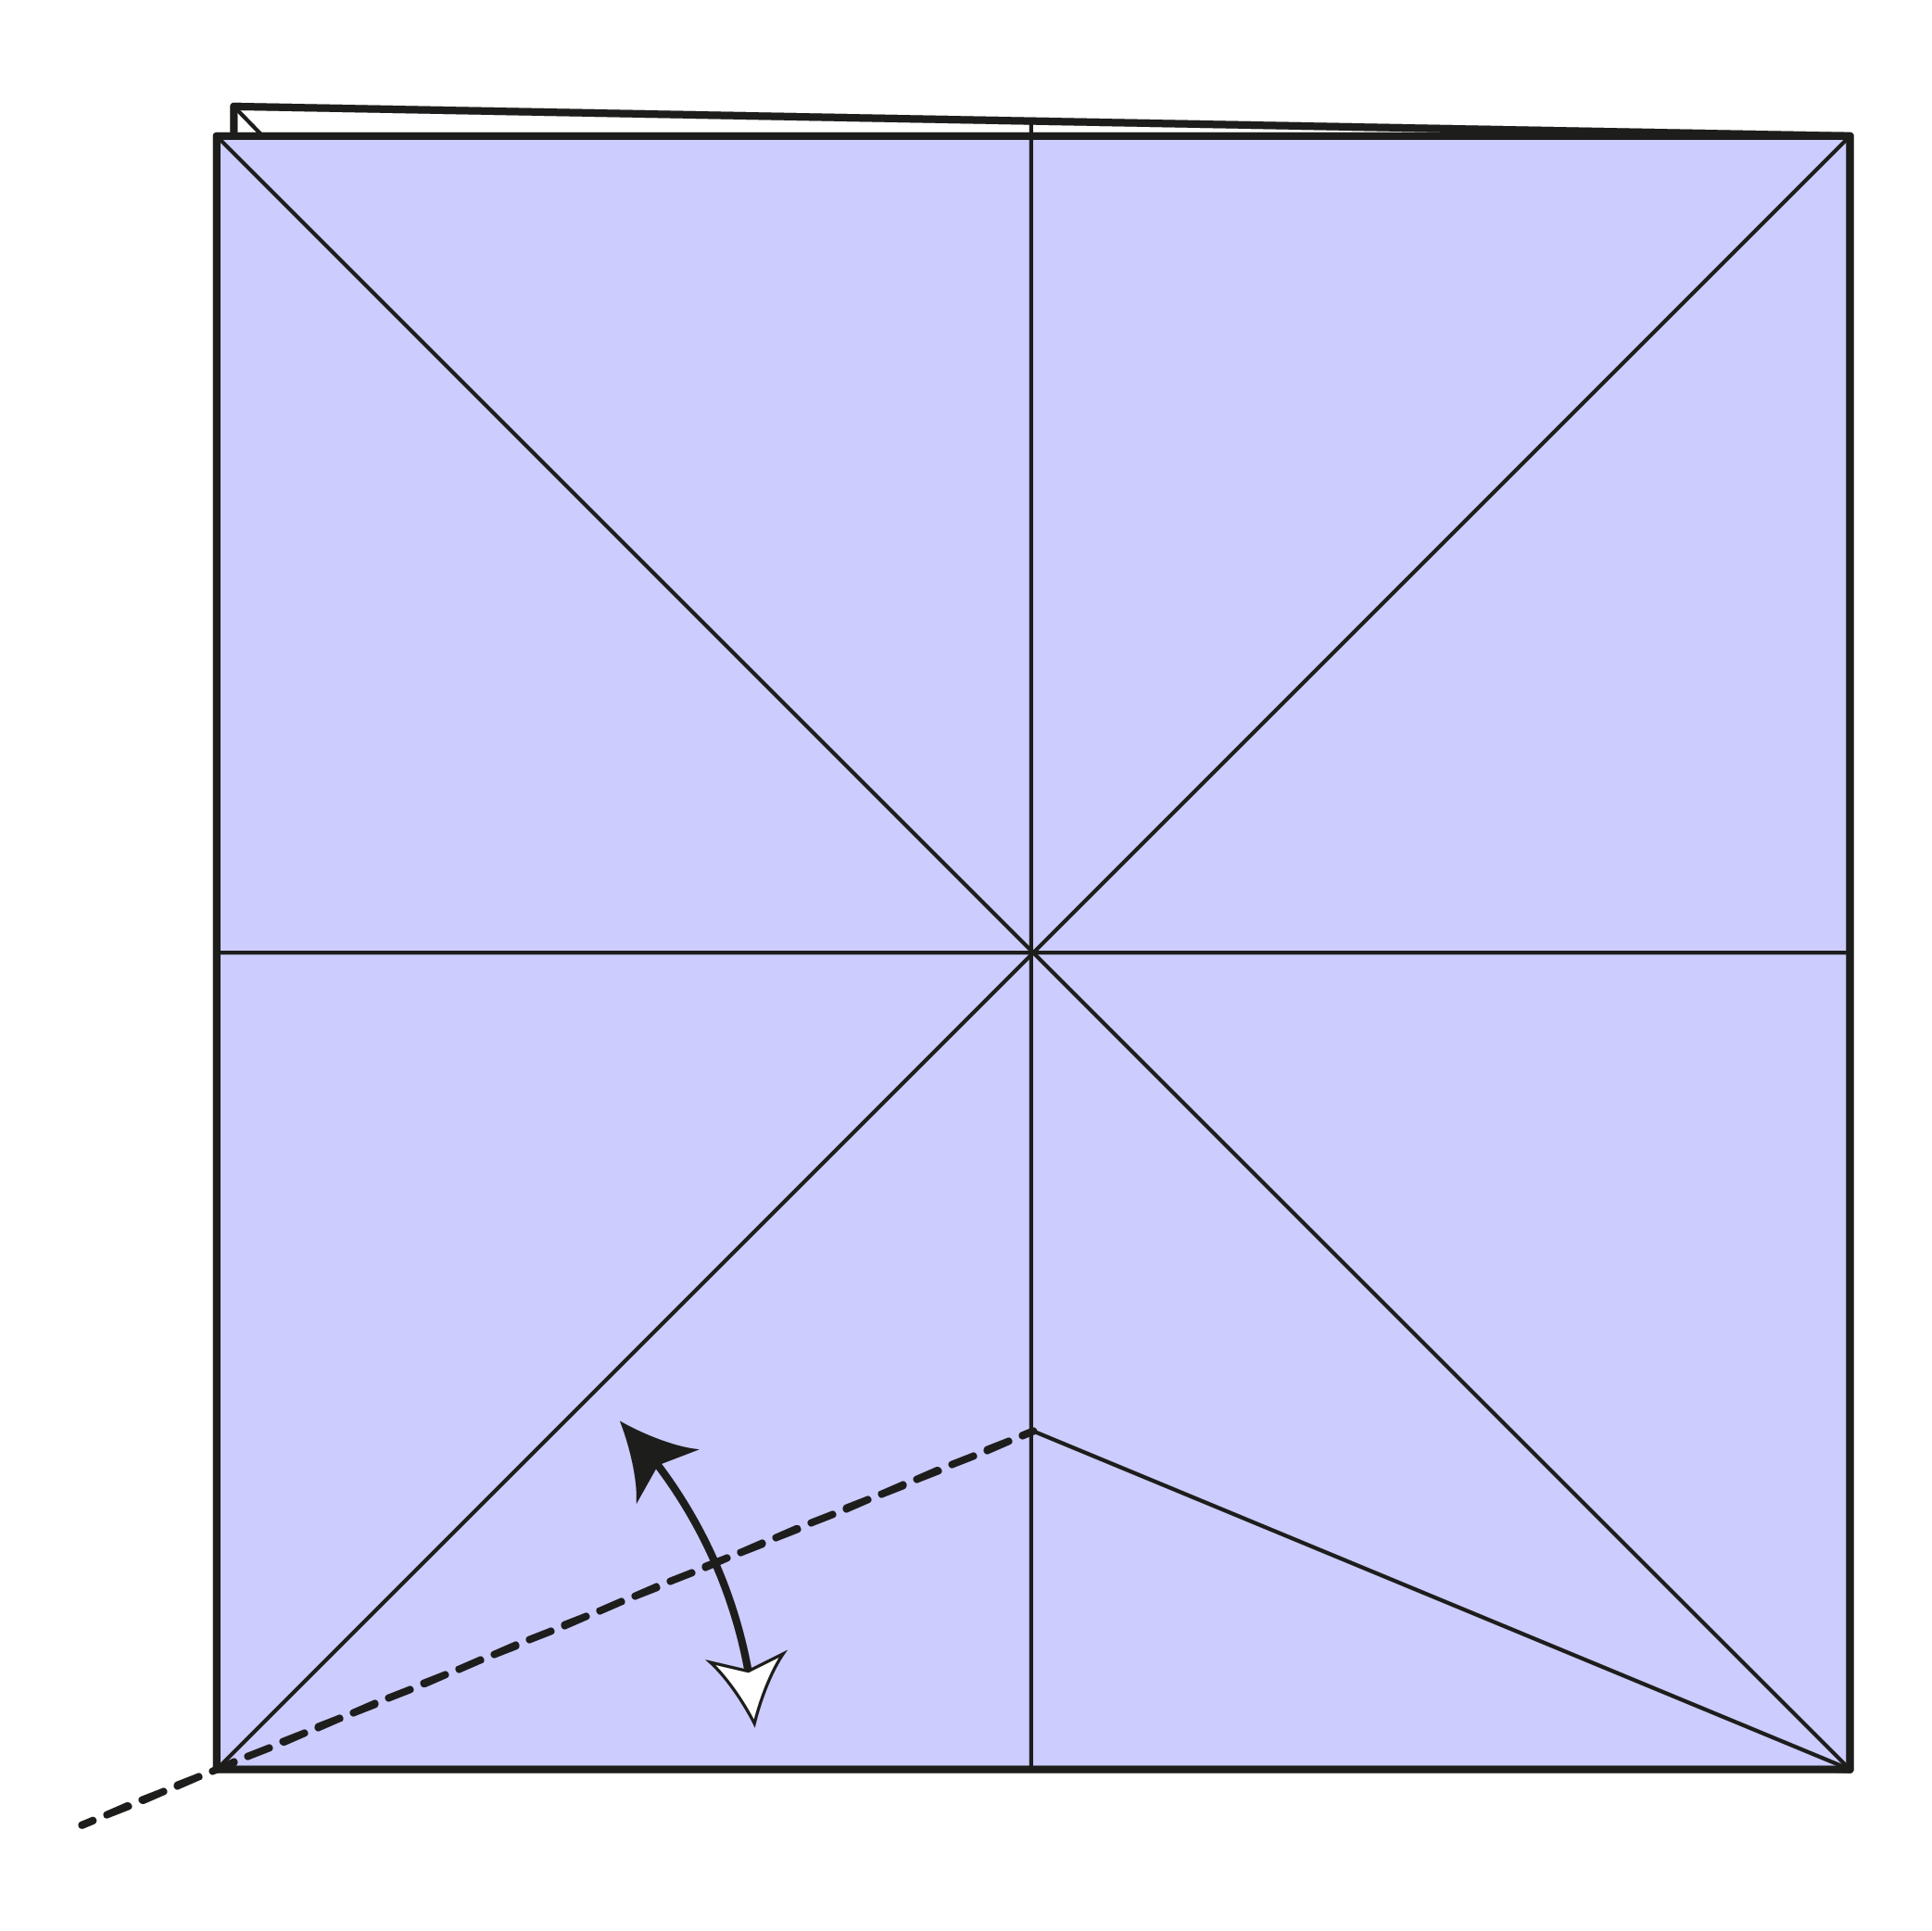
Repeat on the left side.
Step 11
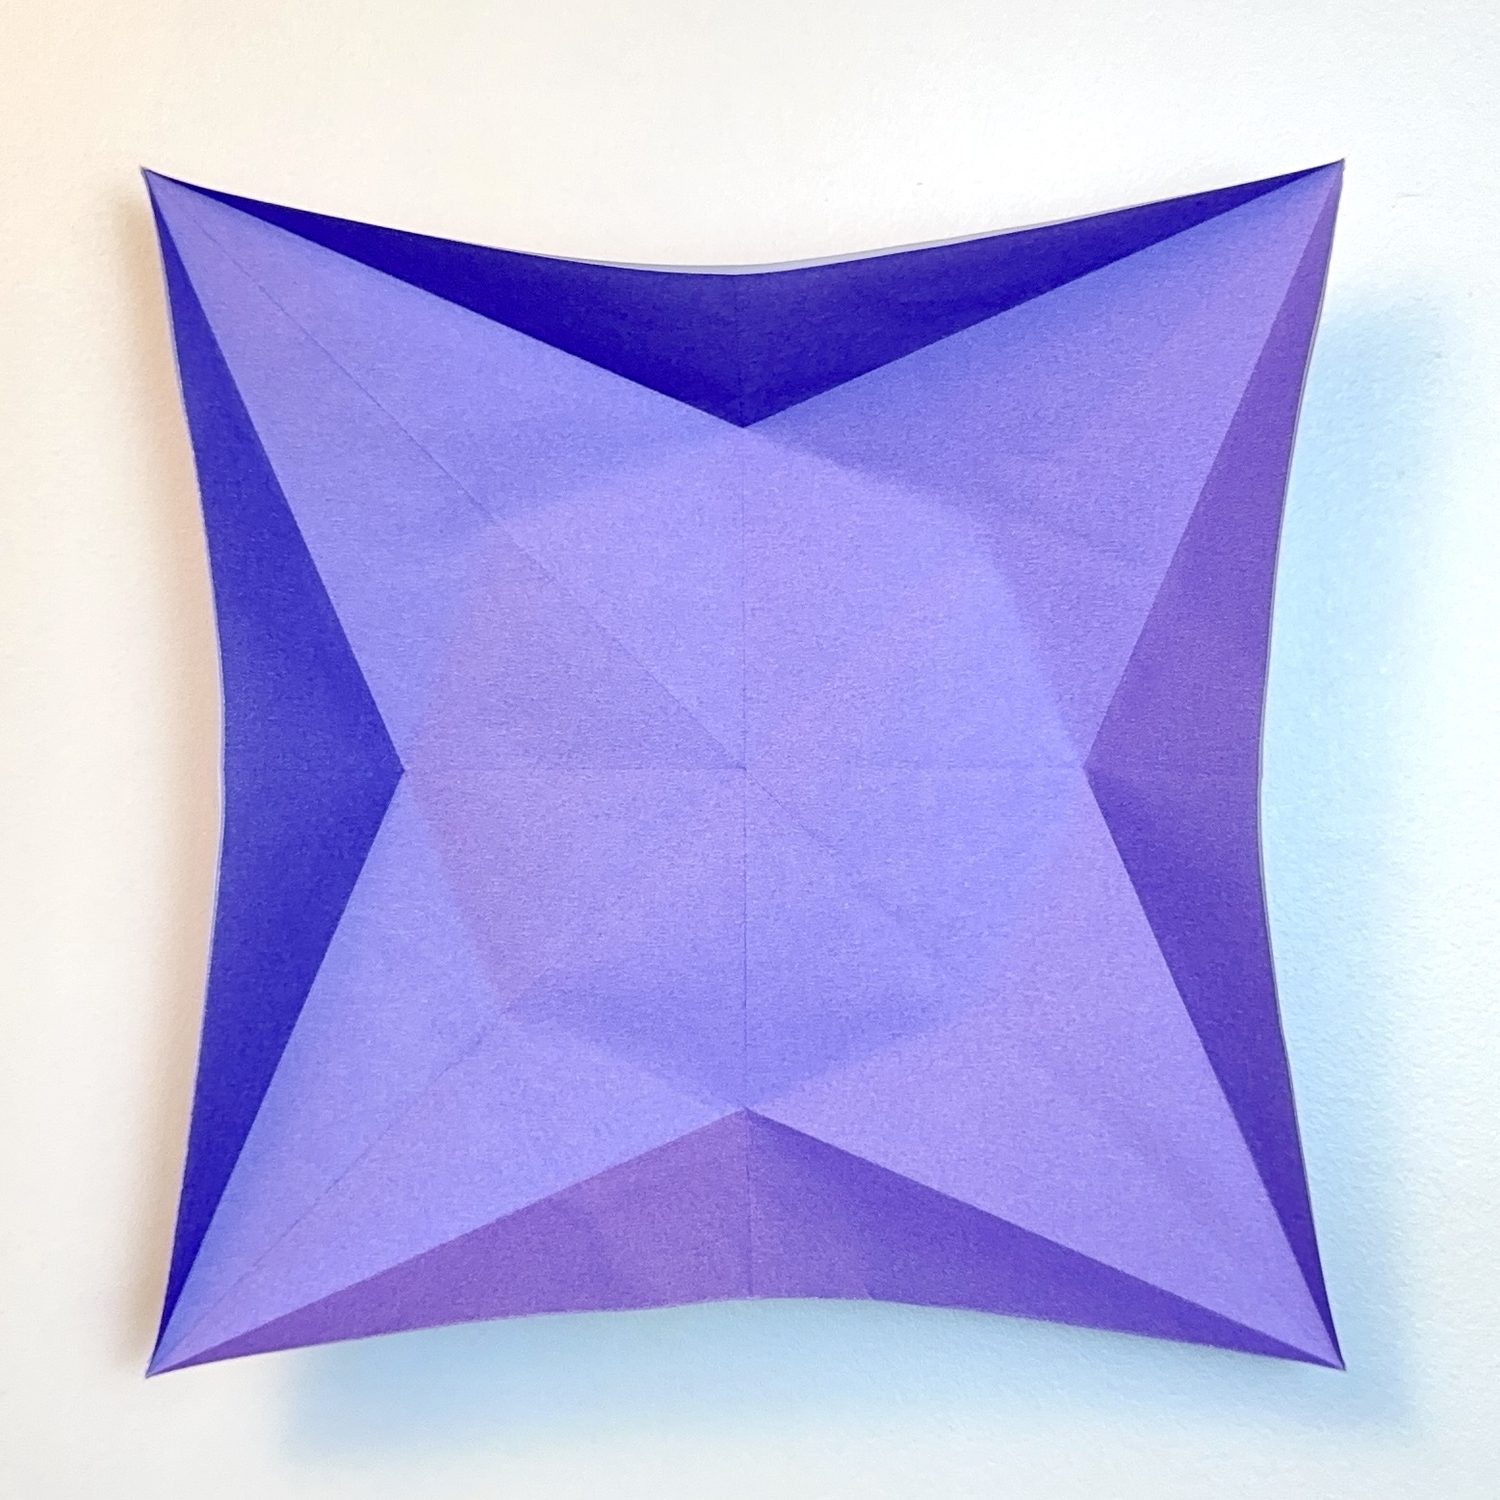
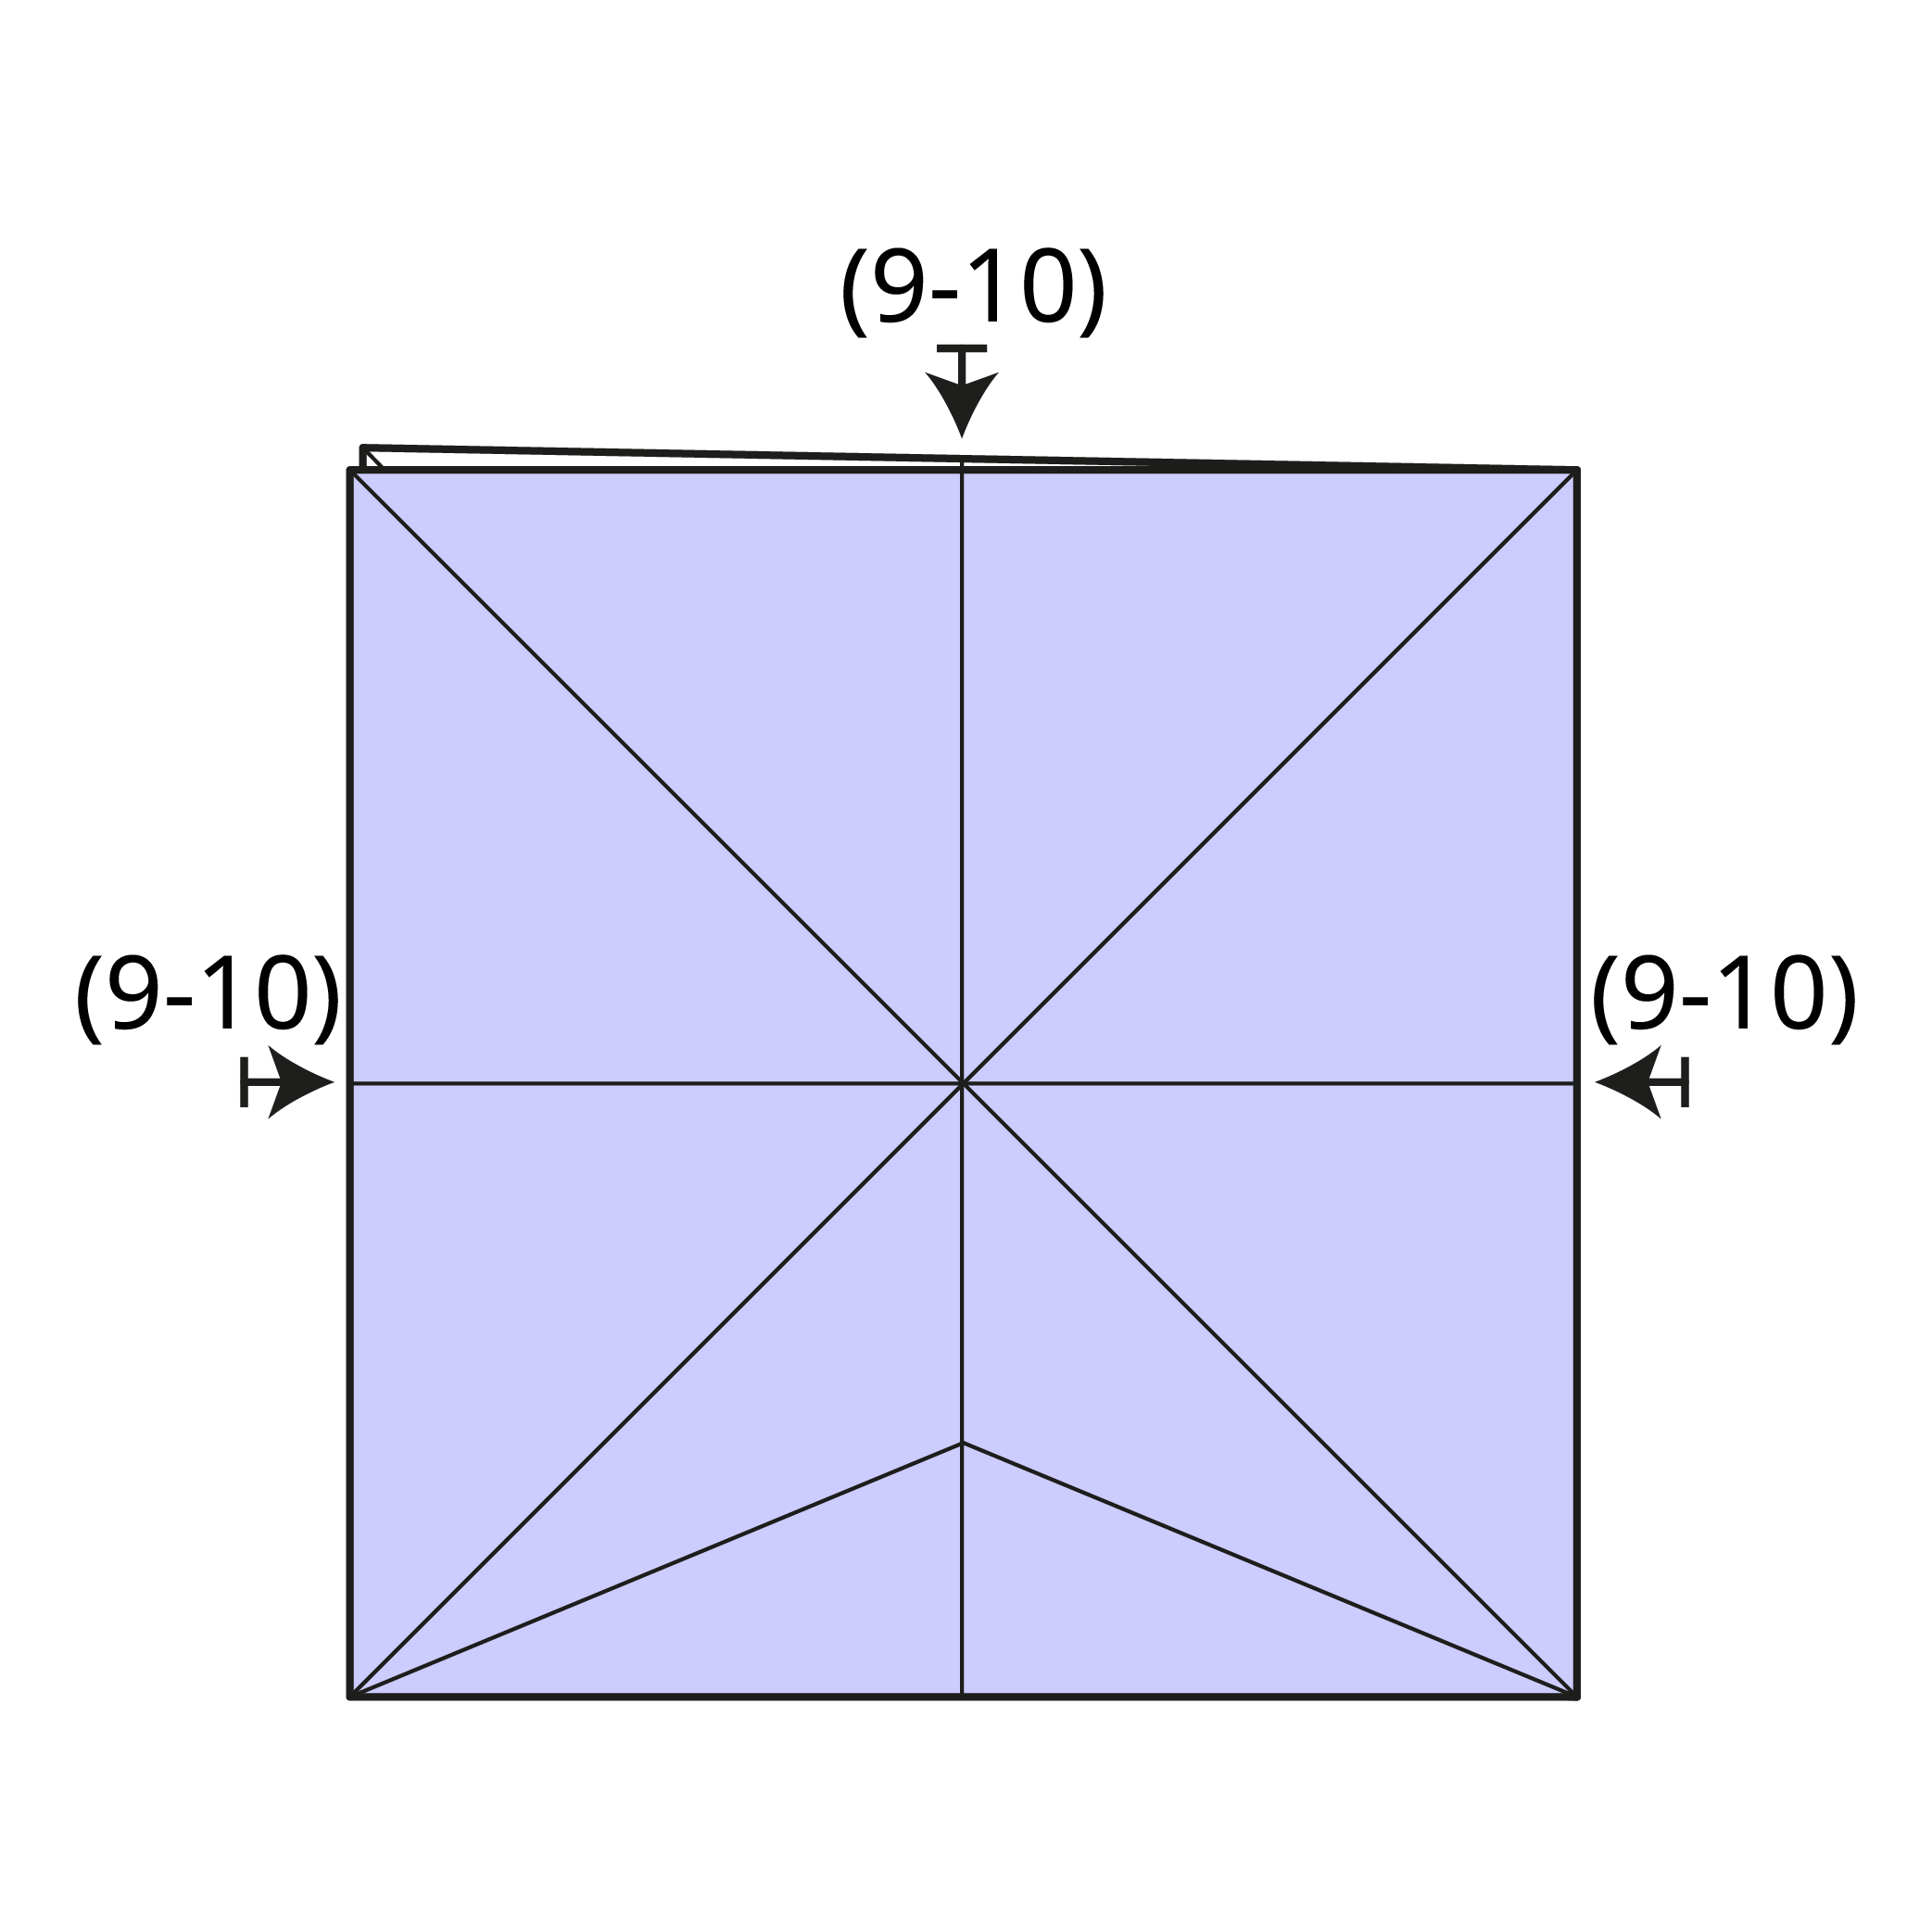
Repeat Steps 9 and 10 on the remaining three sides.
Step 12
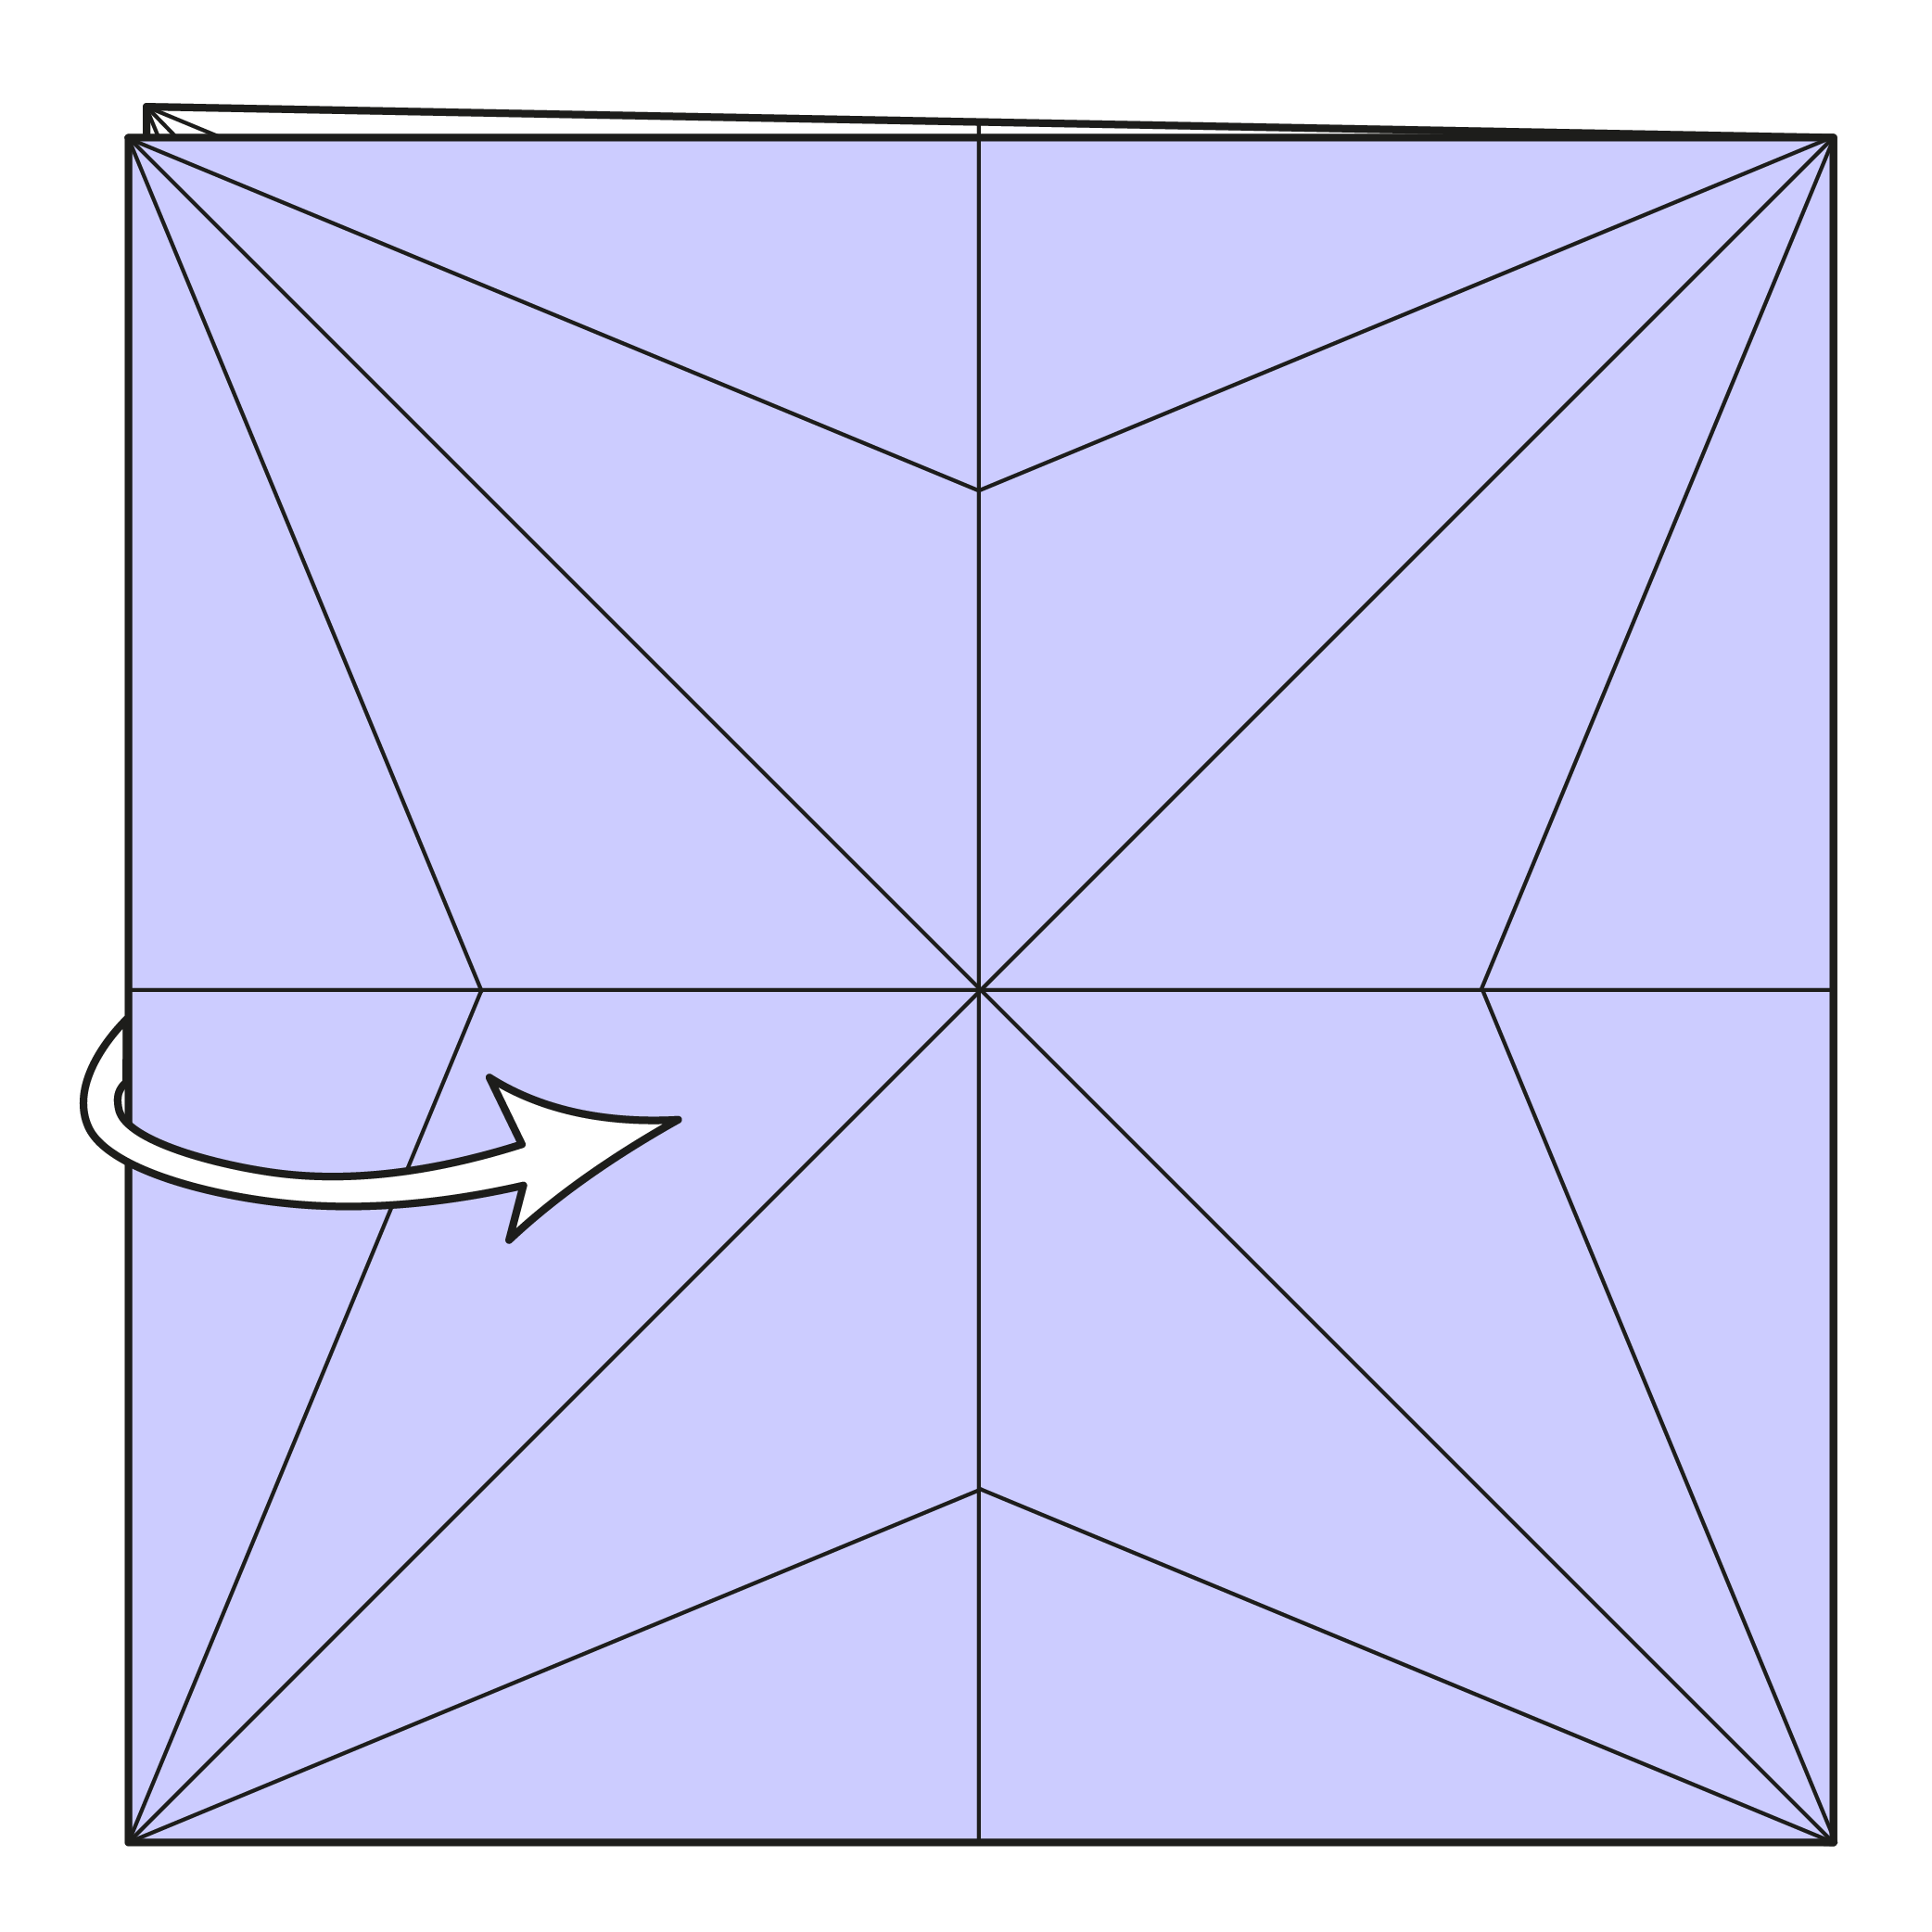
Unfold from left to right.
Step 13
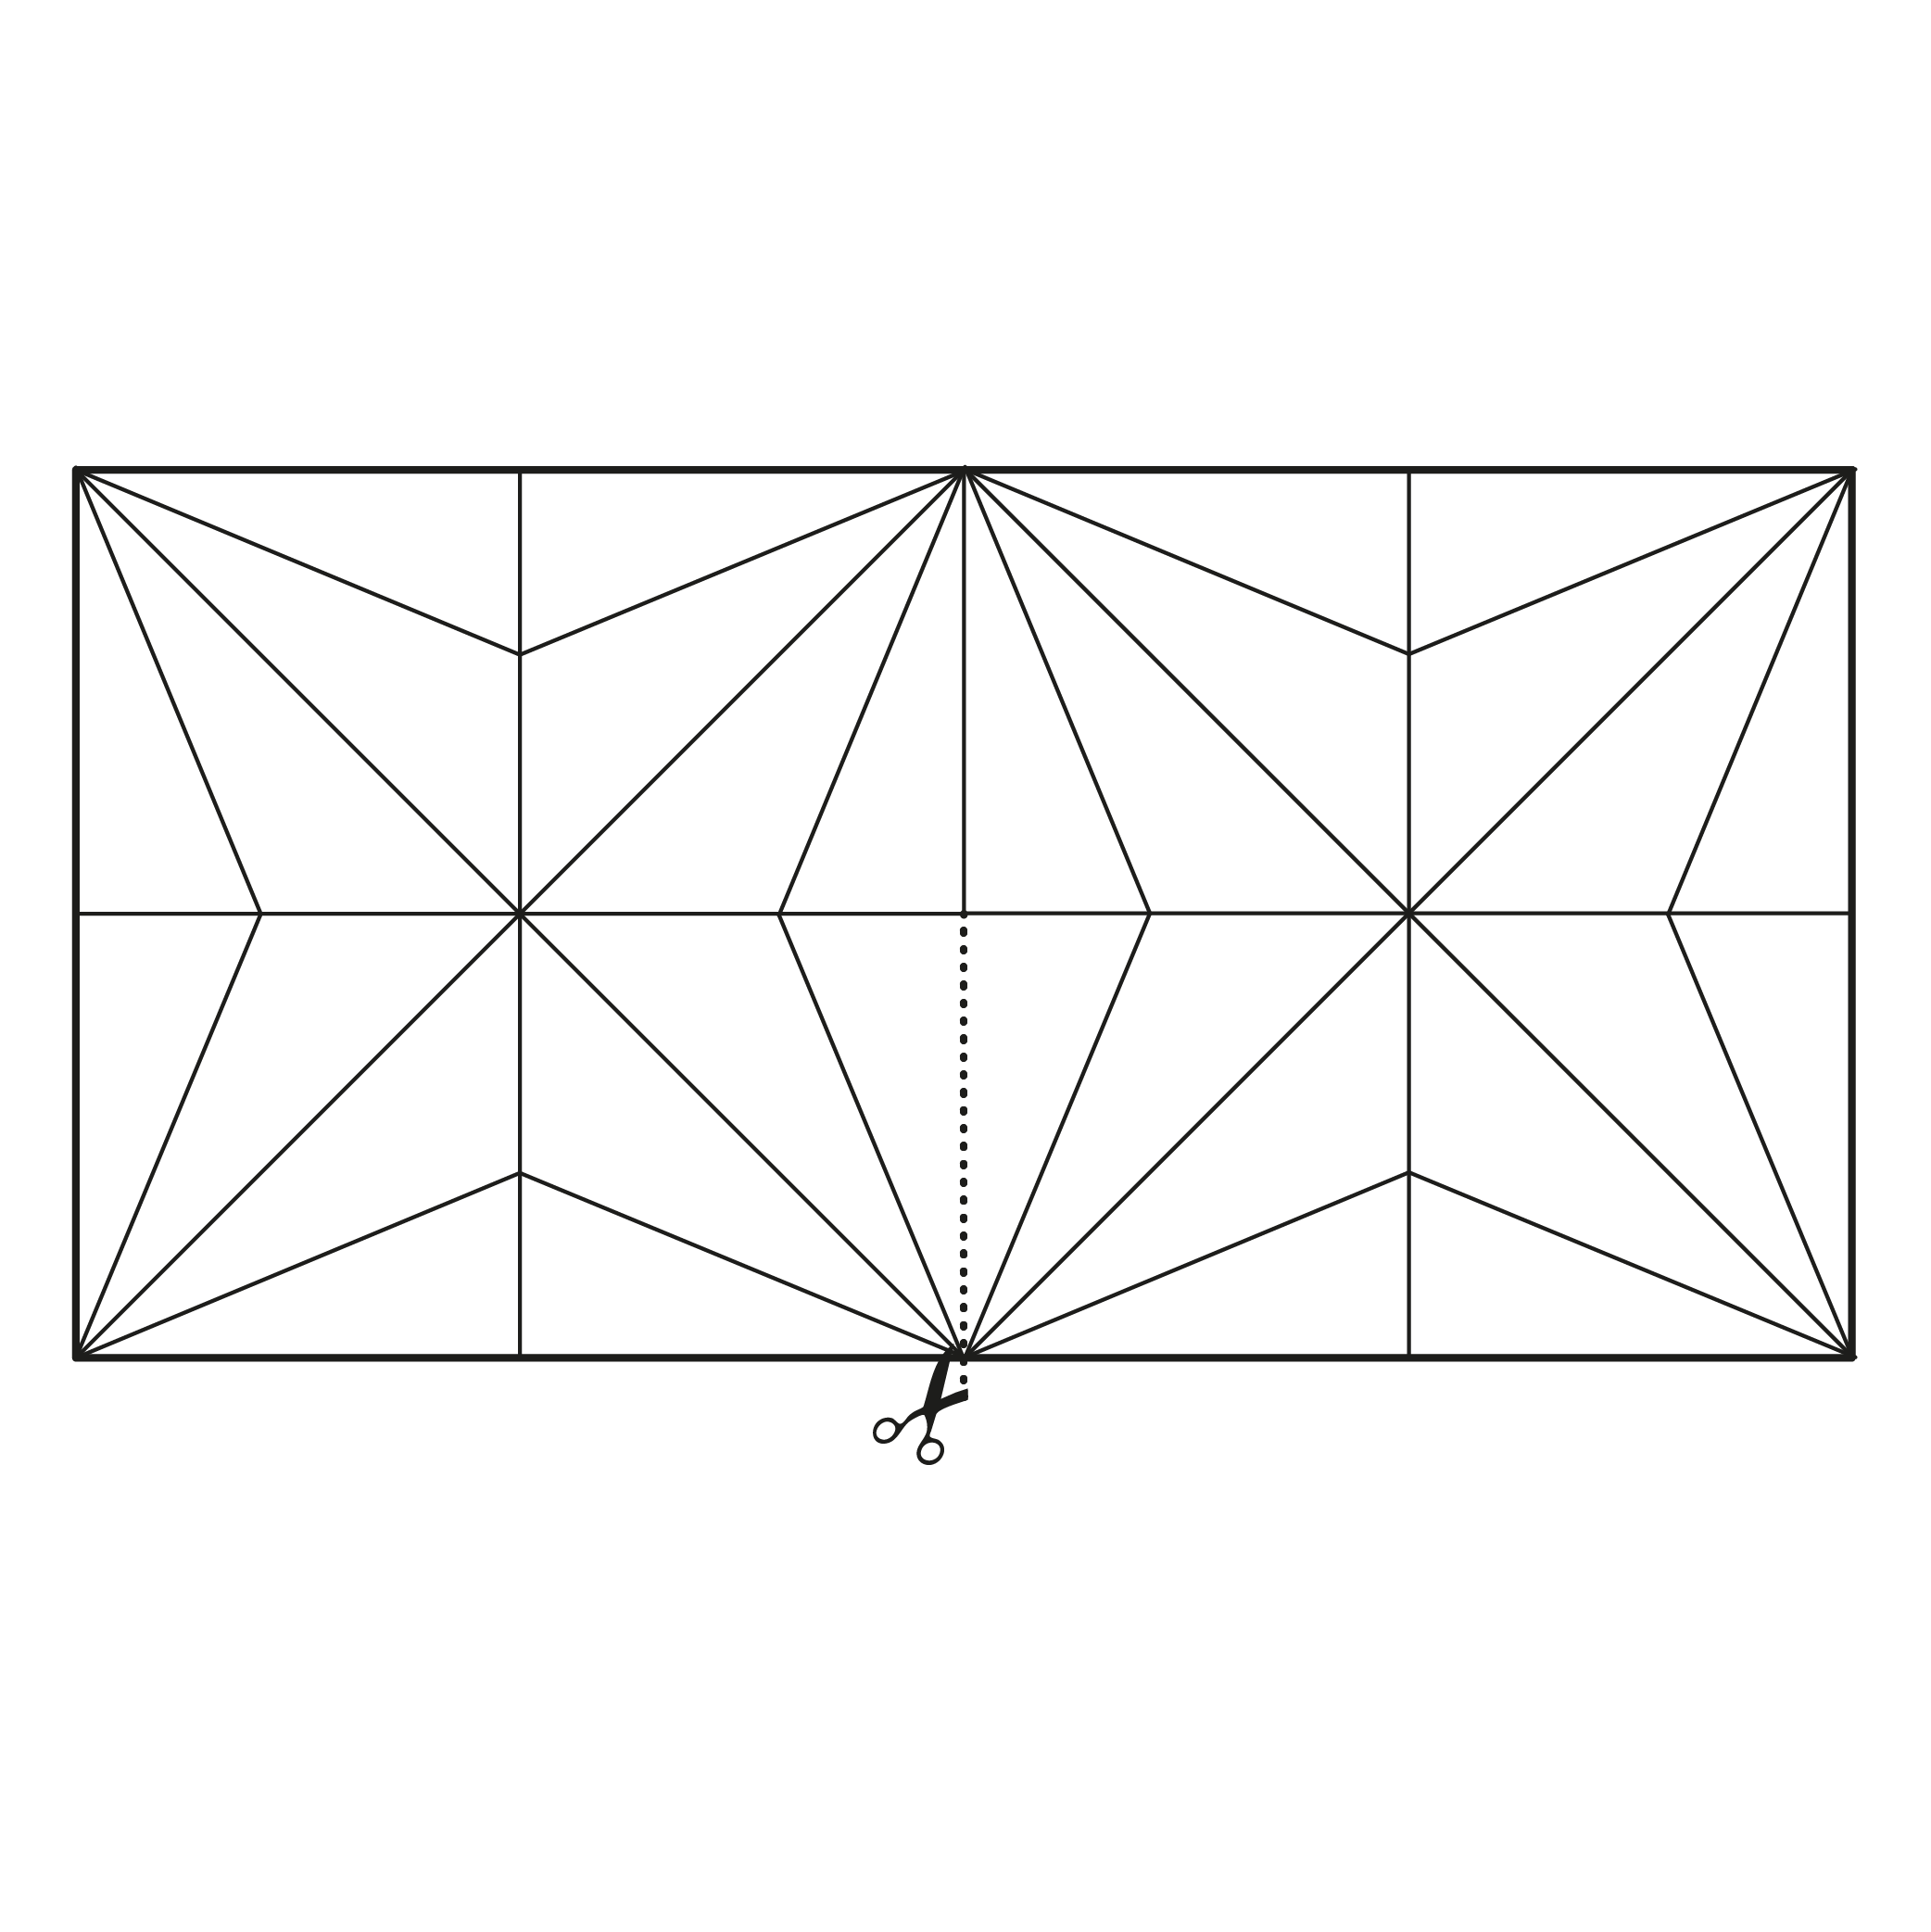
Cut a short slit from the bottom edge to the center point along the existing crease line.
Step 14
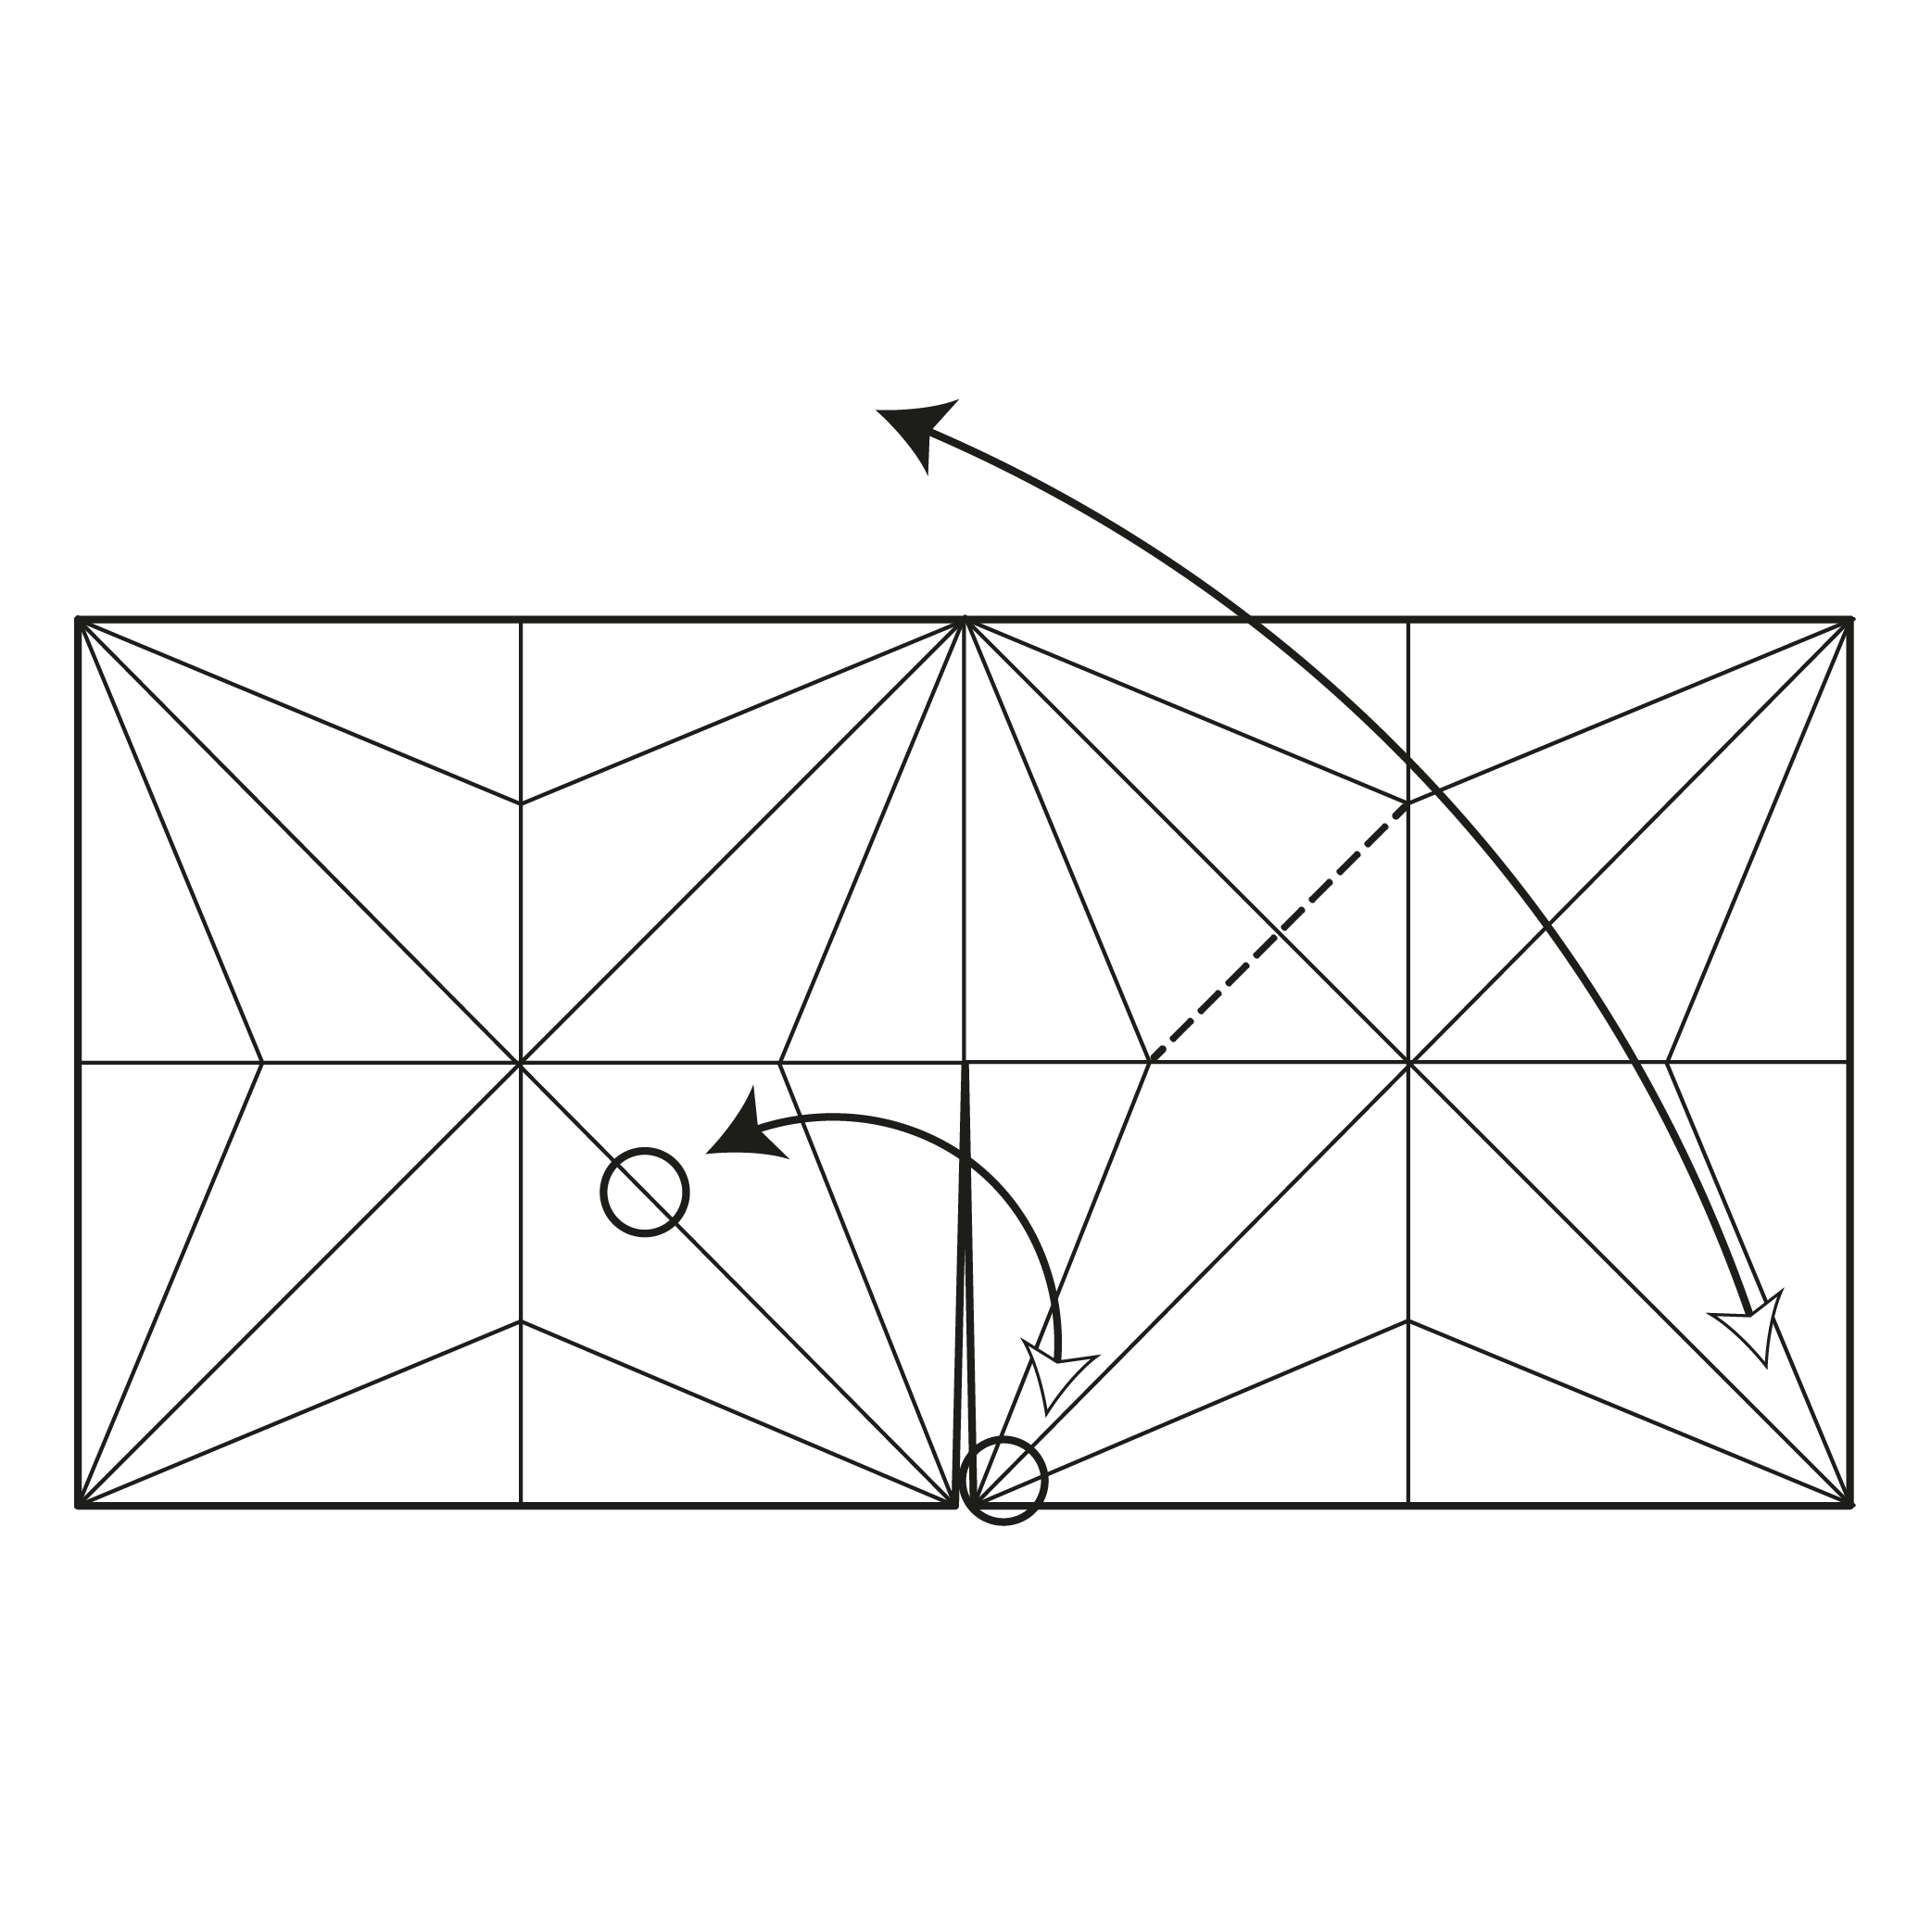
Fold the bottom right corner up to the left along the dashed line. Use the reference points as a guide. Fold only where shown.
Step 15
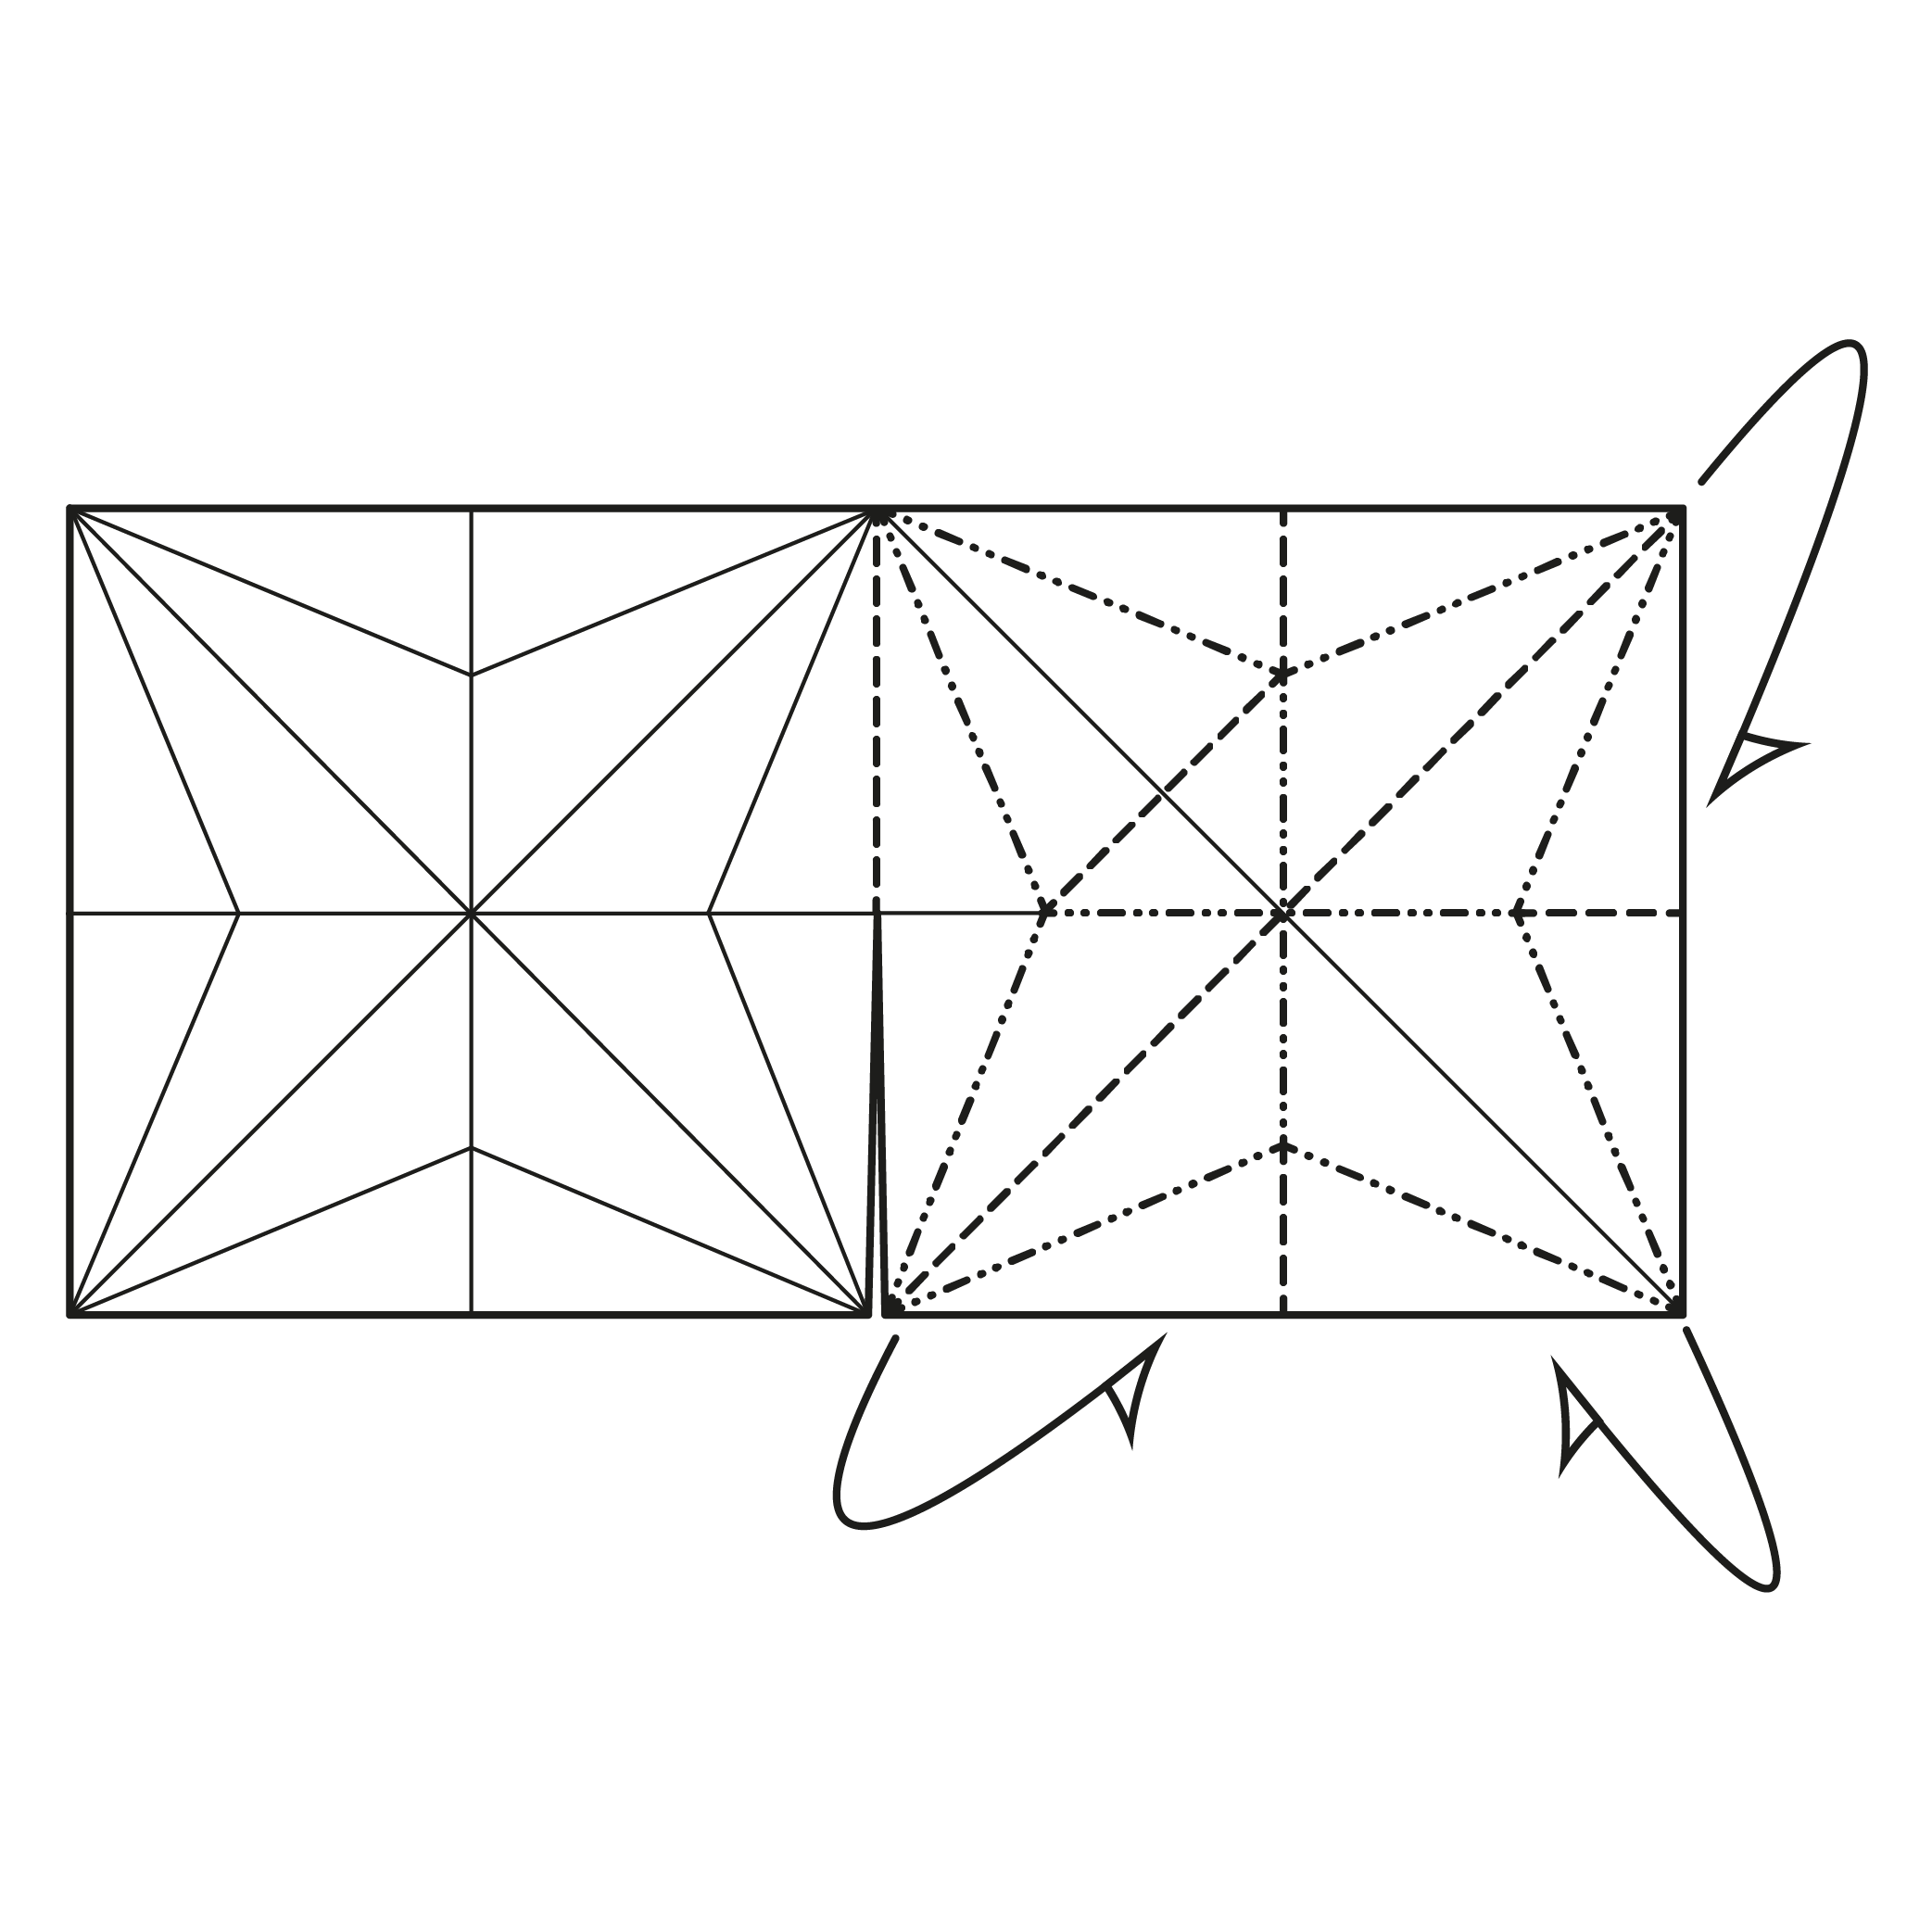
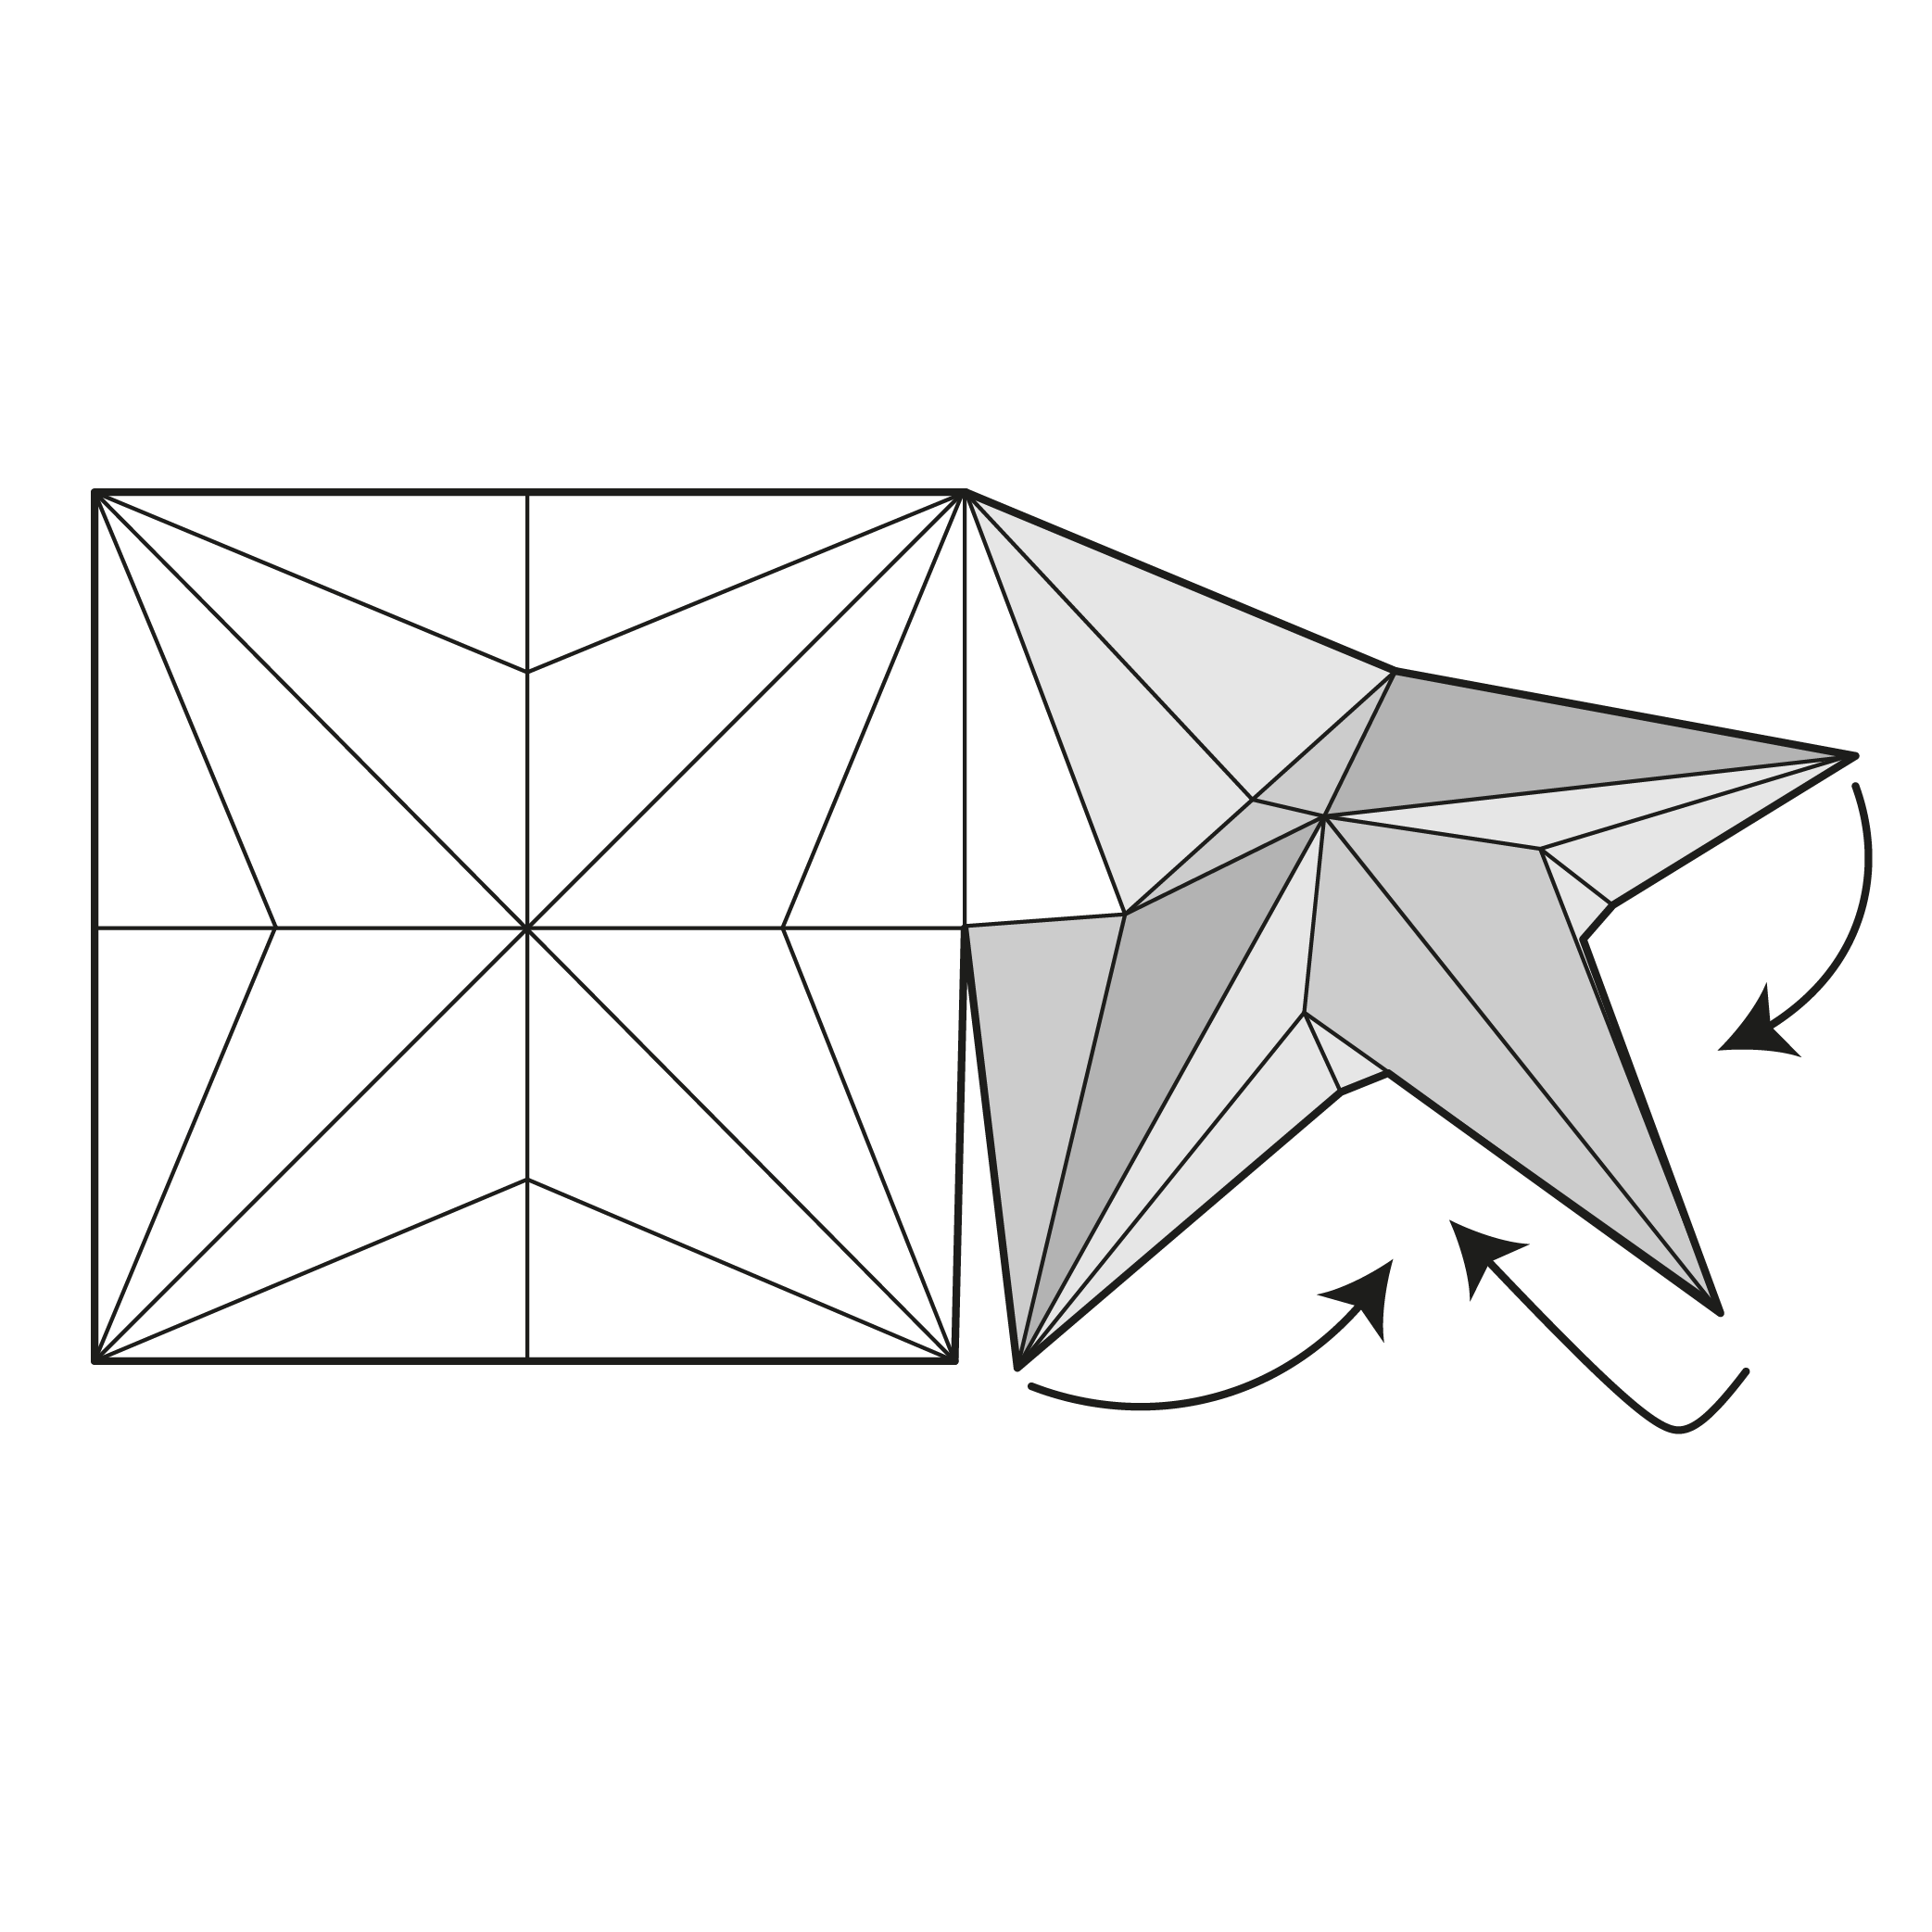
Collapse the model as shown, using the mountain and valley folds as a guide.
🕊️ Folding tip: Here, we’re folding a bird base from the crease pattern. Start by folding the mountain folds connected to the corners. Then fold along the crease you made in Step 14.
Step 16
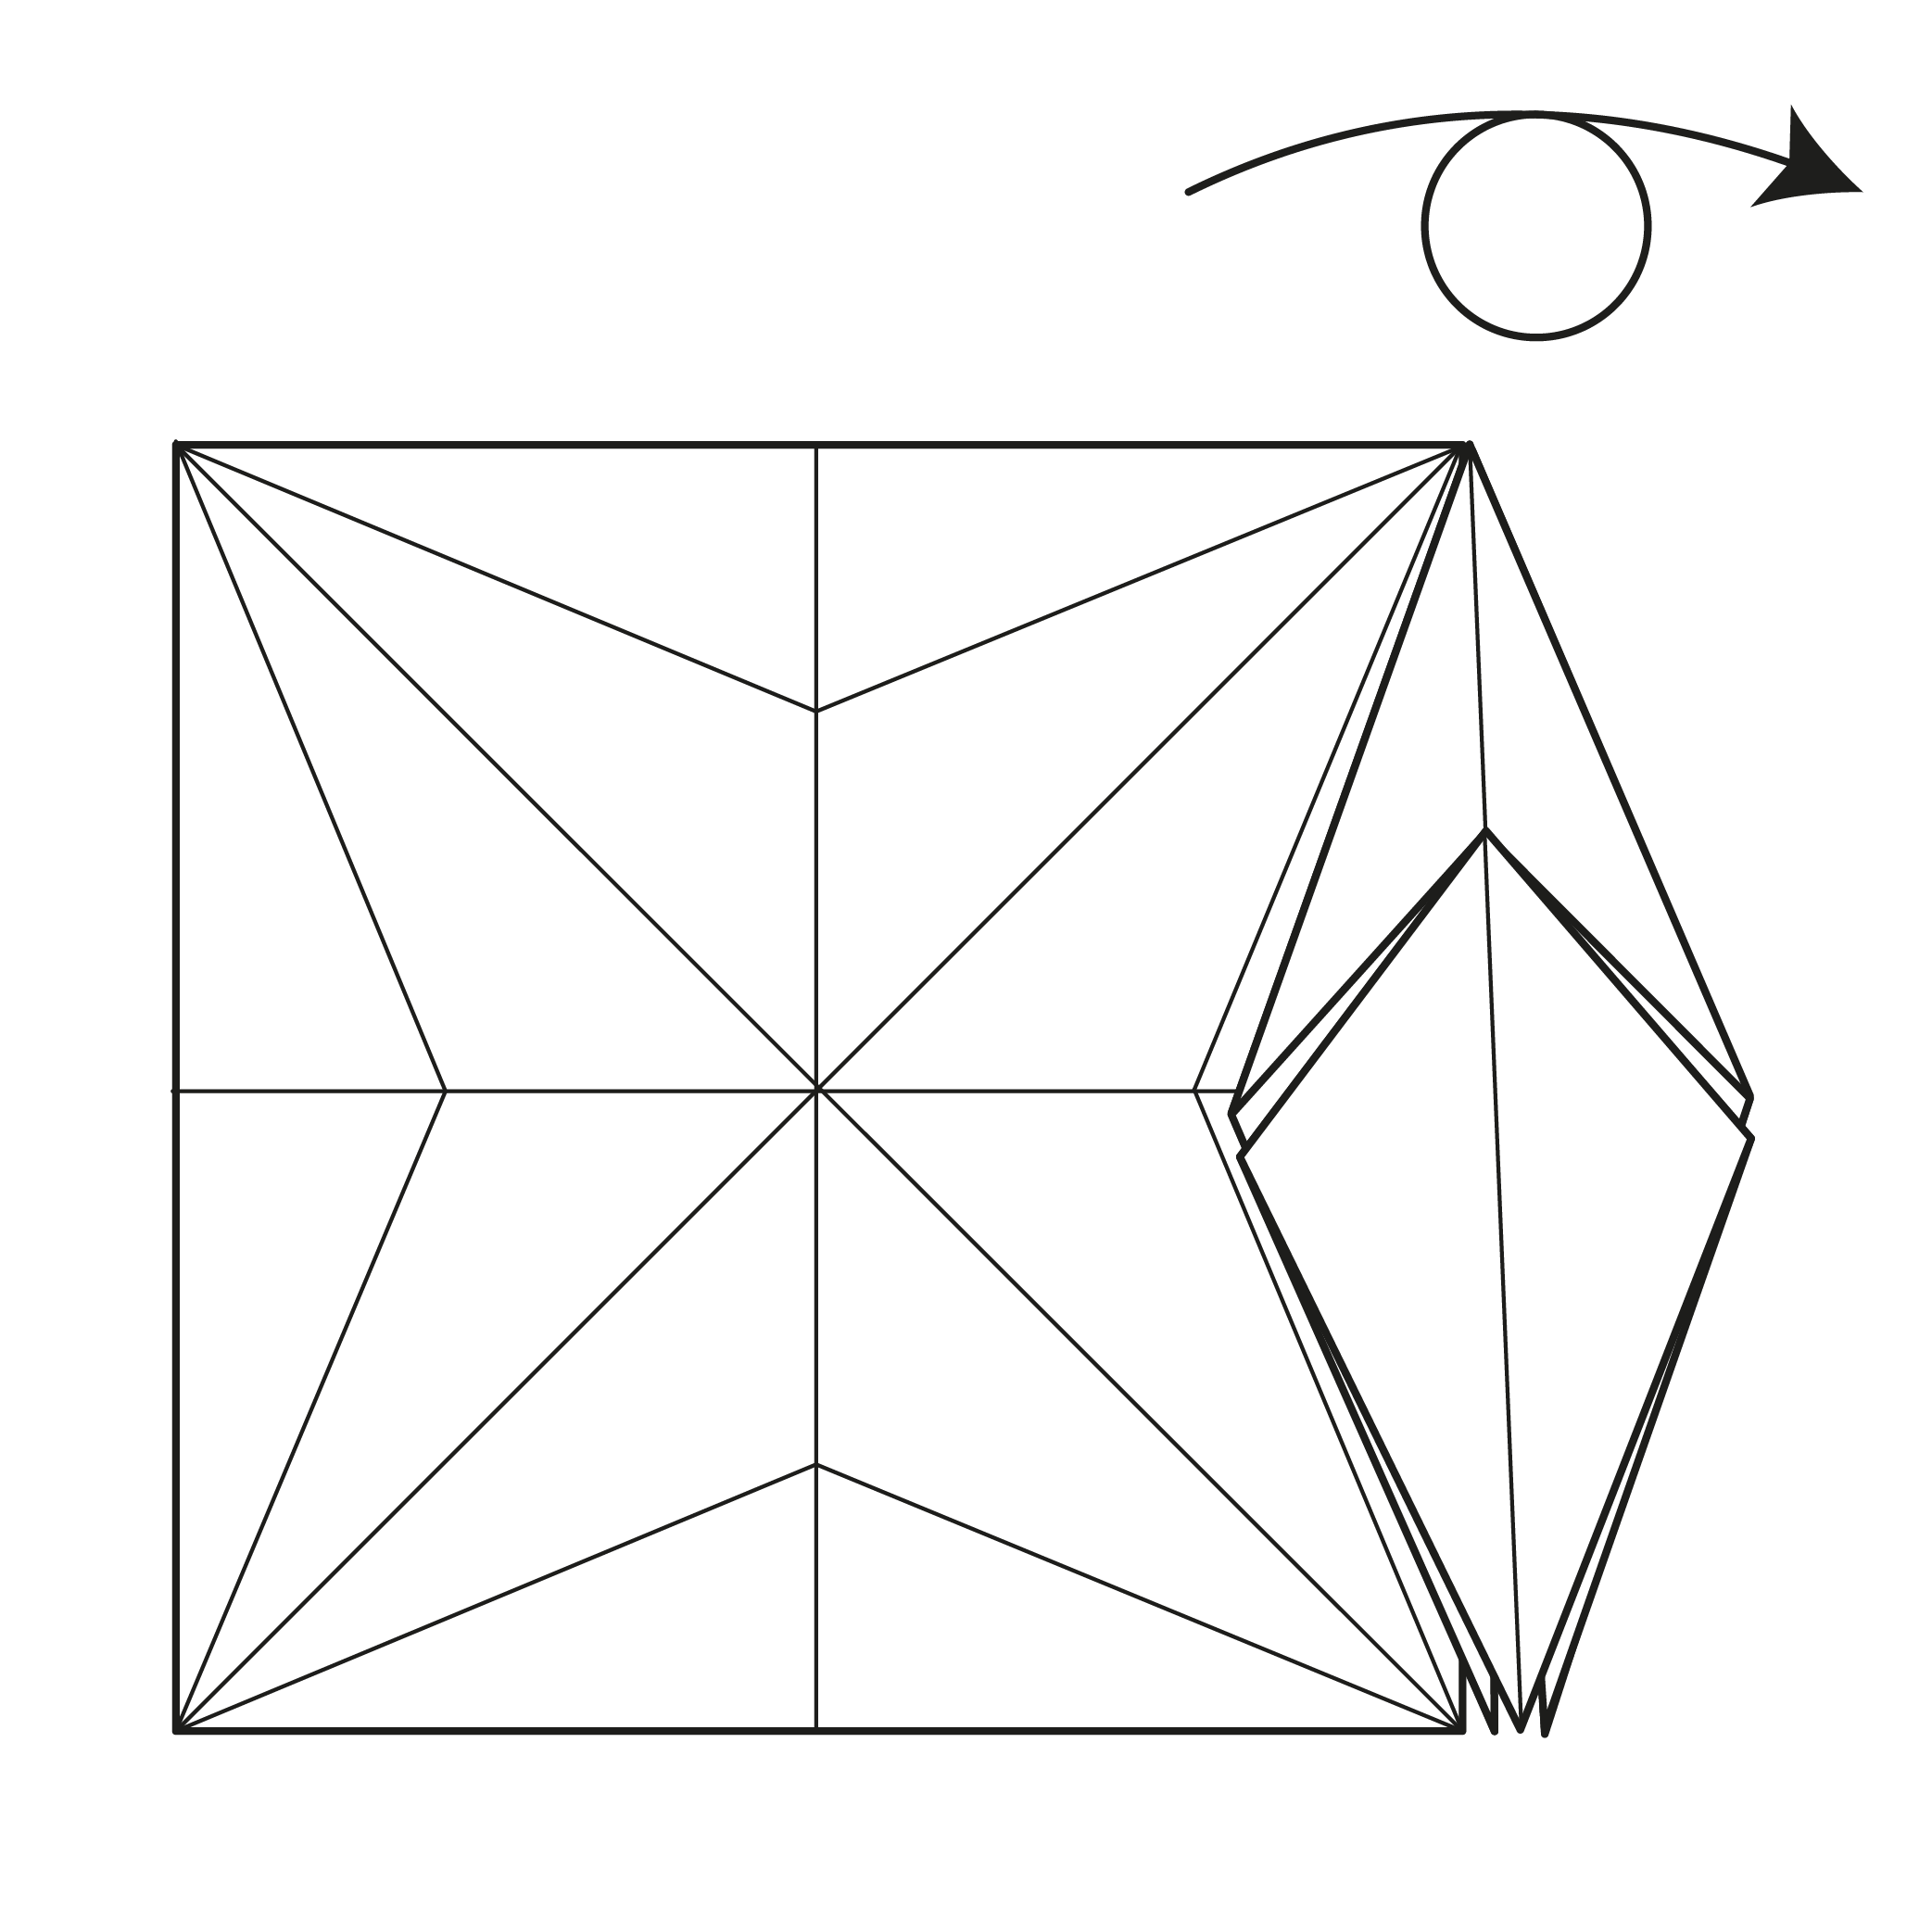
Turn the model over.
Step 17
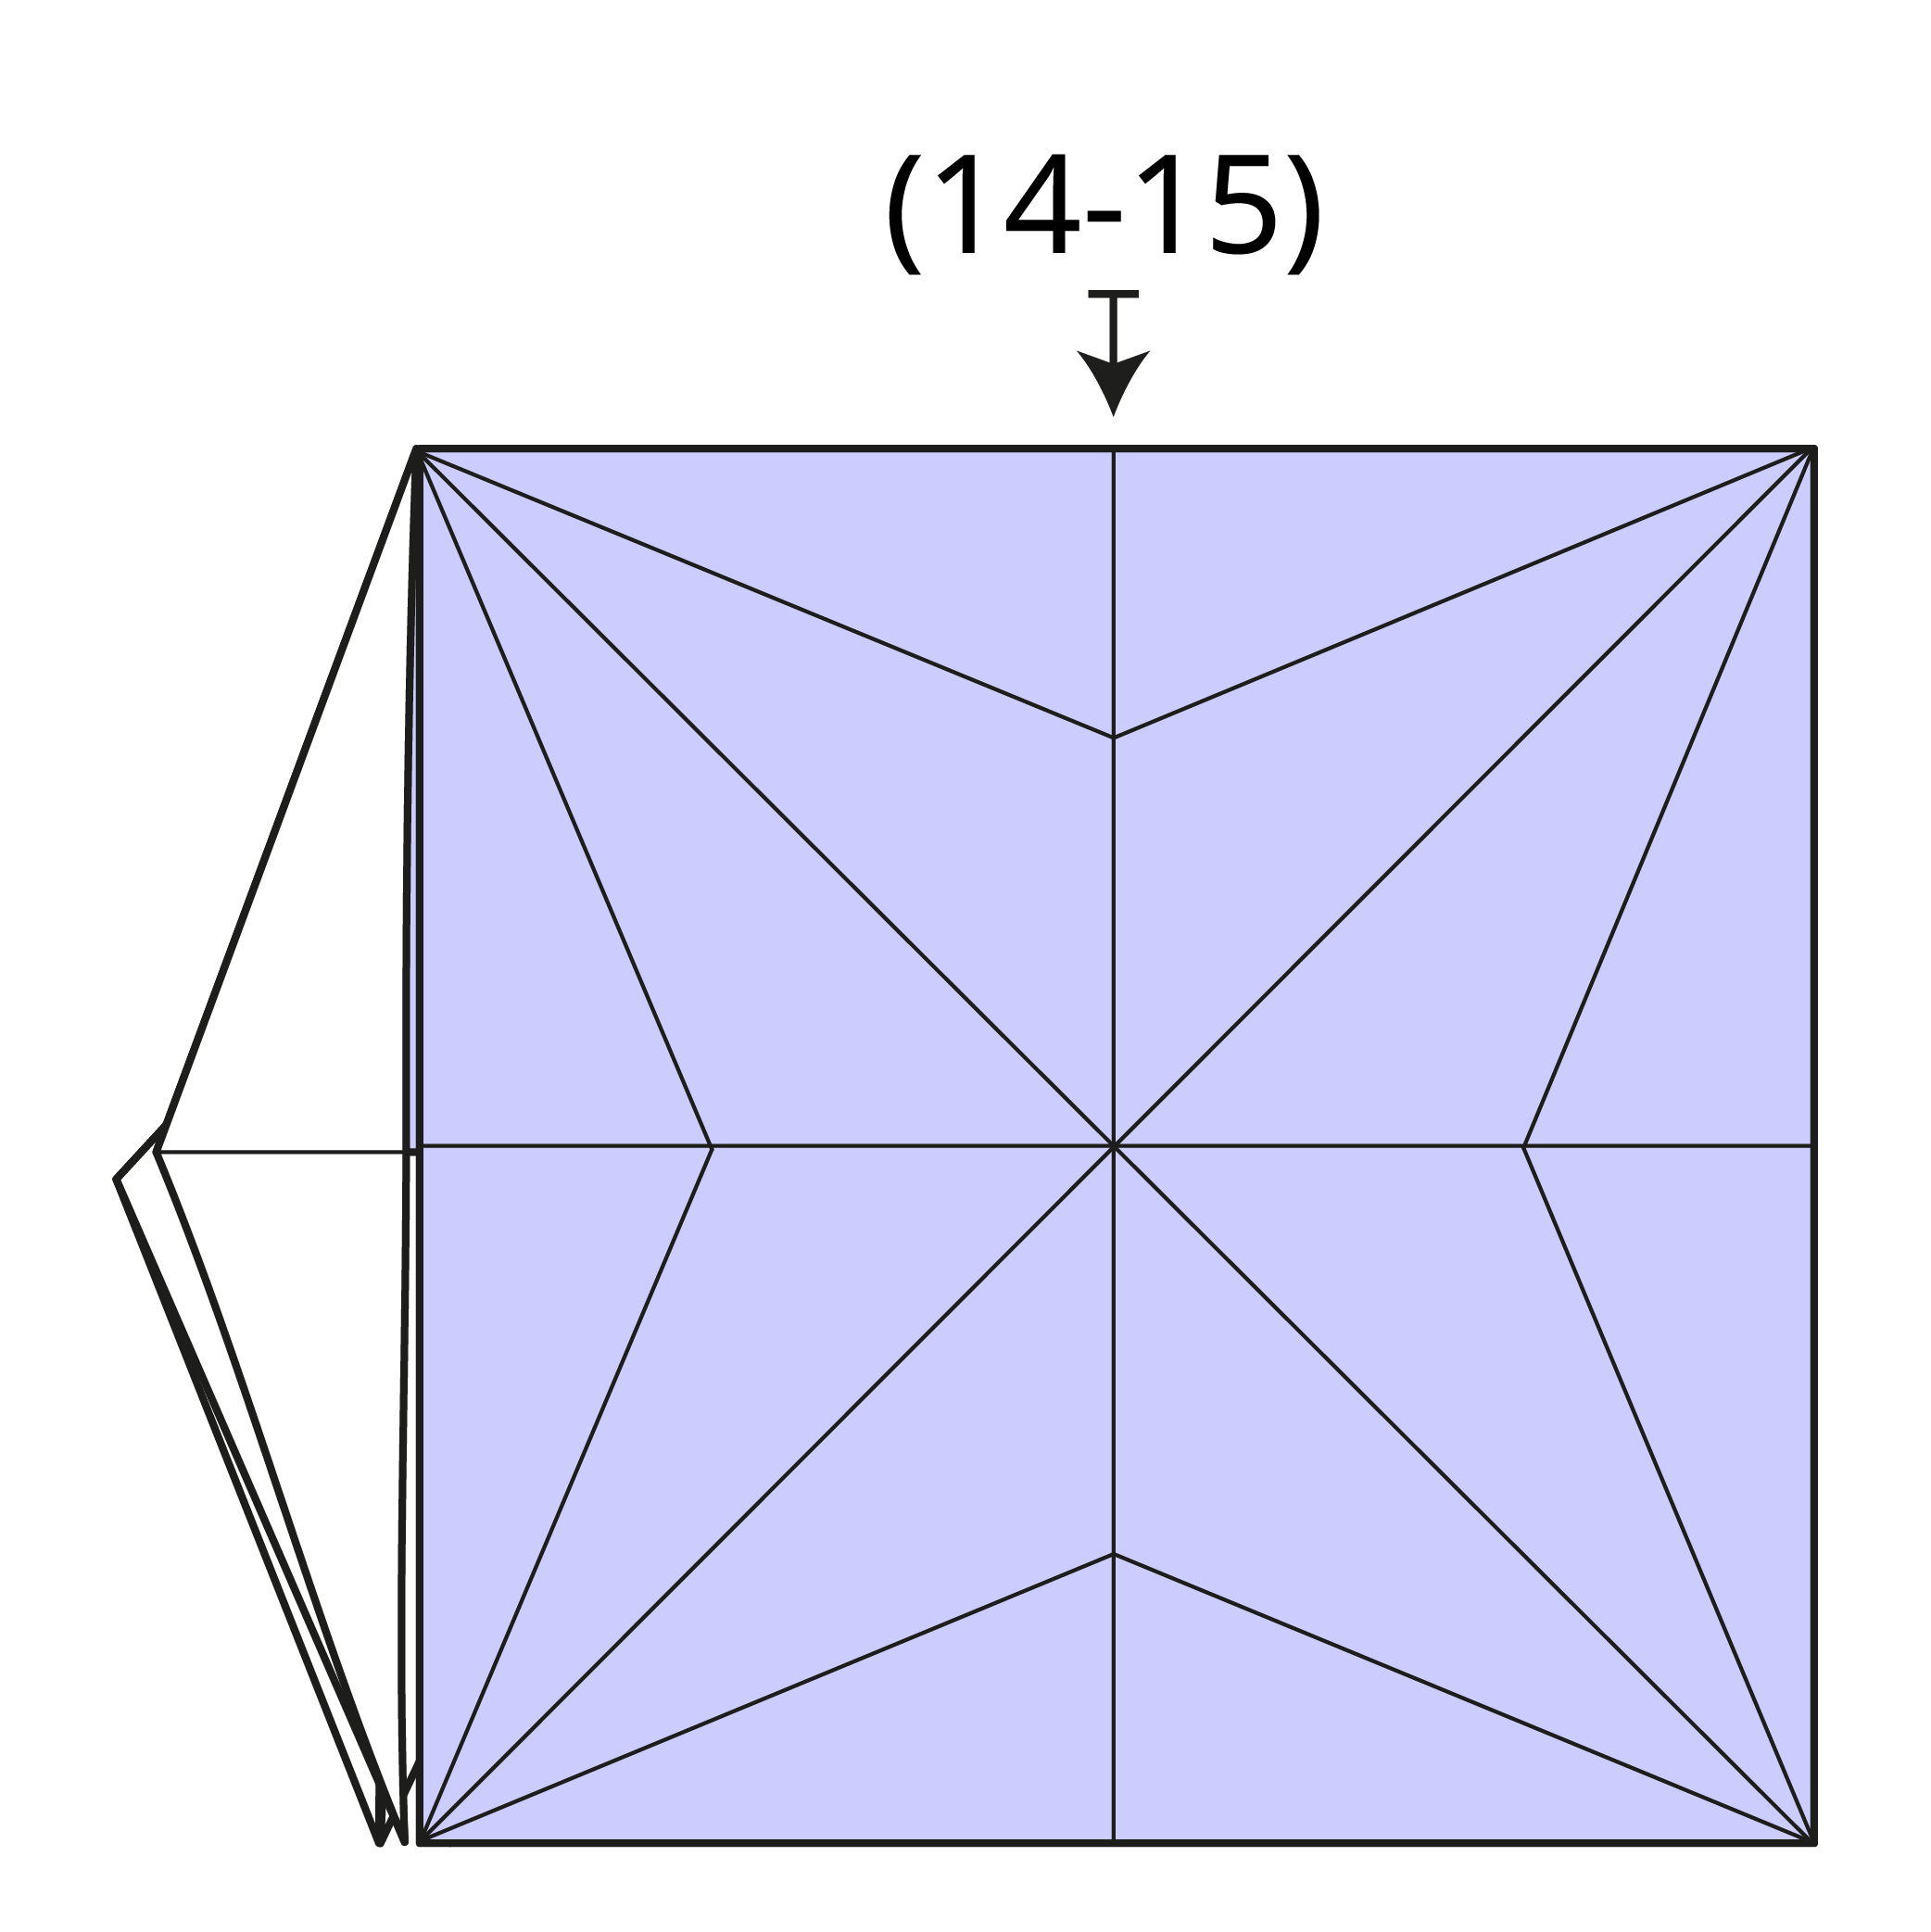
Repeat Steps 14 and 15 on this side.
Step 18
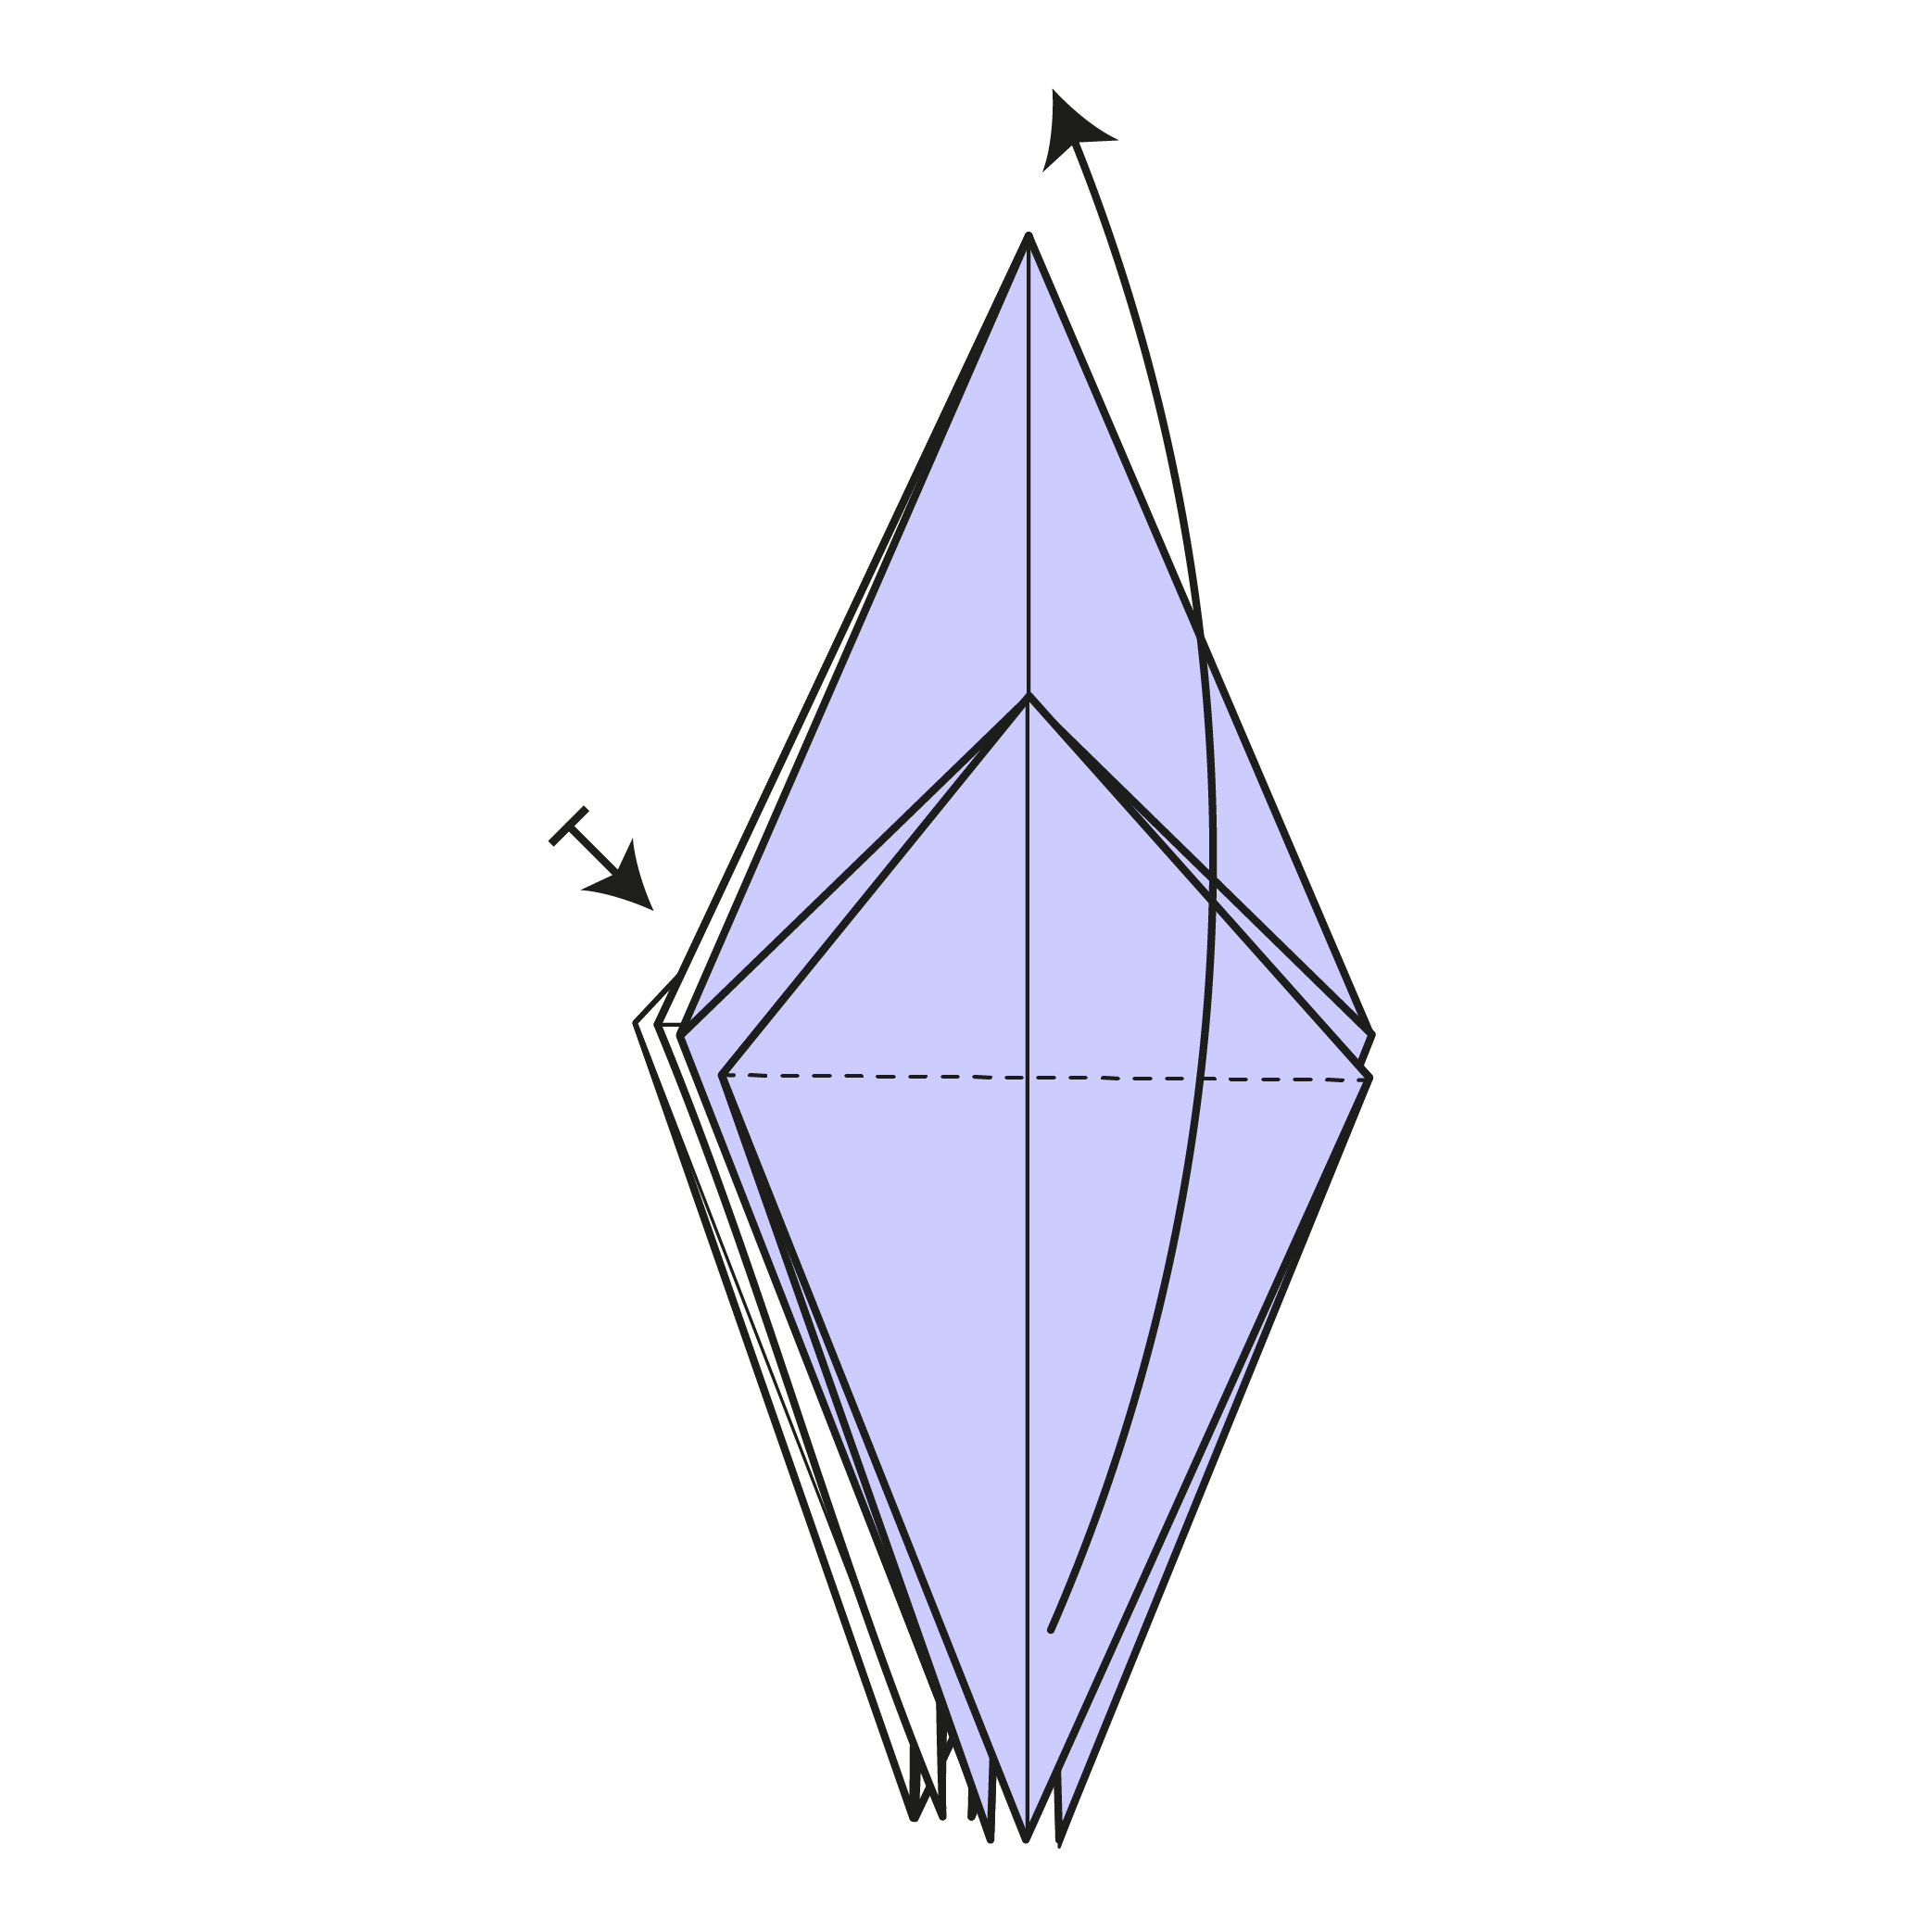
Fold the bottom corner to the top corner, top flap only. Repeat on the other side.
Step 19
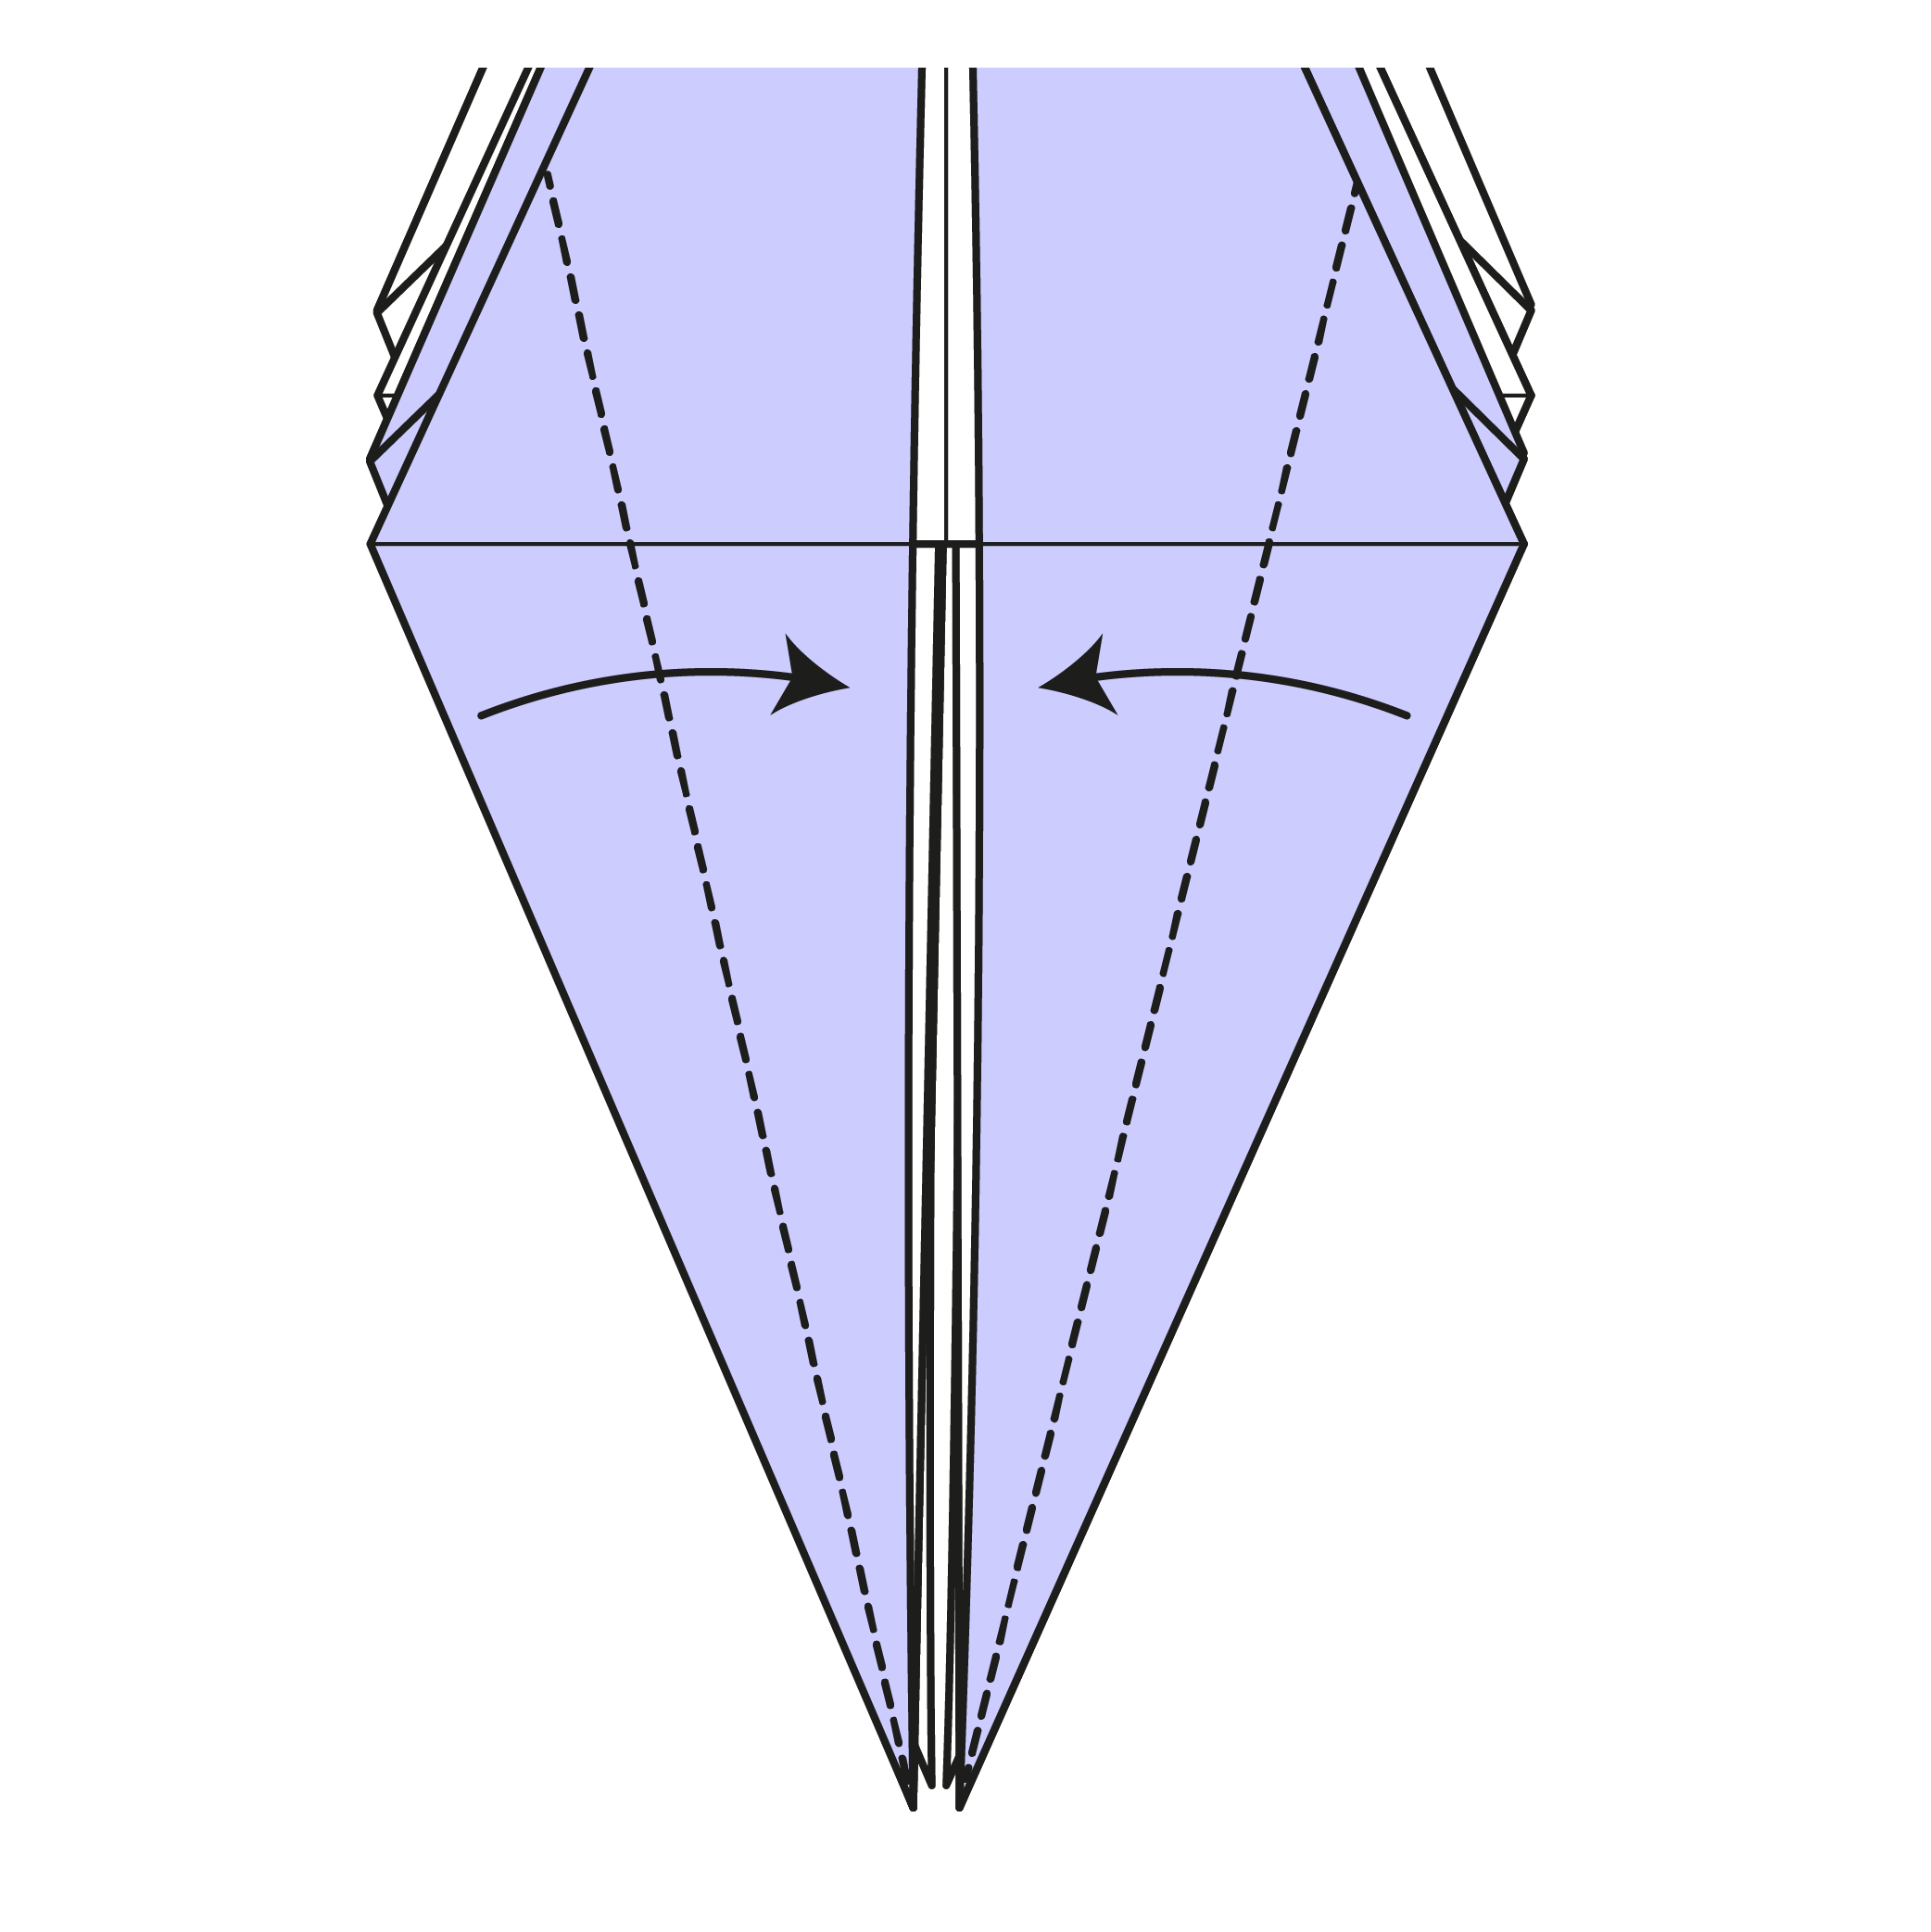
Fold the two bottom edges of the top flaps to the center line. Leave a small gap.
Step 20
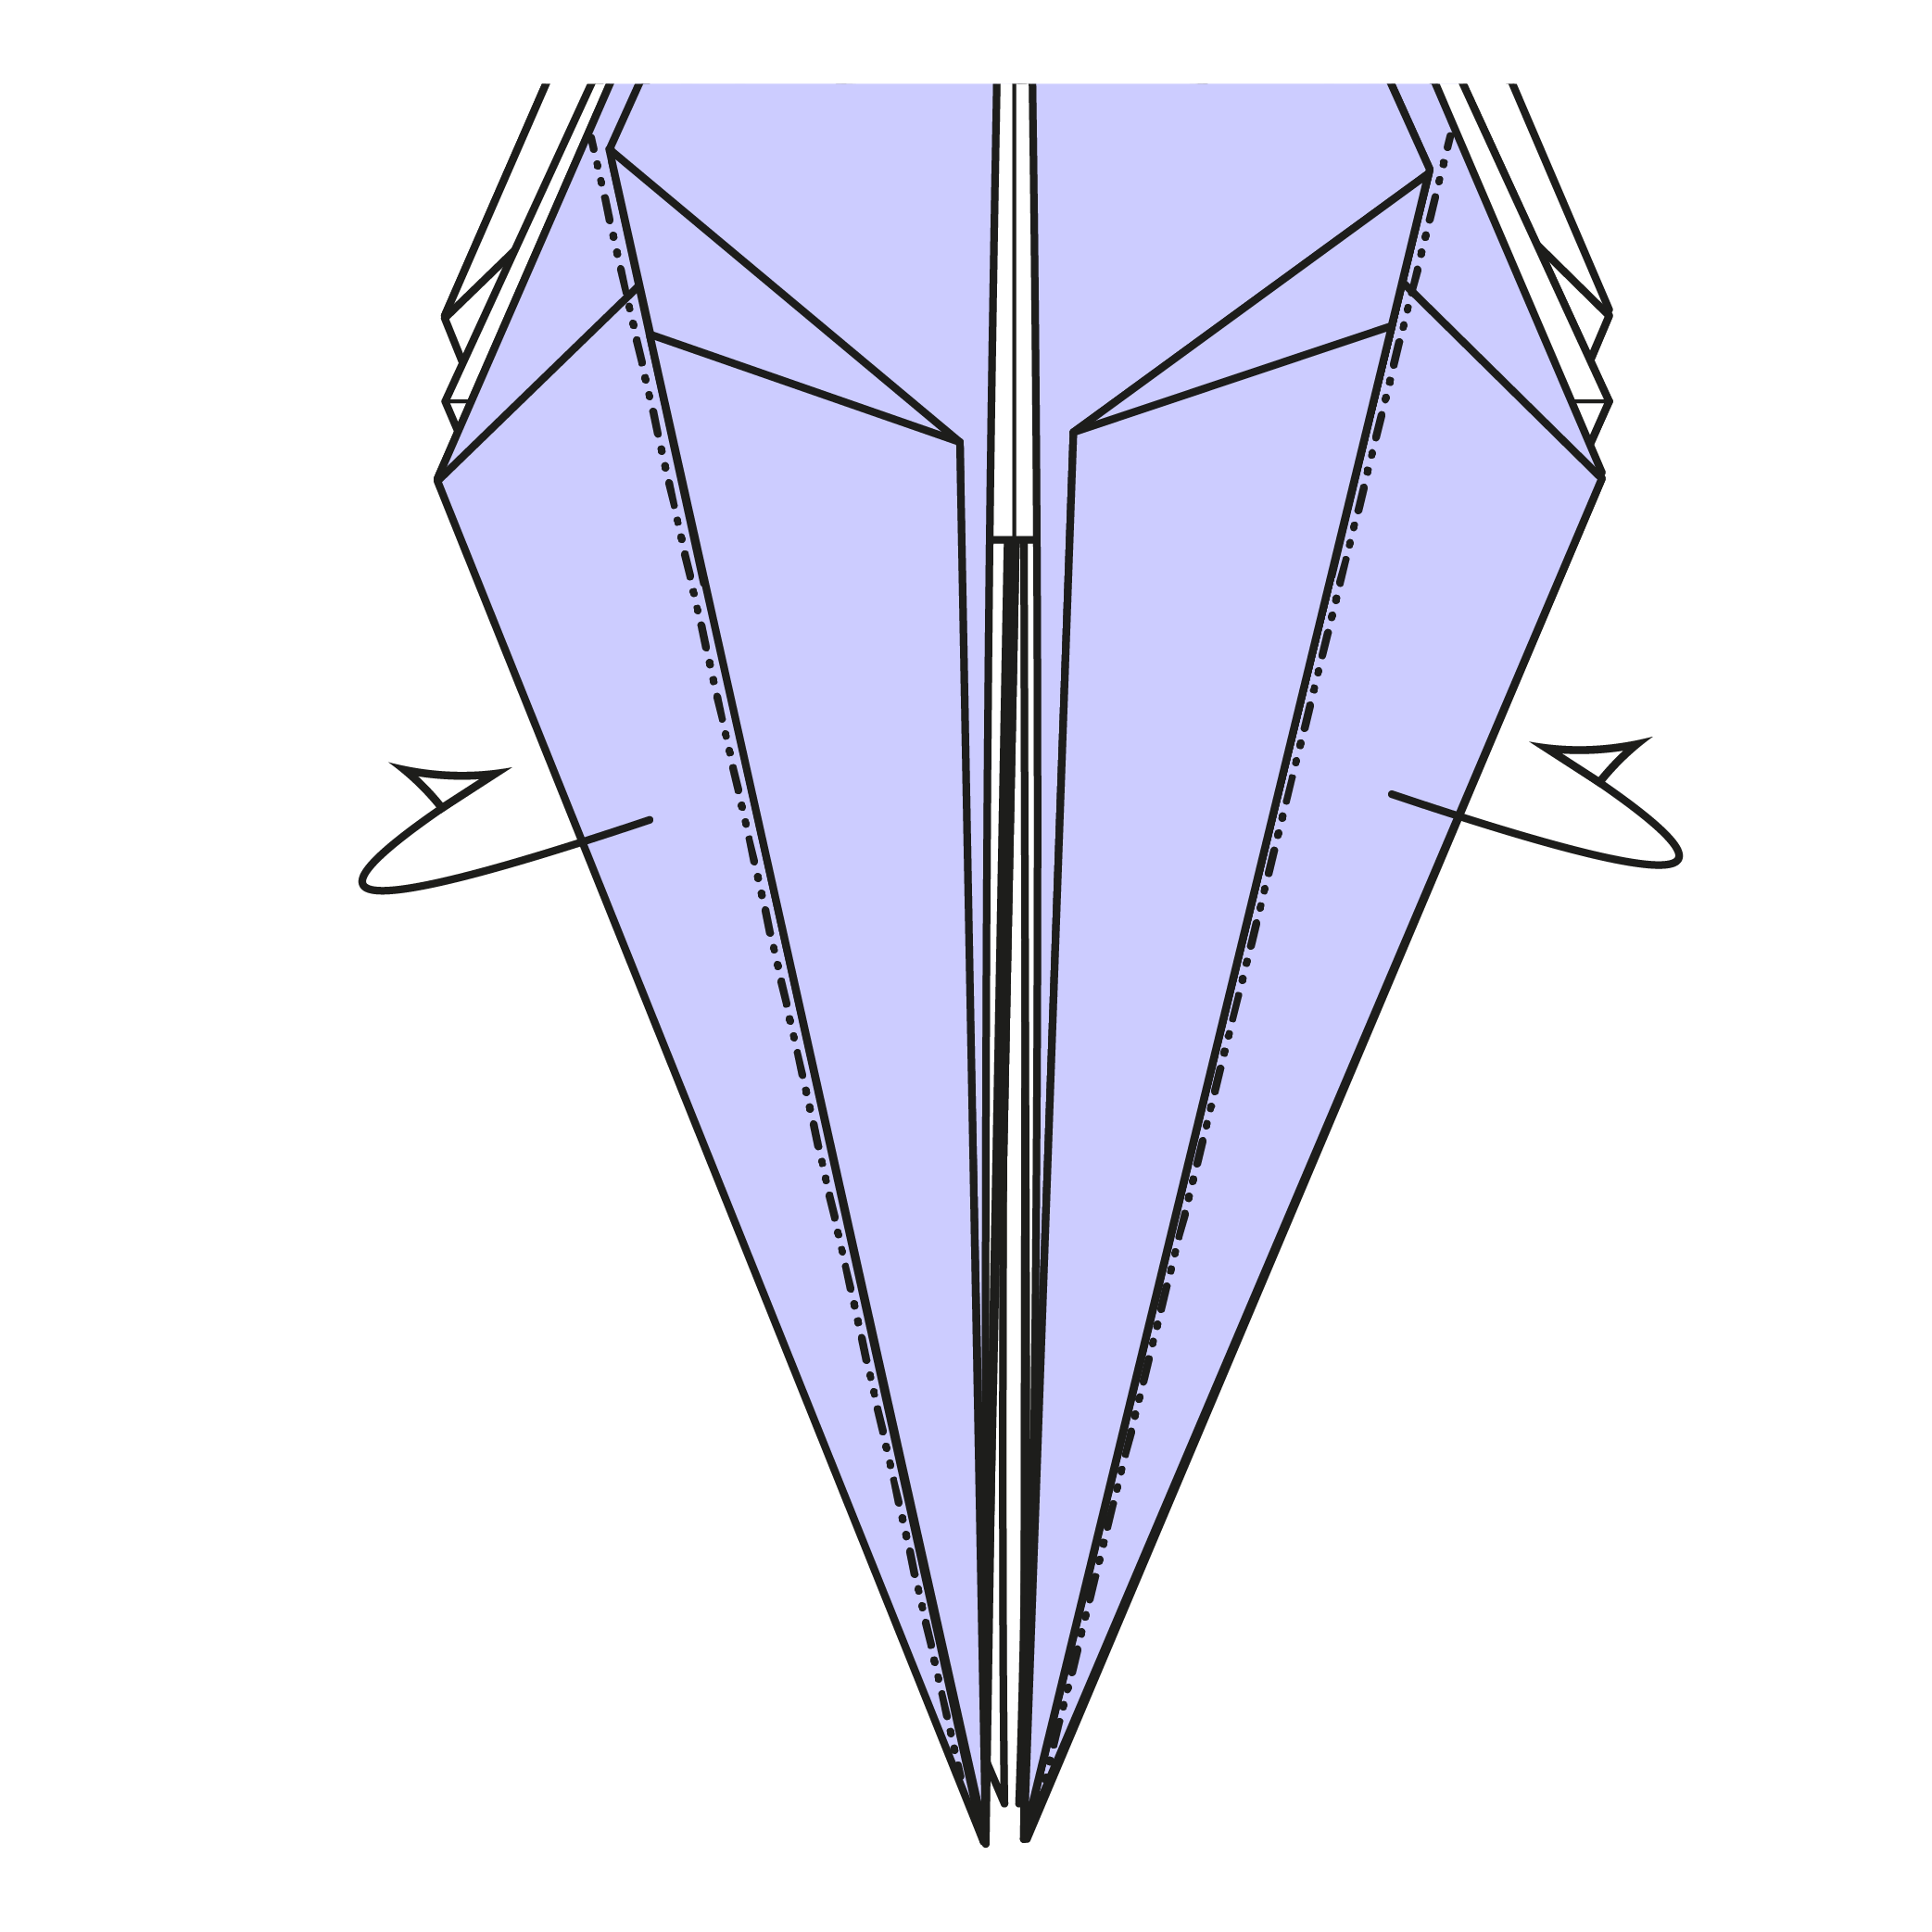
Mountain fold the edges of the next flaps in the same way as Step 19. You can also open the flaps and use valley folds instead.
Step 21
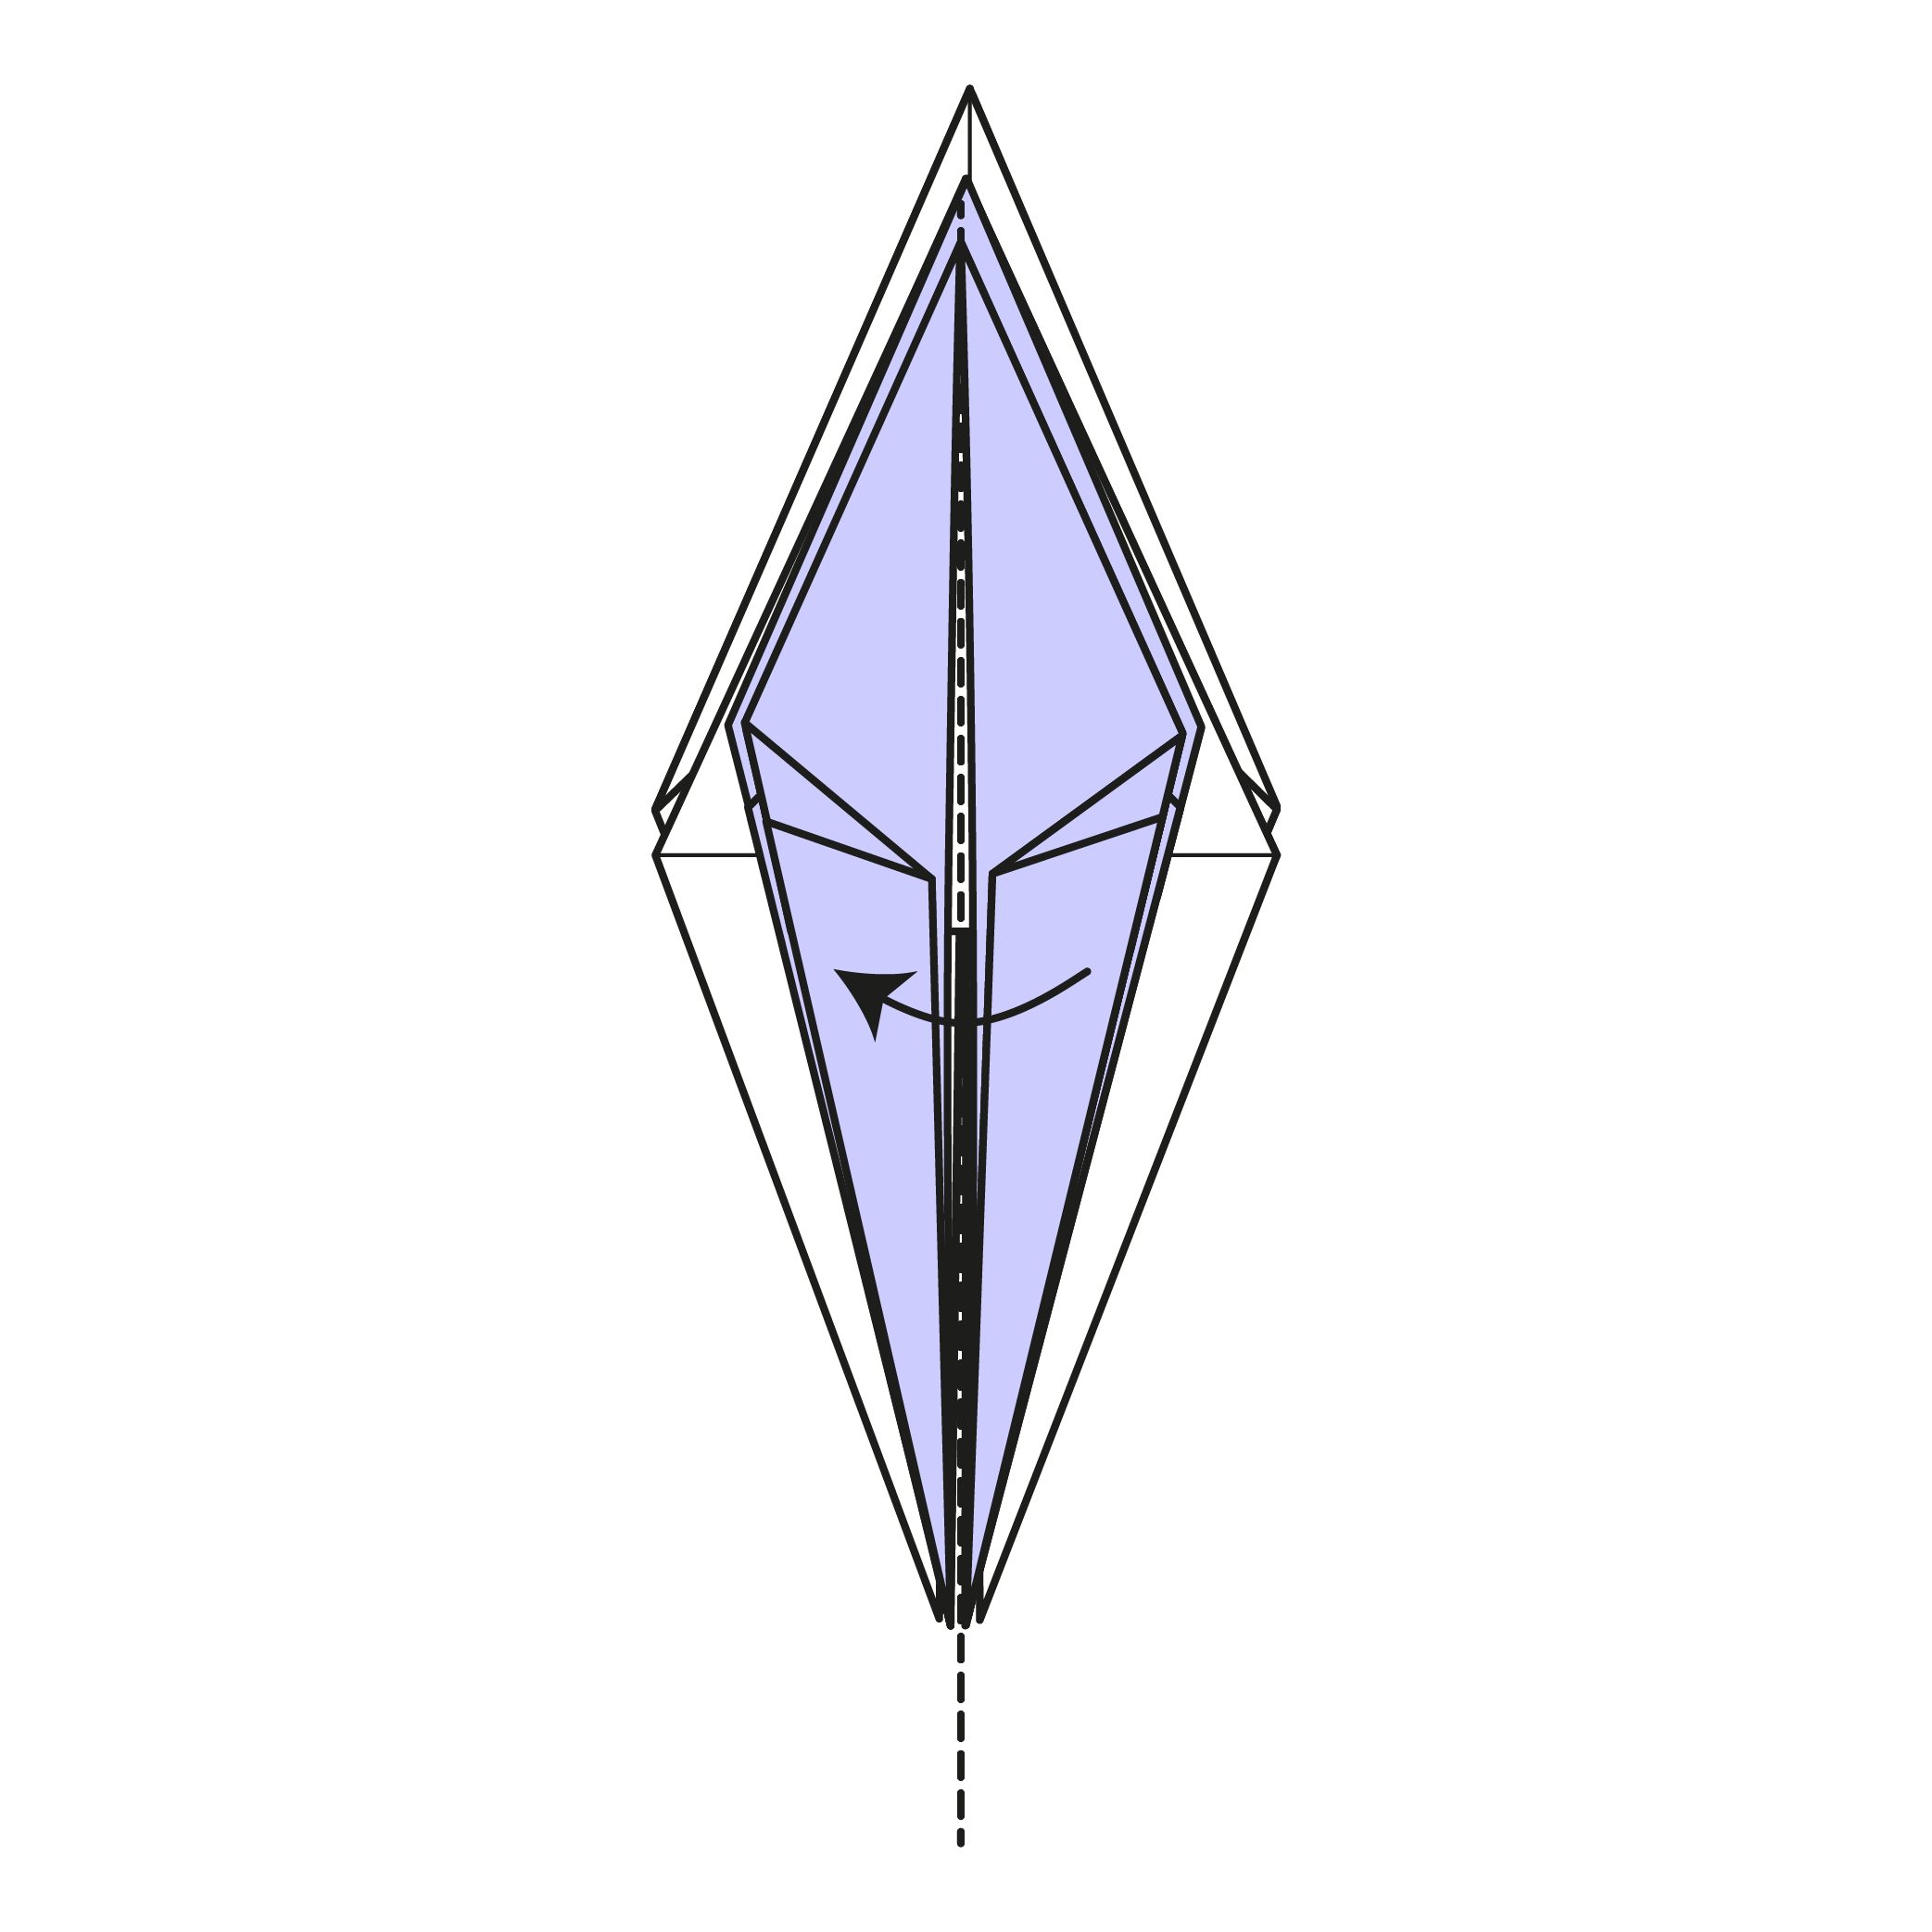
Flip the top right flap to the left.
Step 22
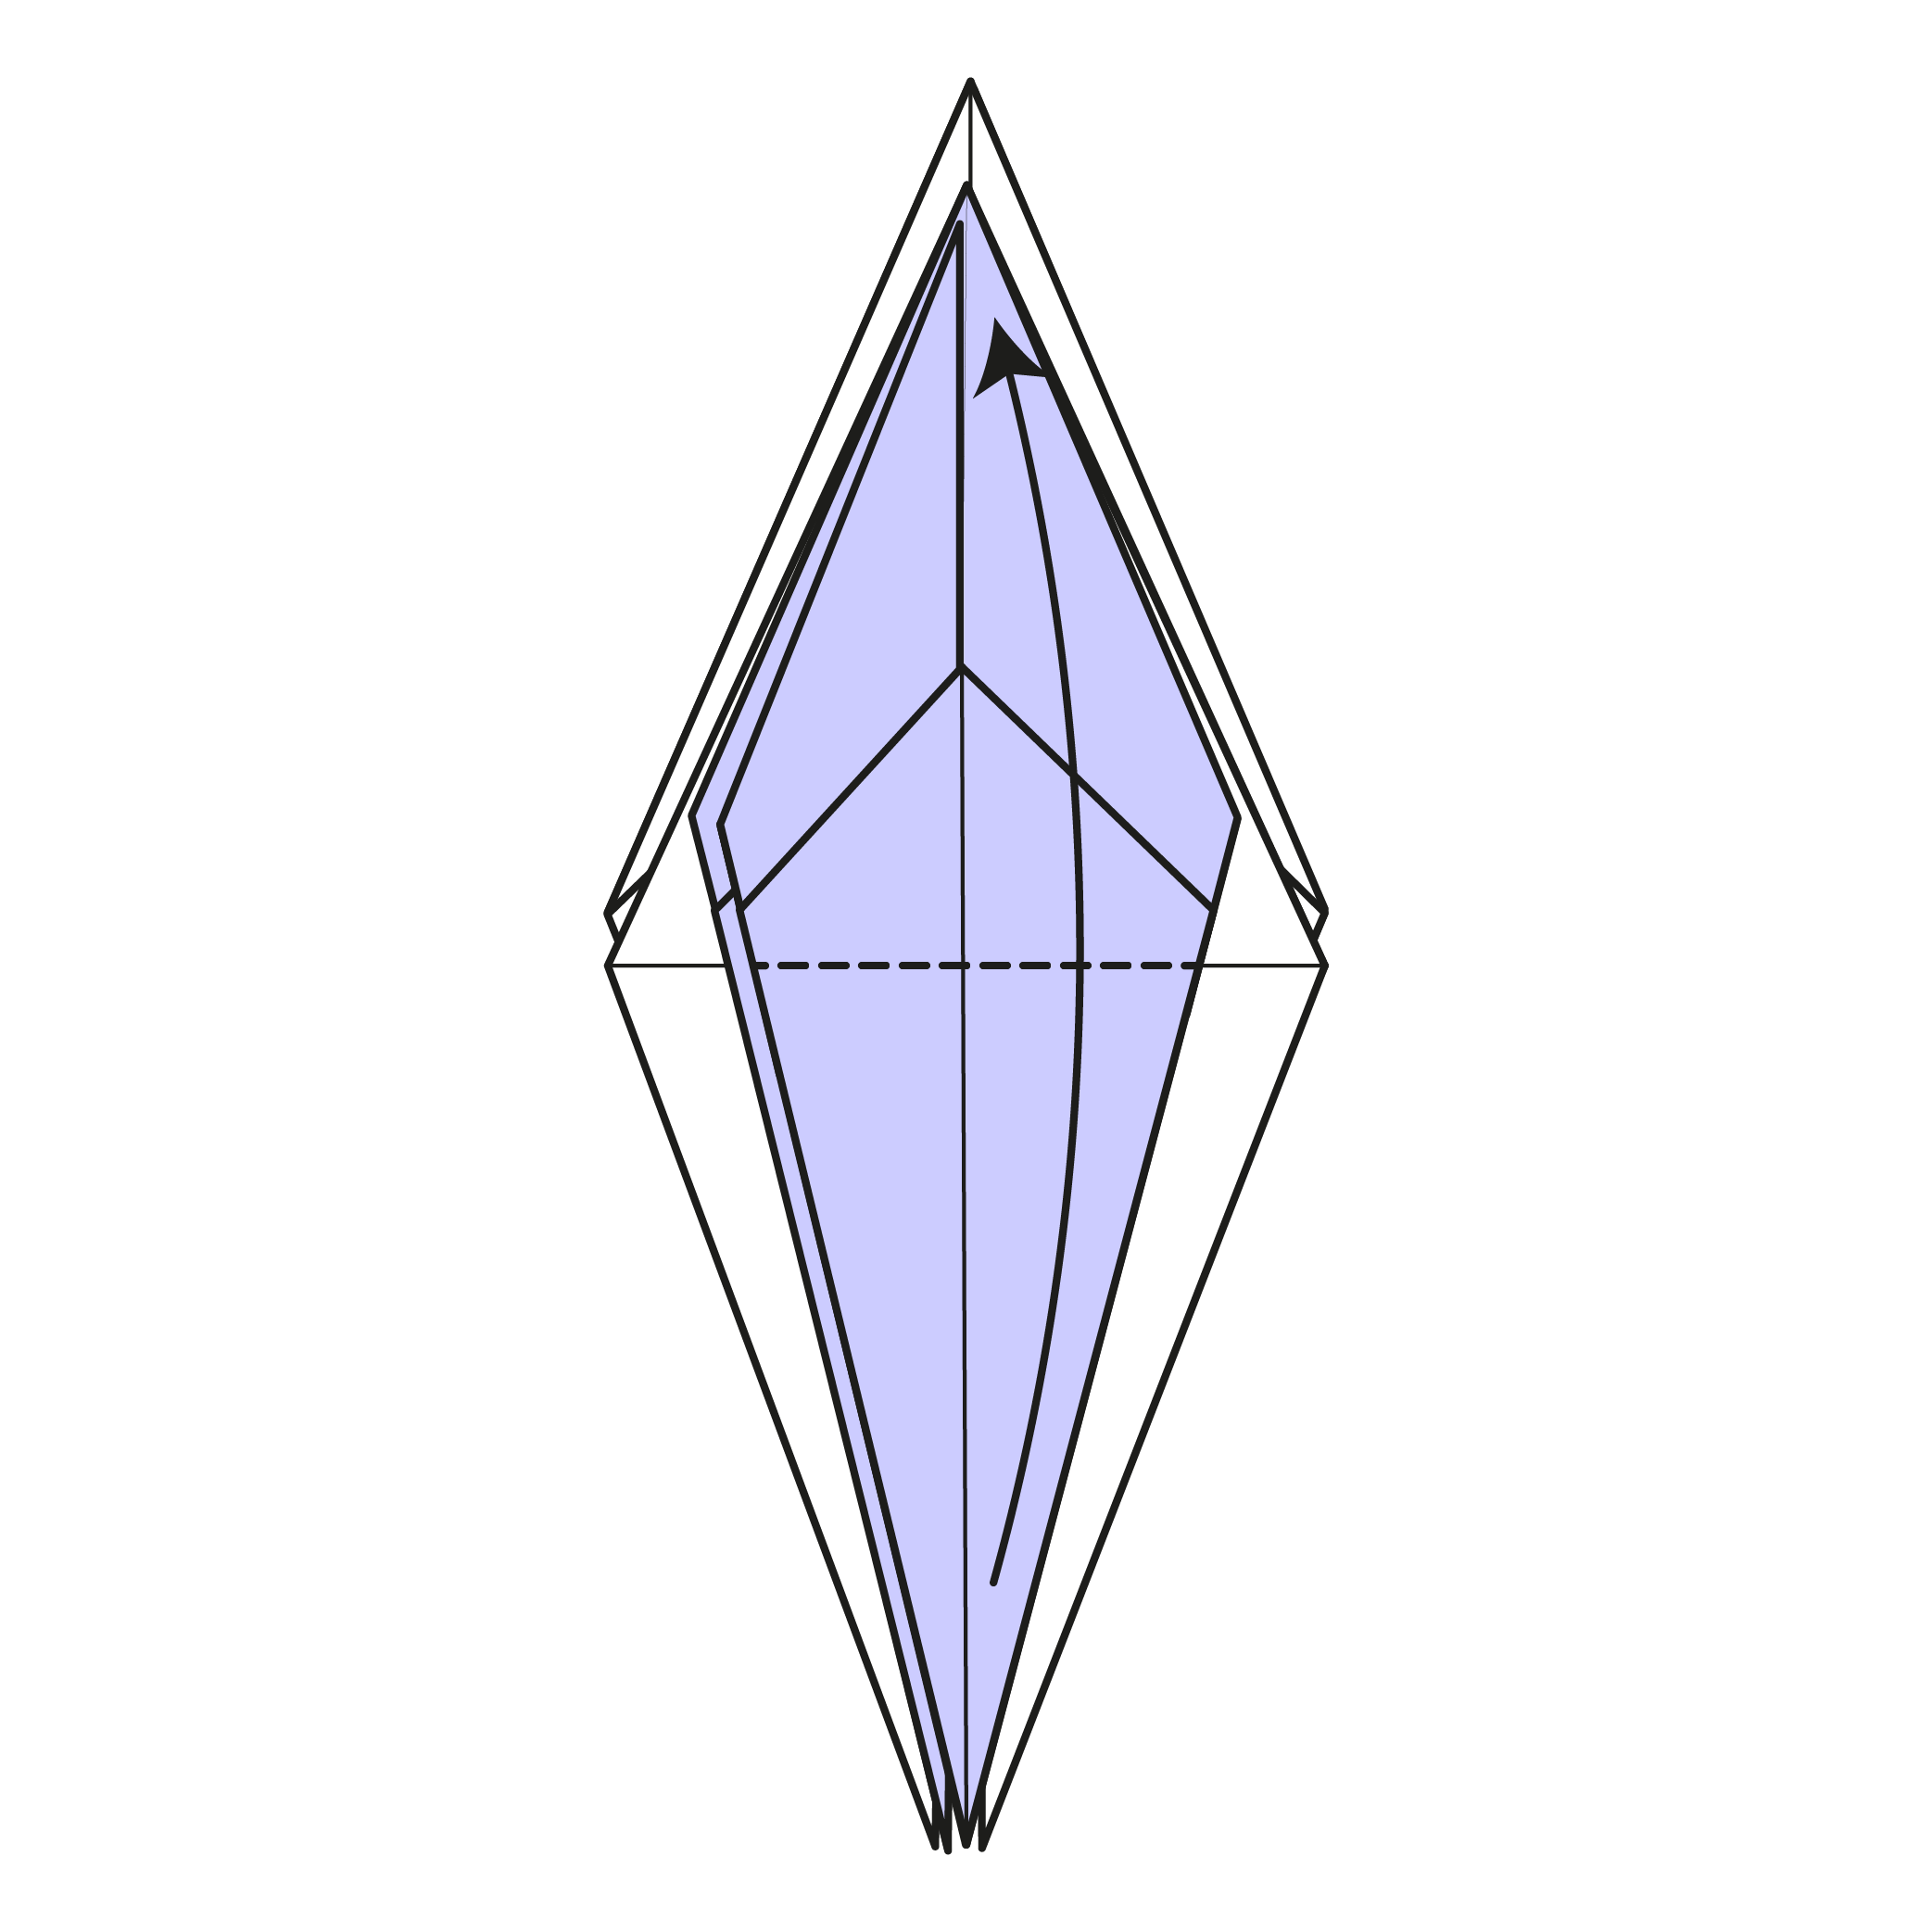
Fold the bottom corner to the top corner, top flap only.
Step 23
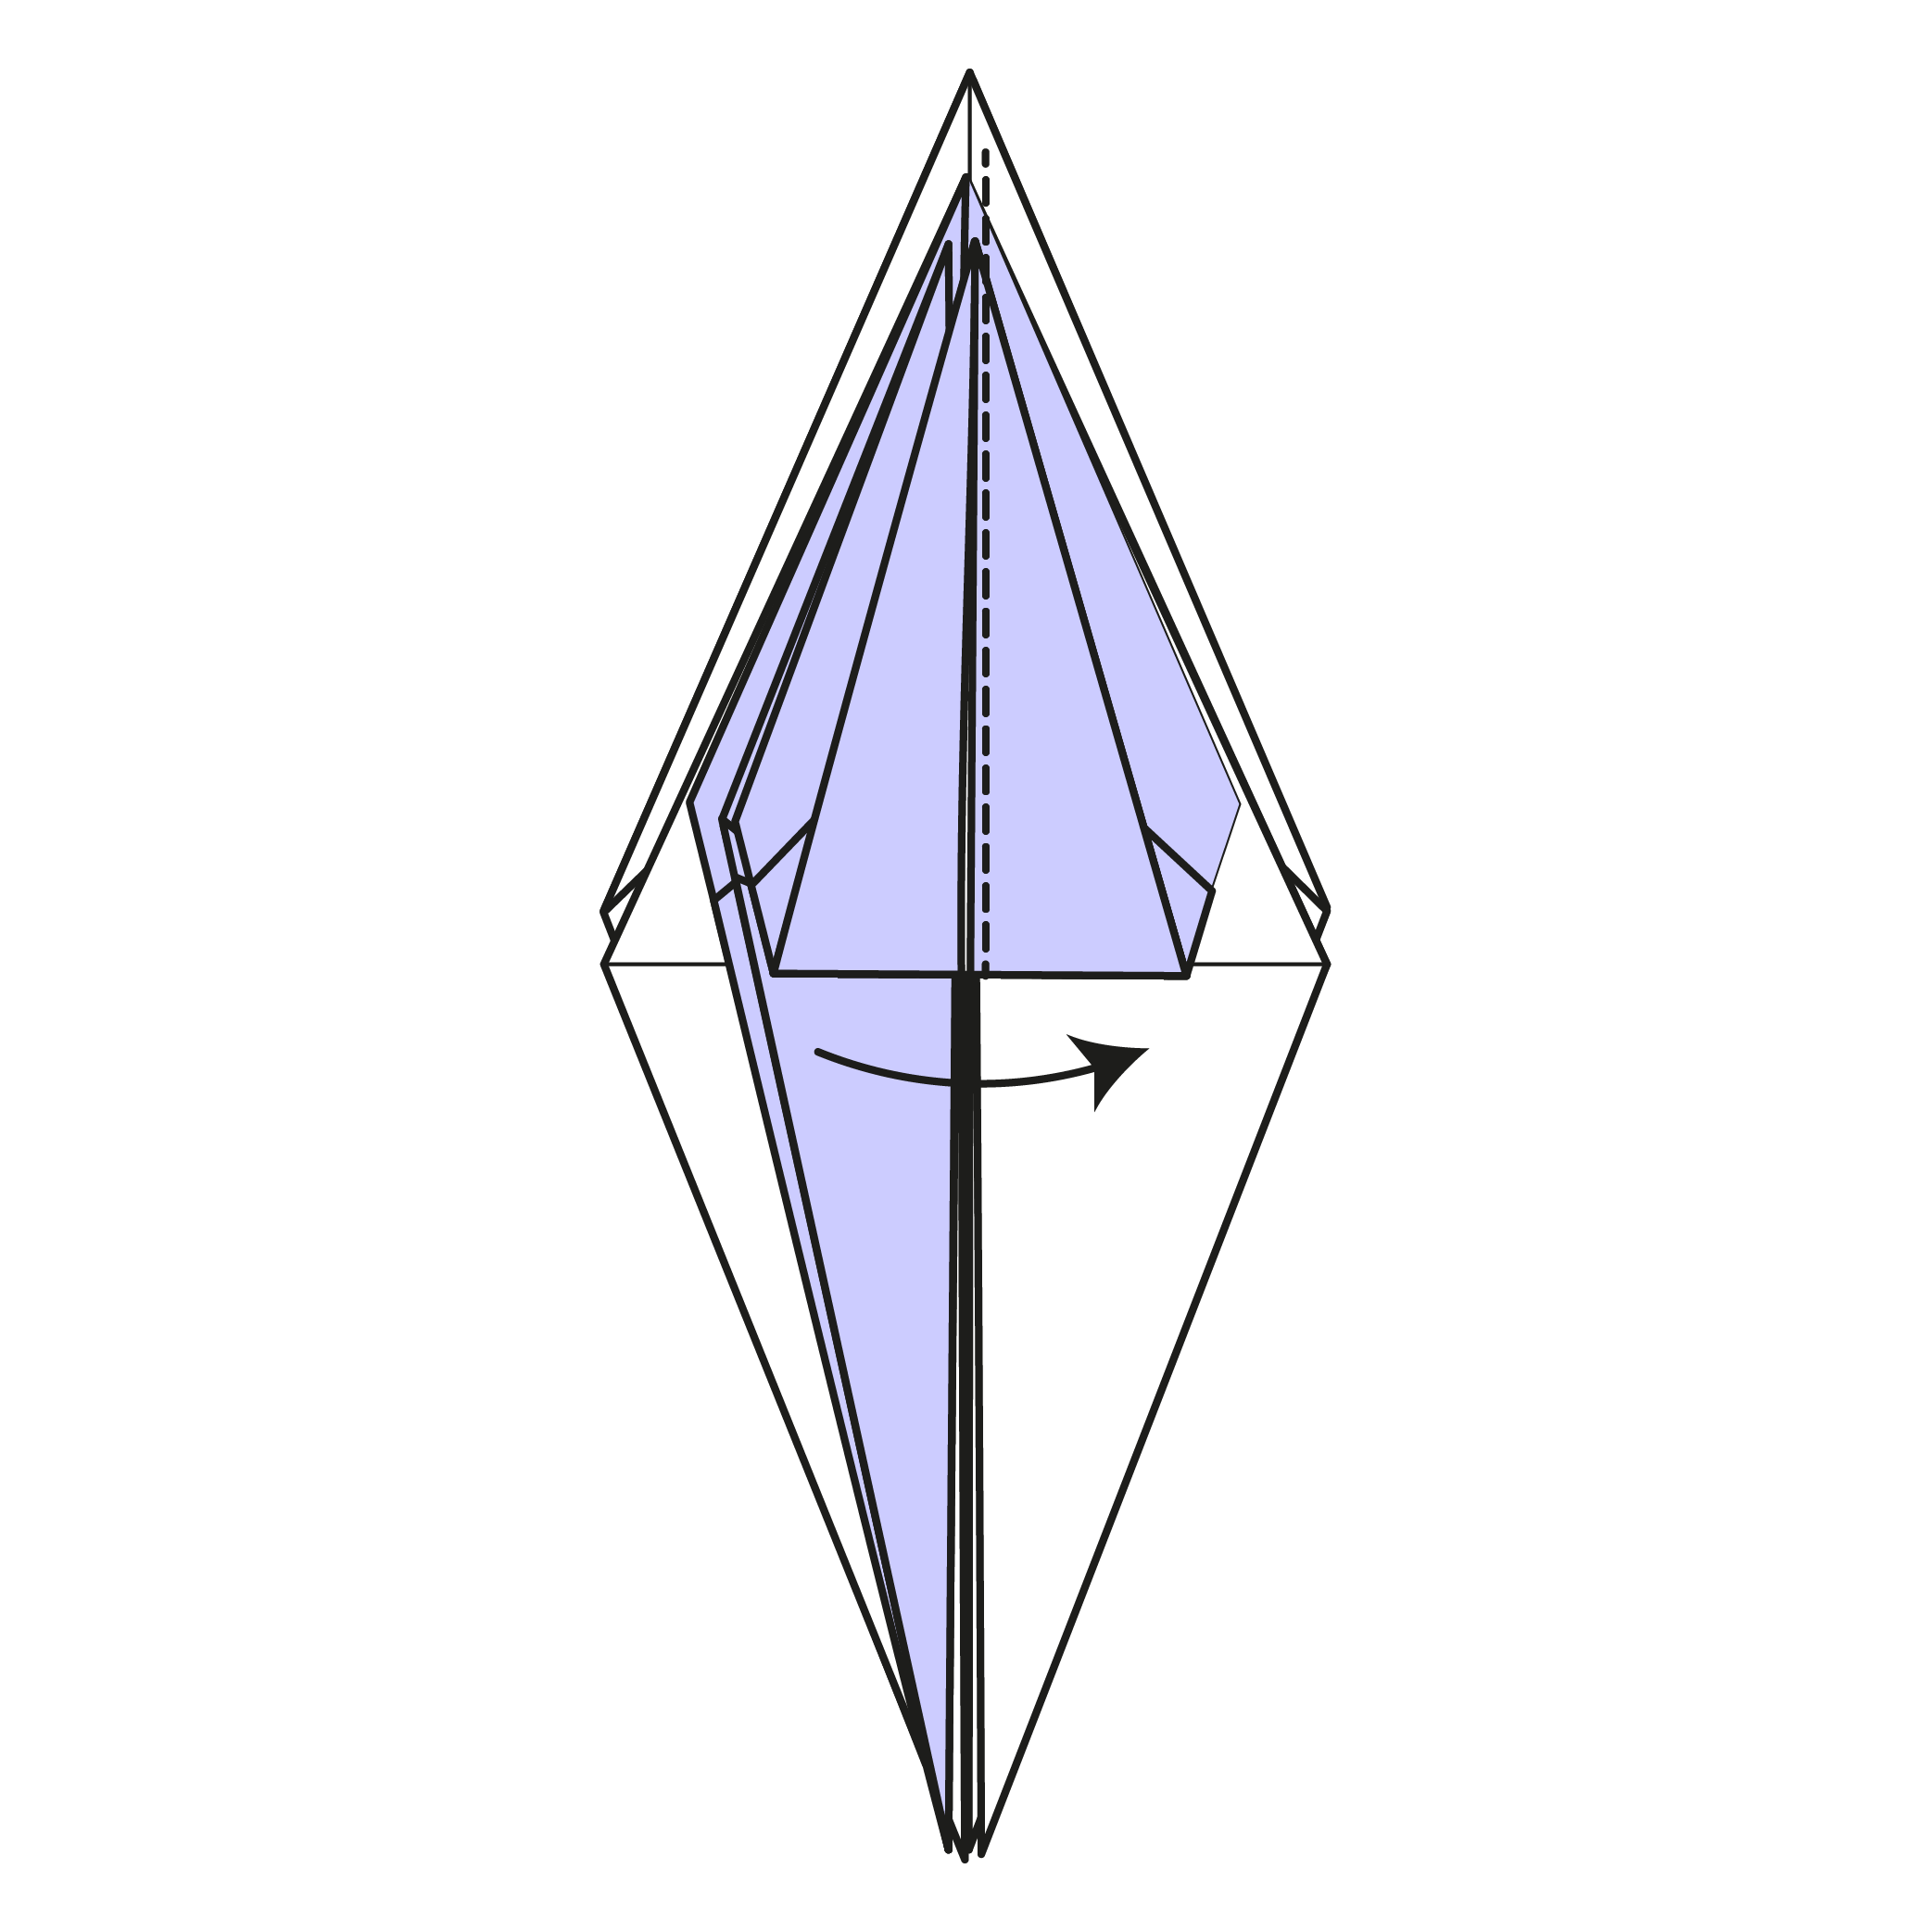
Flip the flap from Step 21 back, from left to right.
Step 24
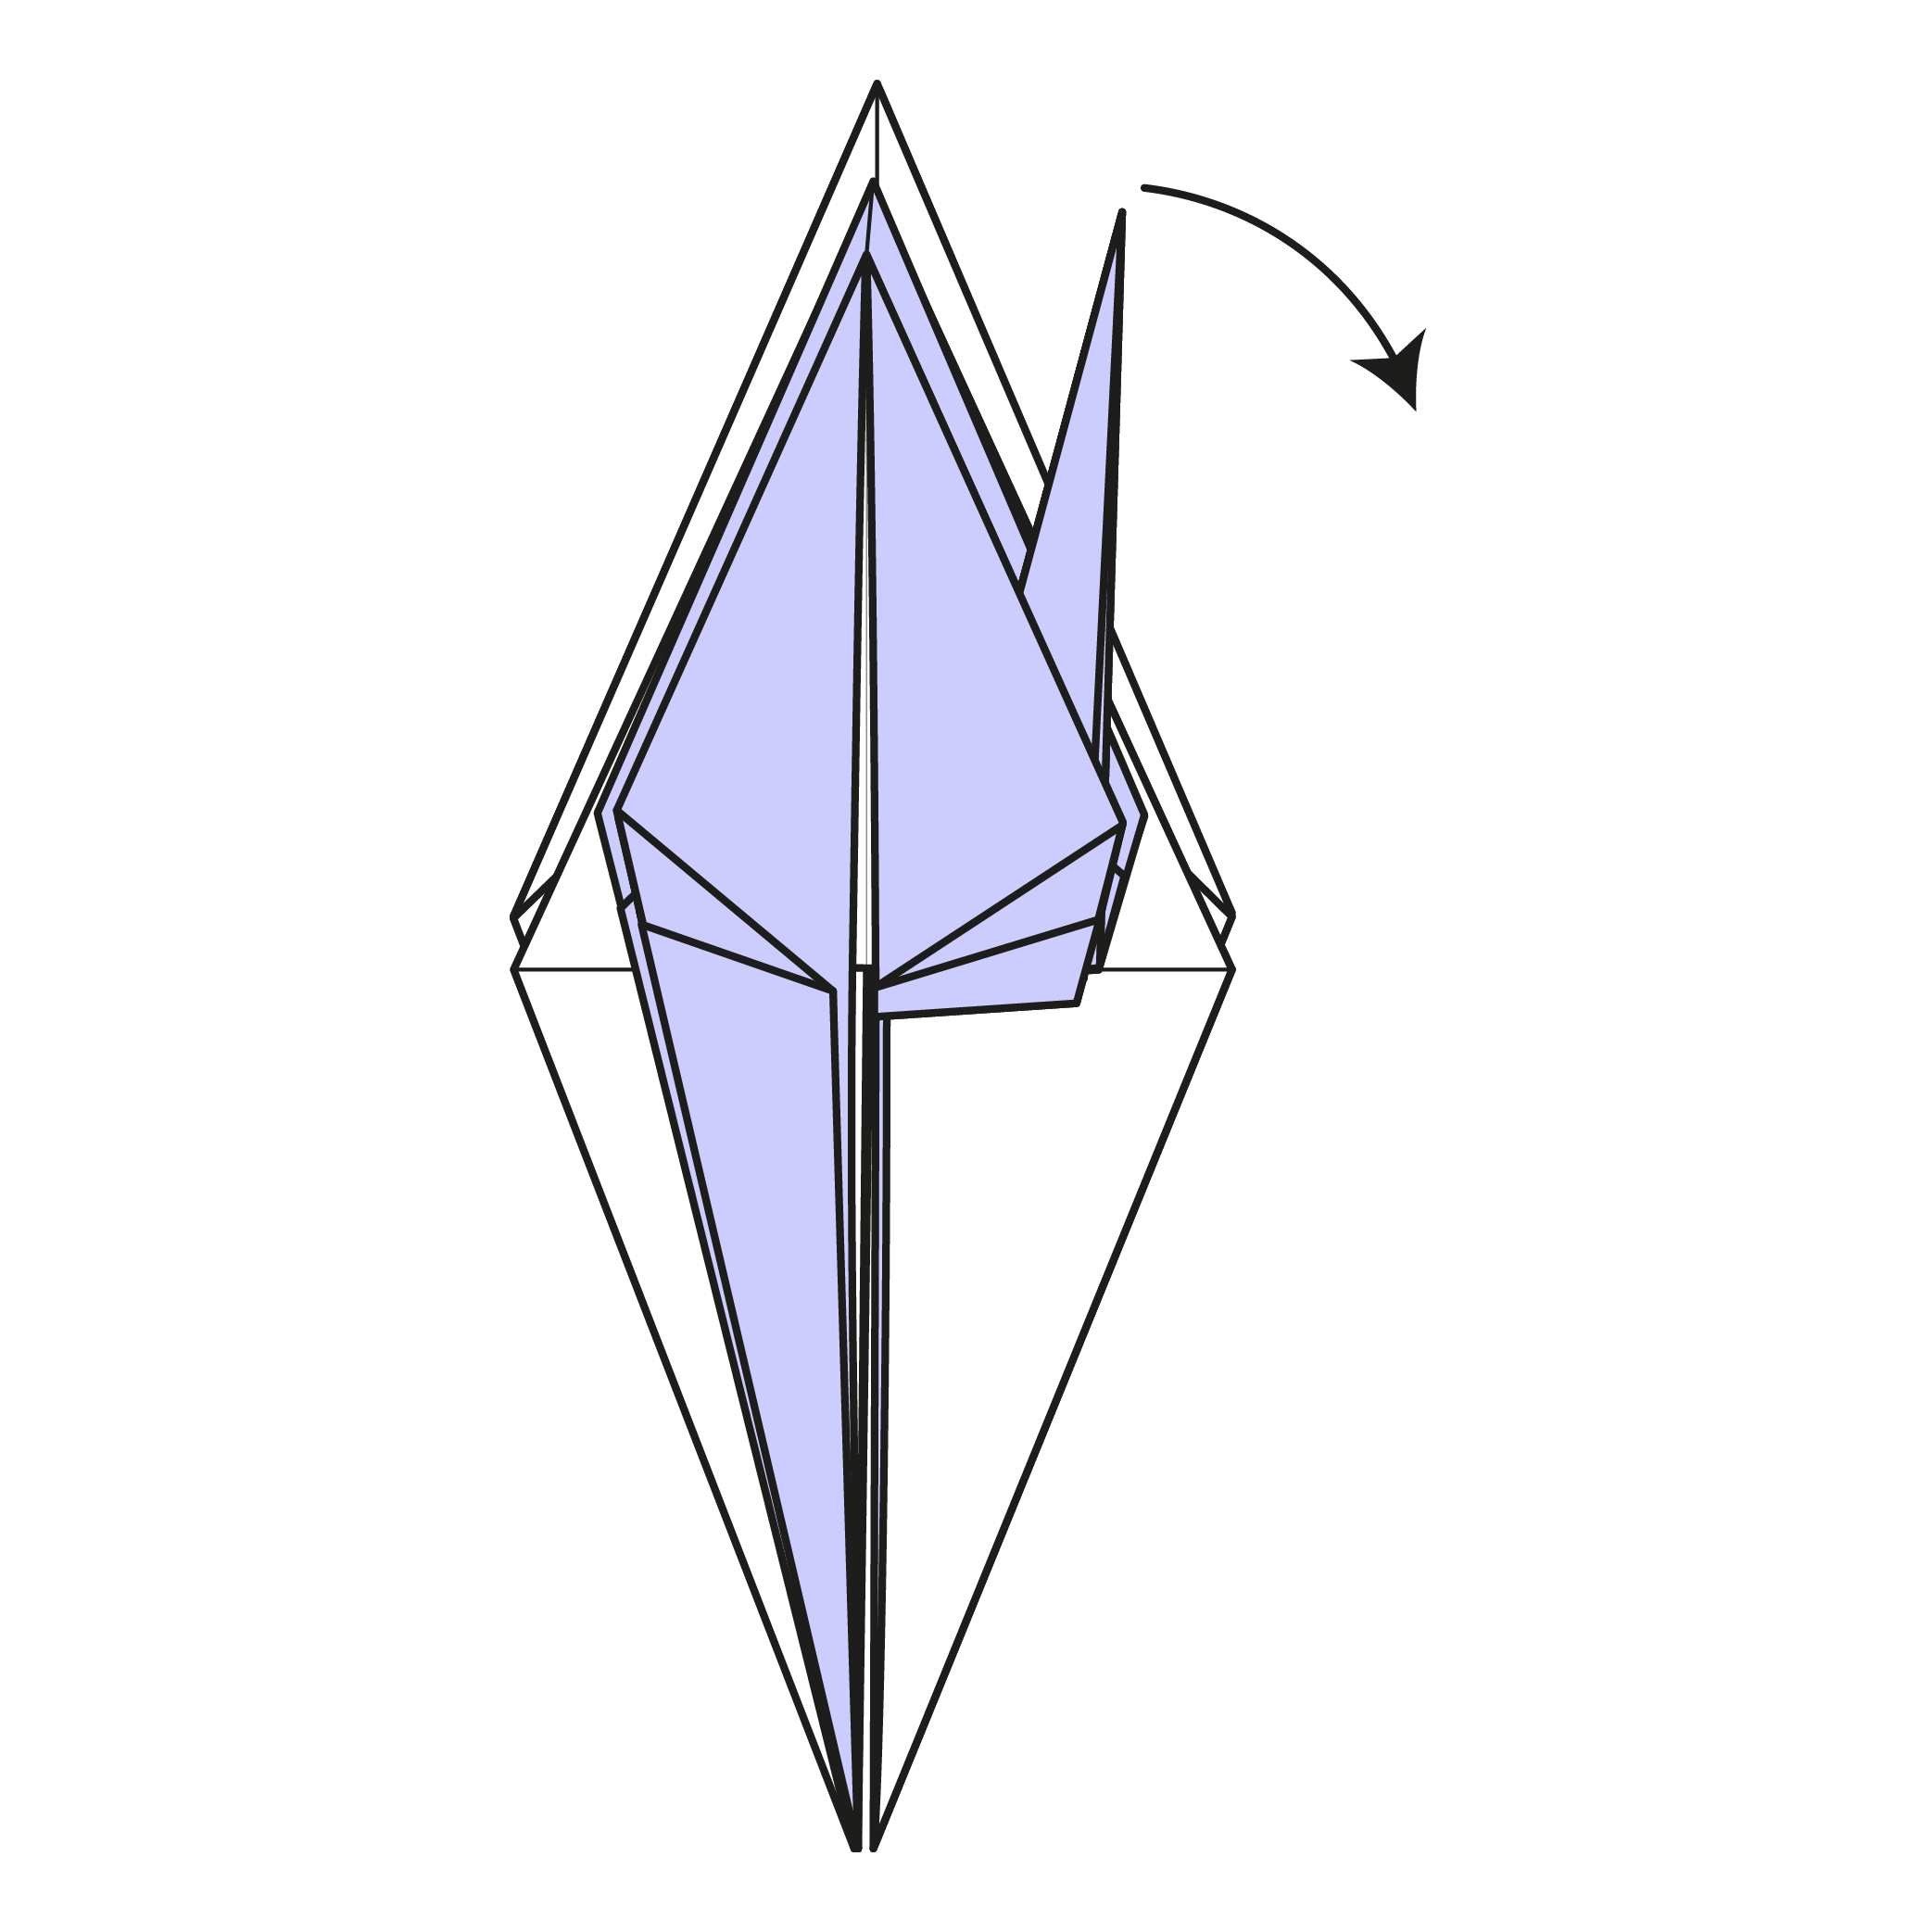
Pull the tip down to the right using a swivel fold. Adjust the angle to your liking.
Step 25
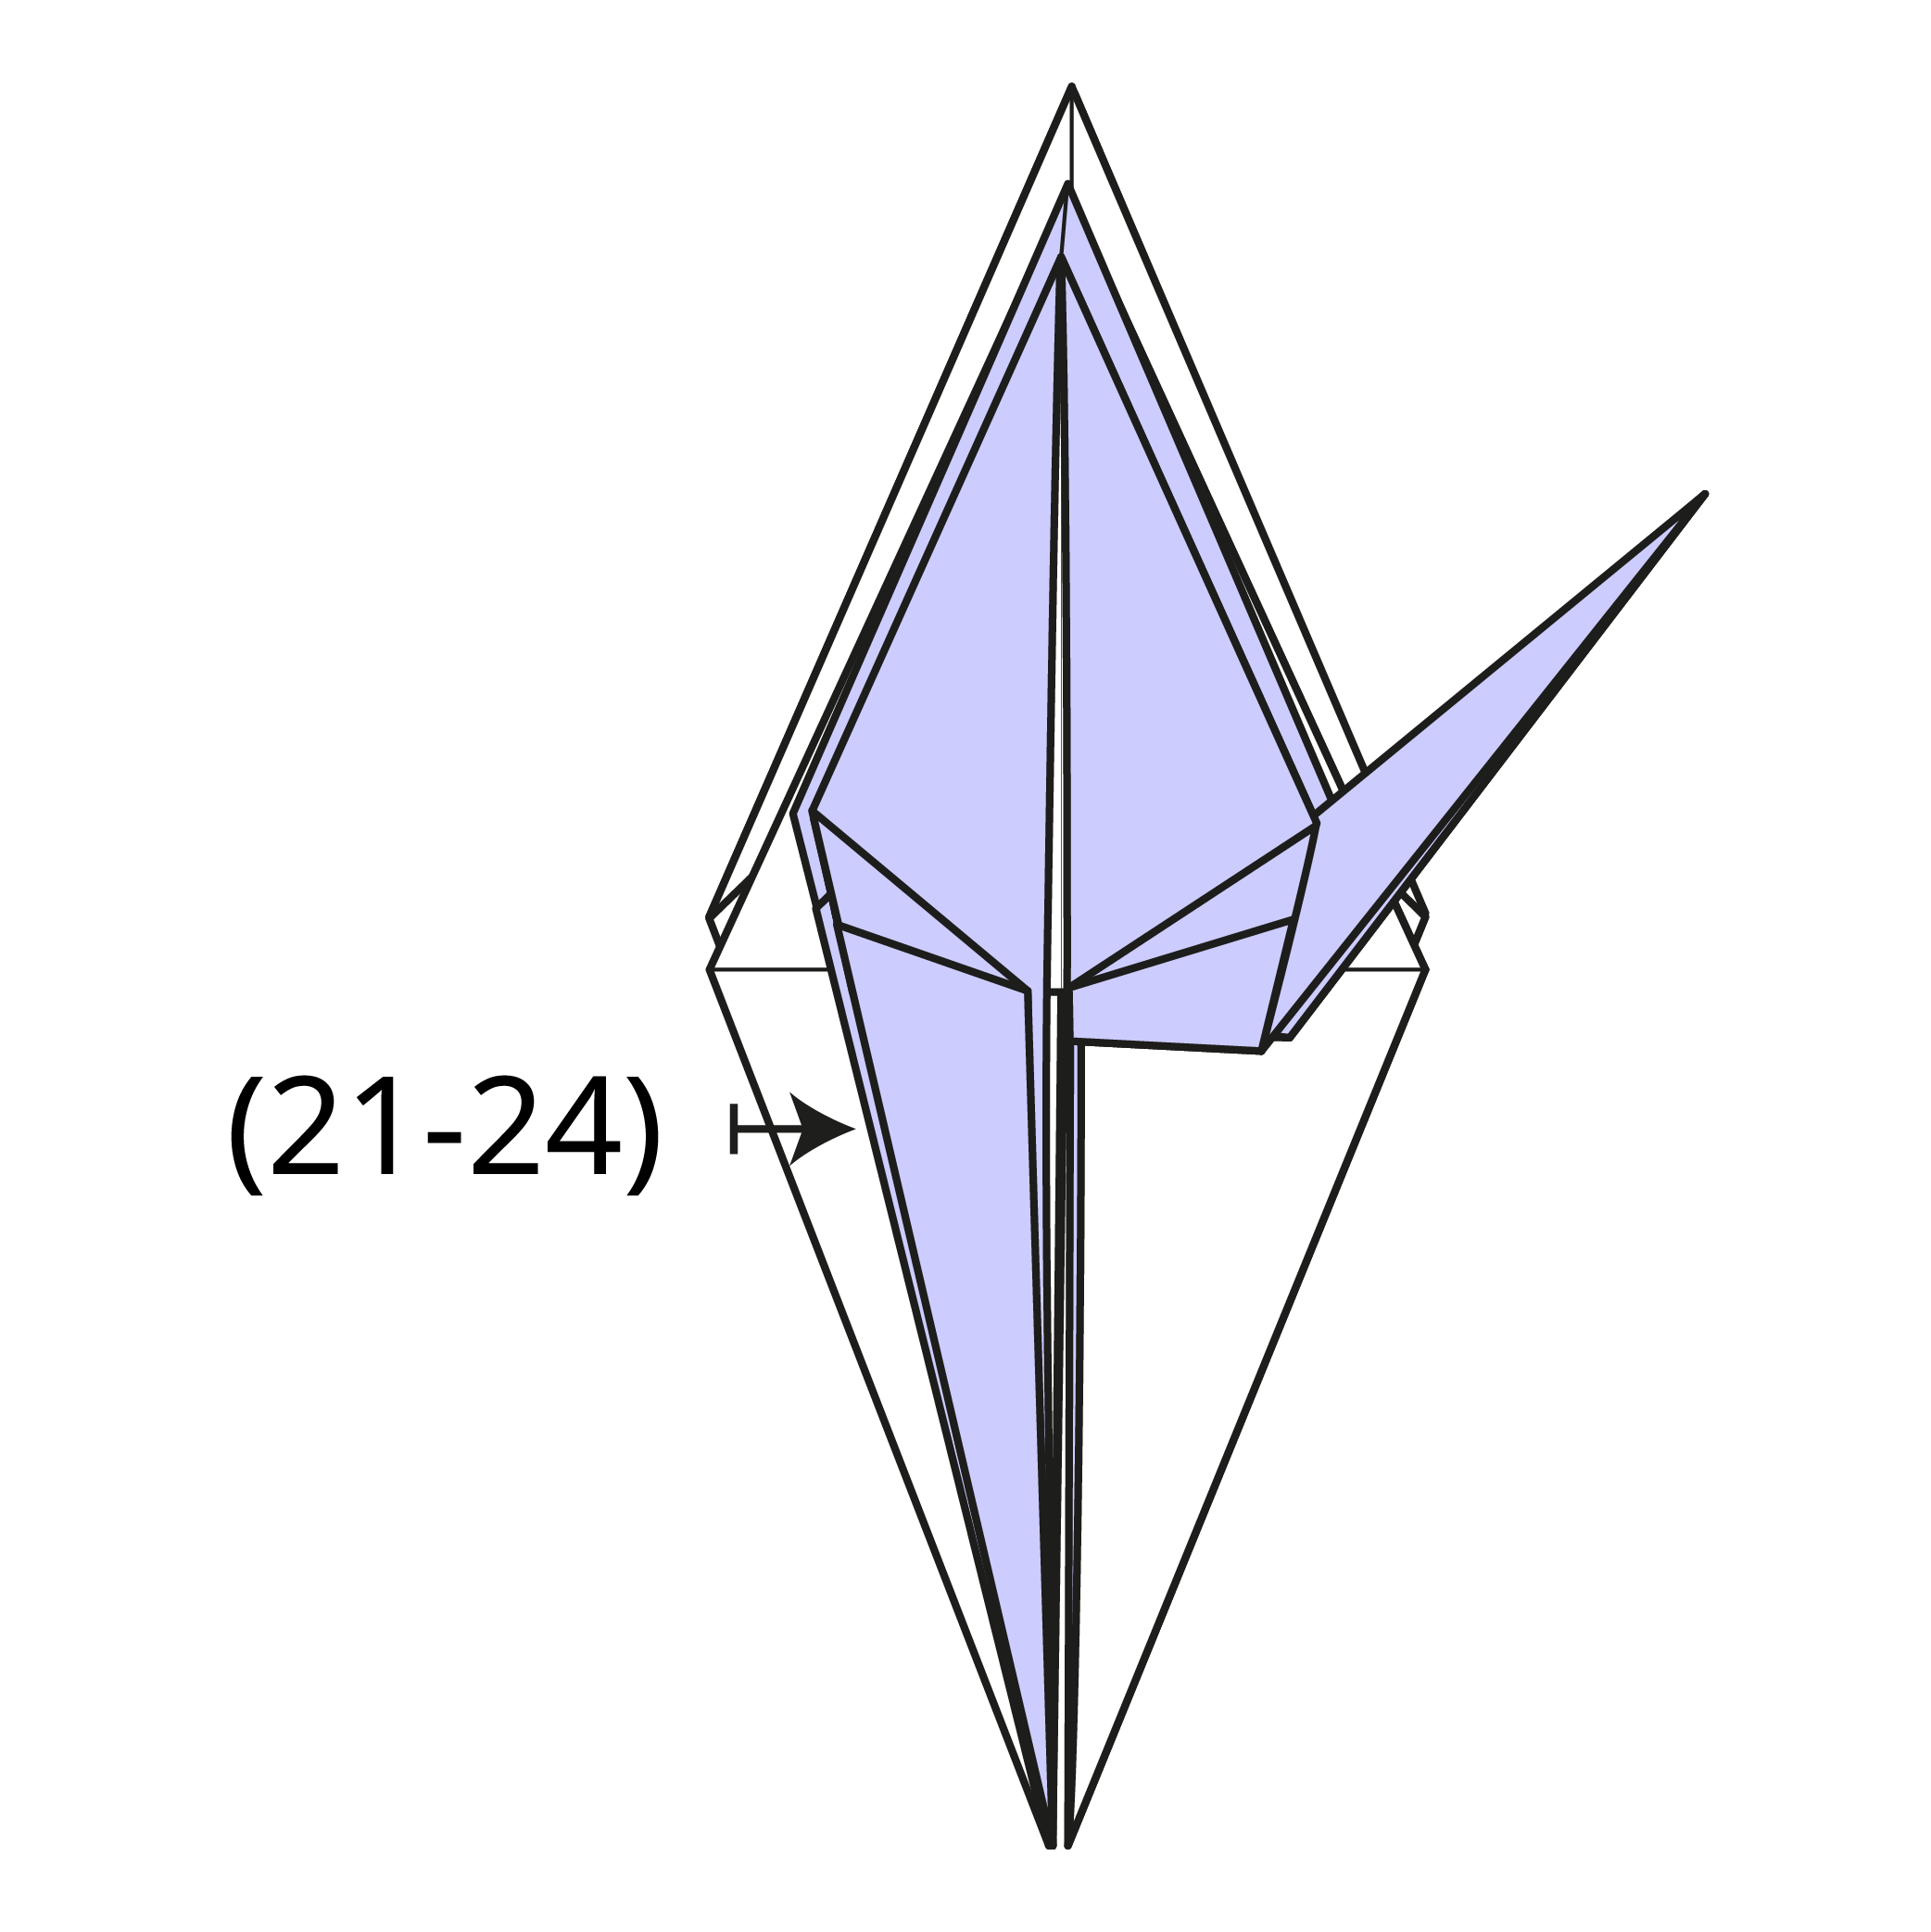
Repeat Steps 21 to 24 on the left side.
Step 26
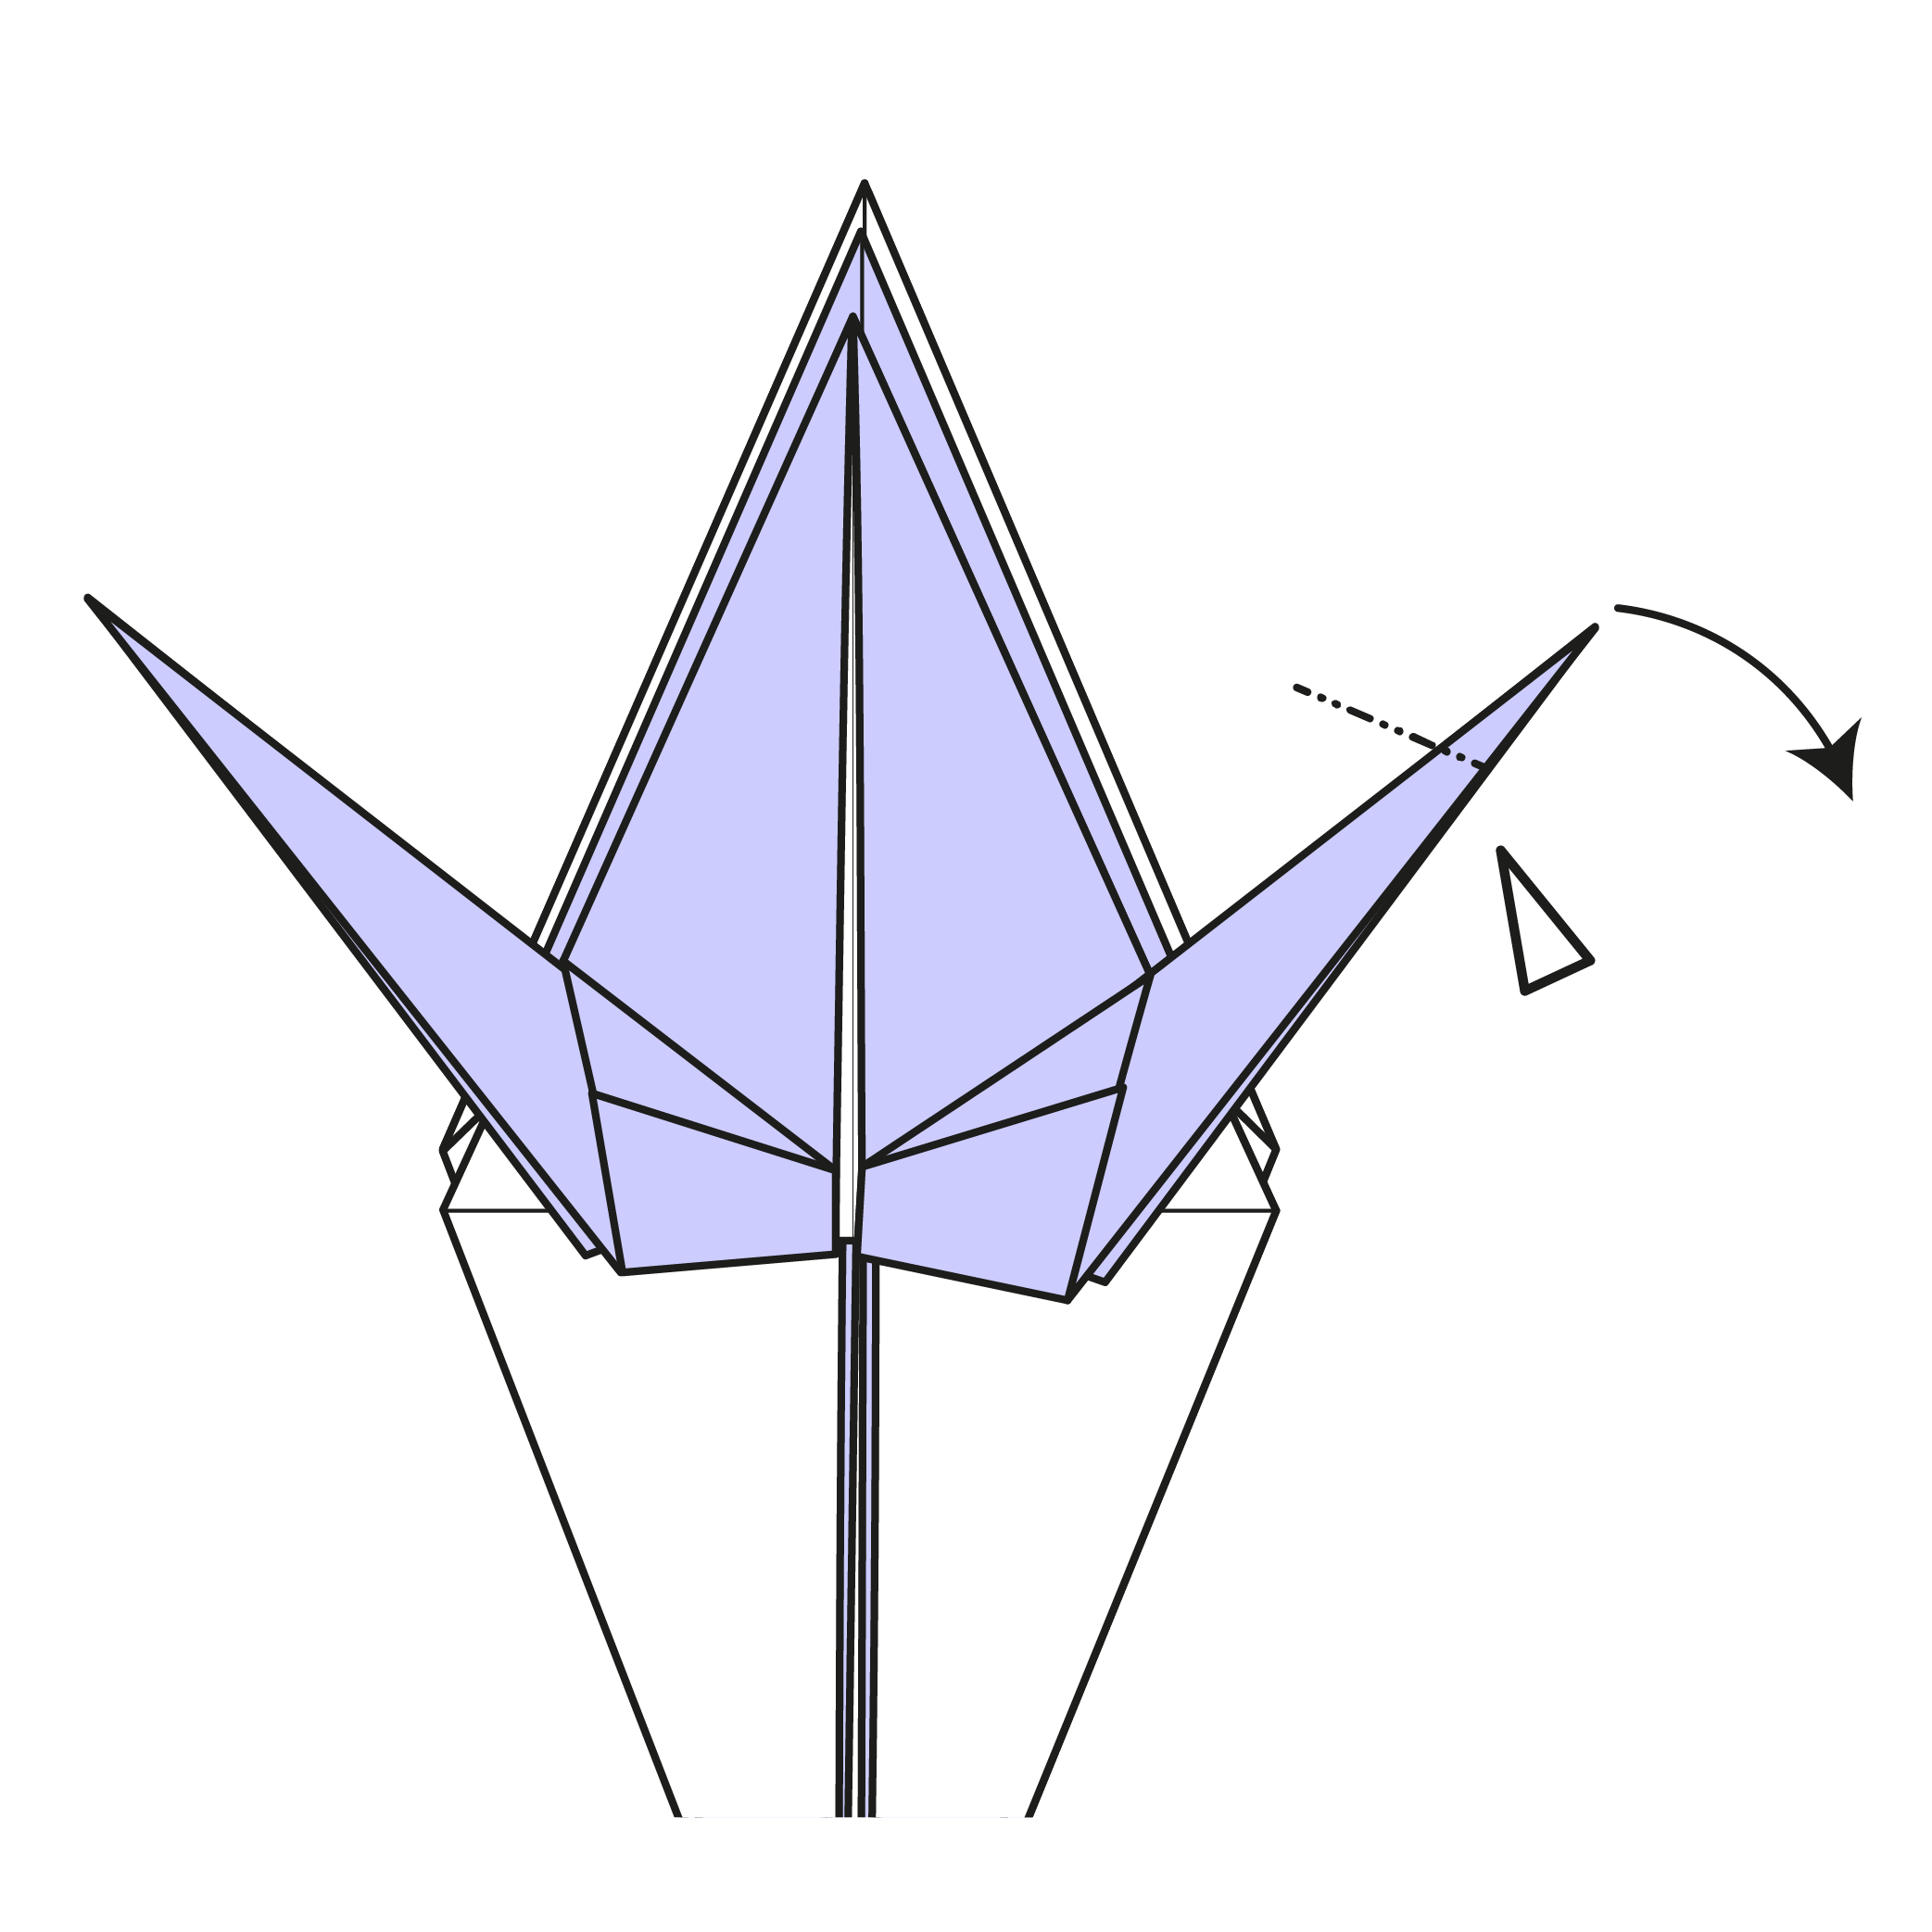
Push down the crane’s head, then make an inside reverse fold.
Step 27
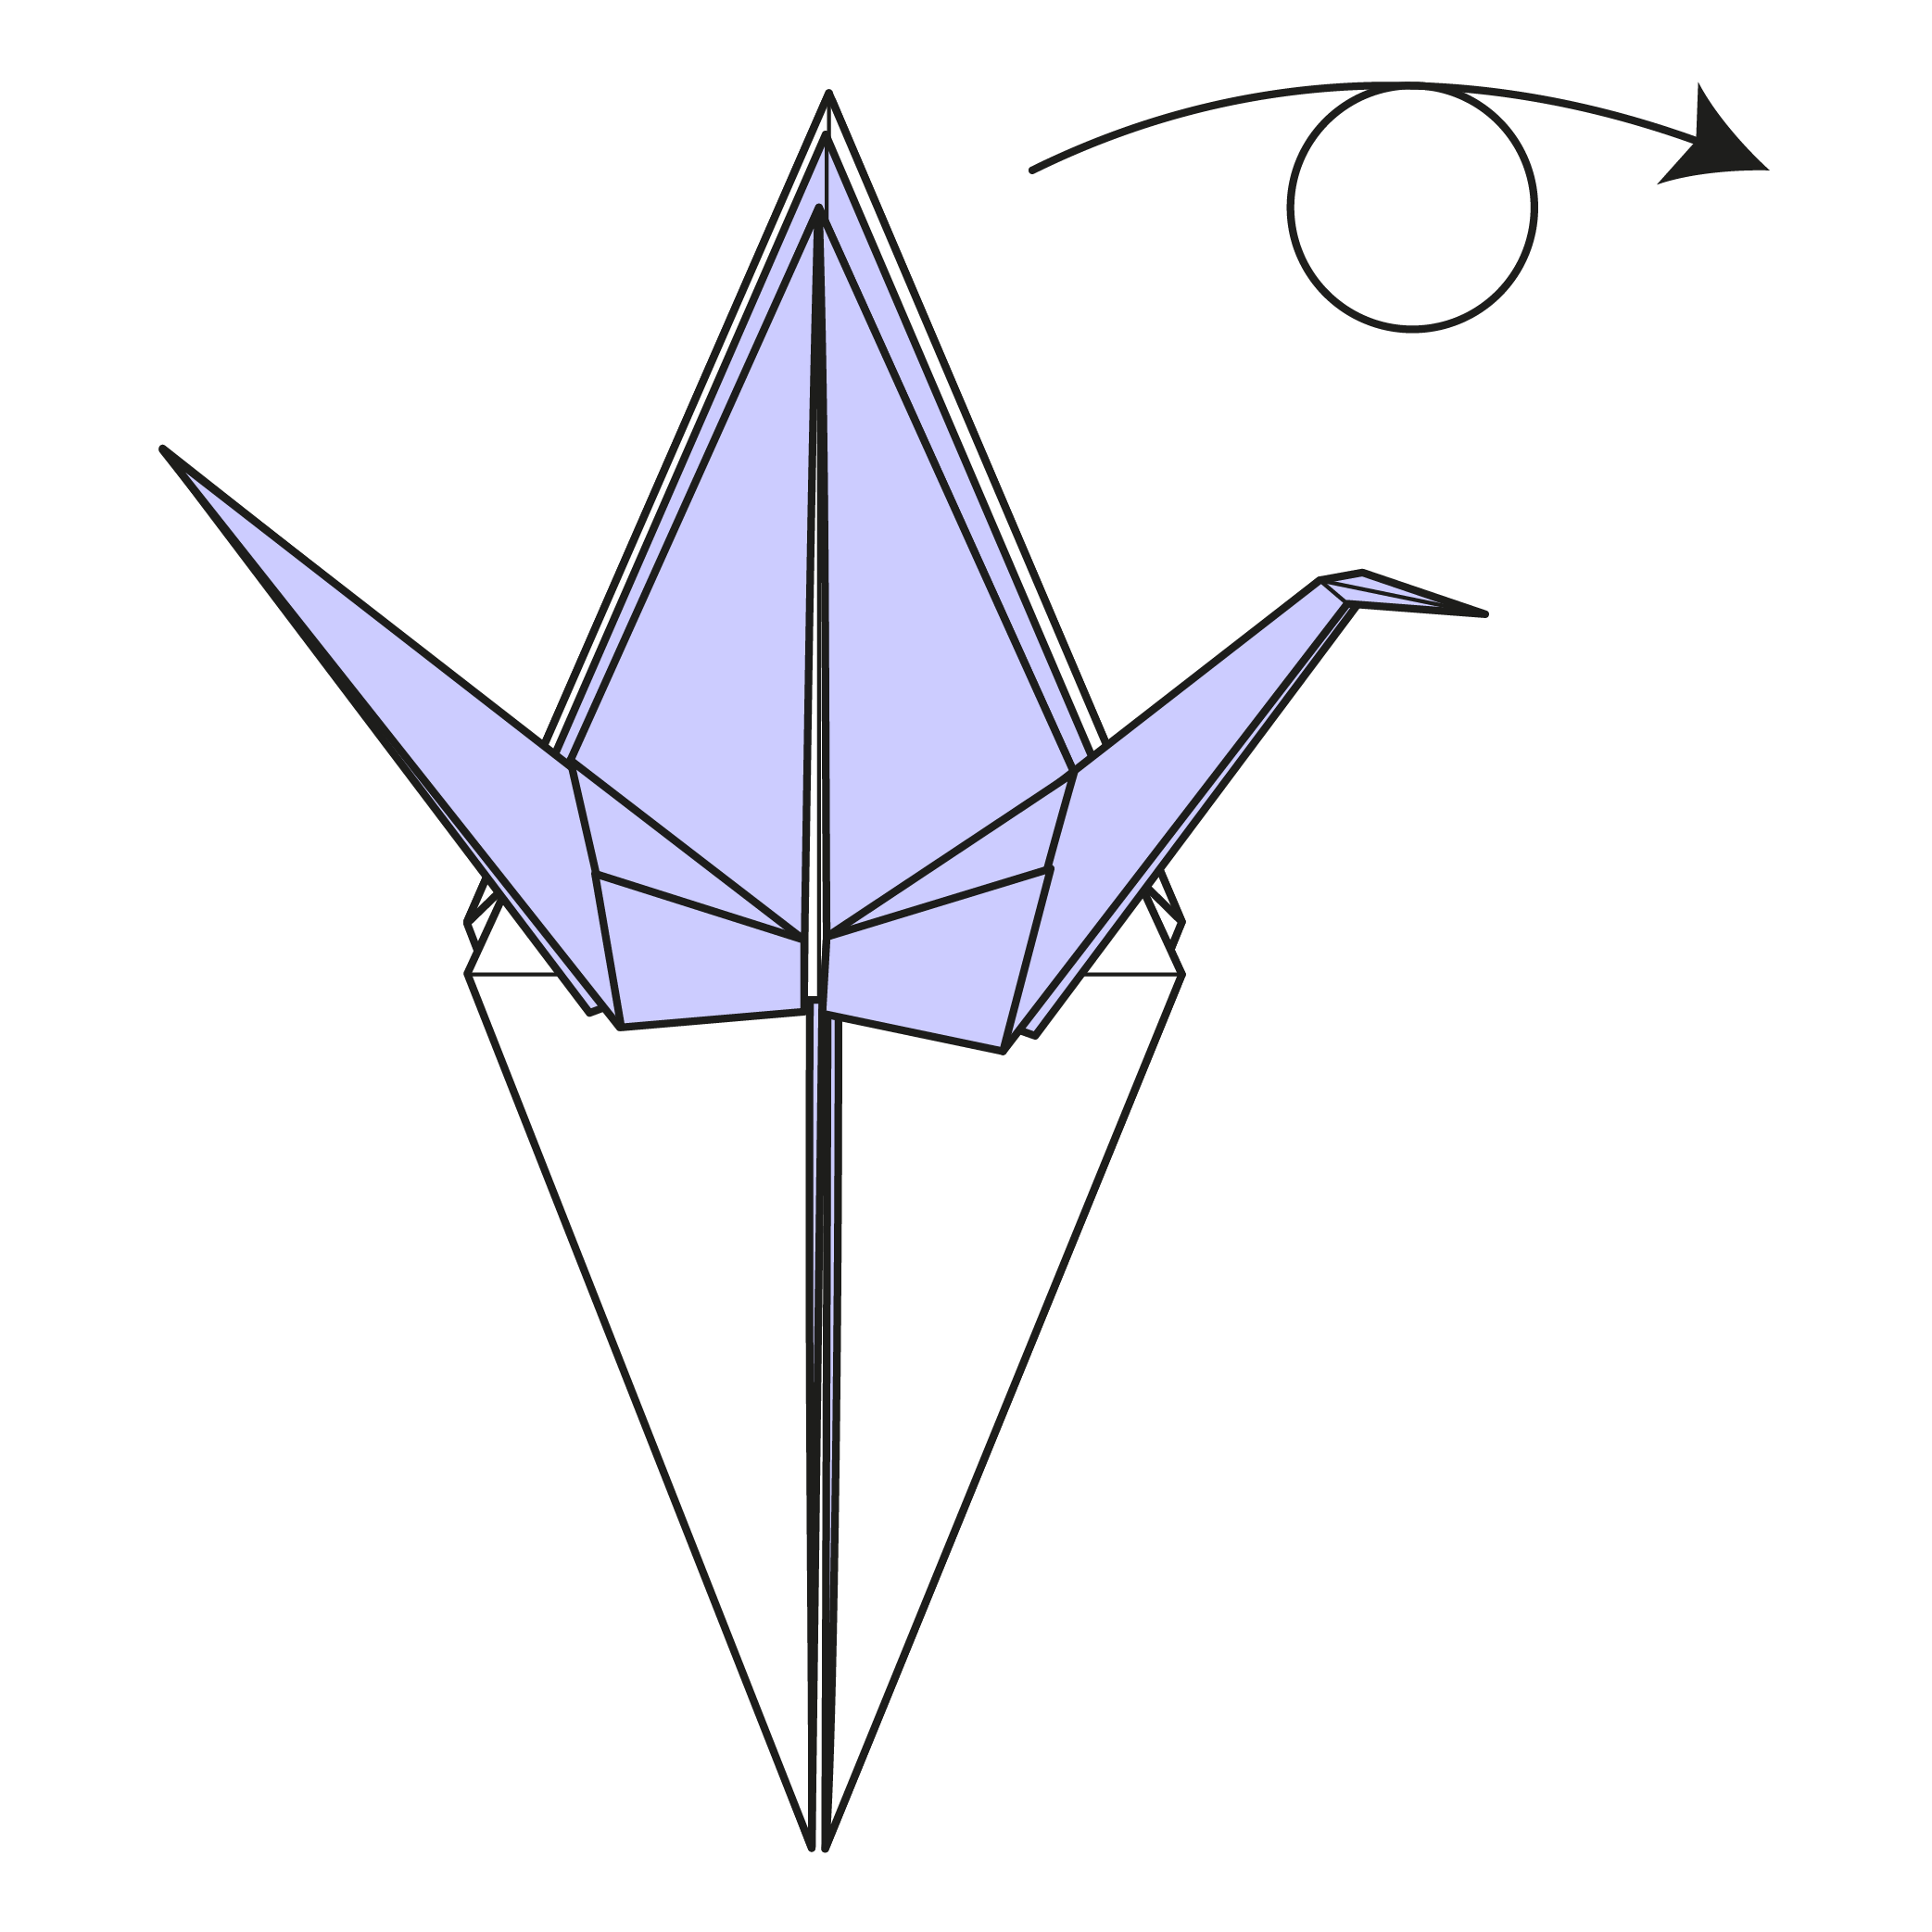
Turn the model over.
Step 28
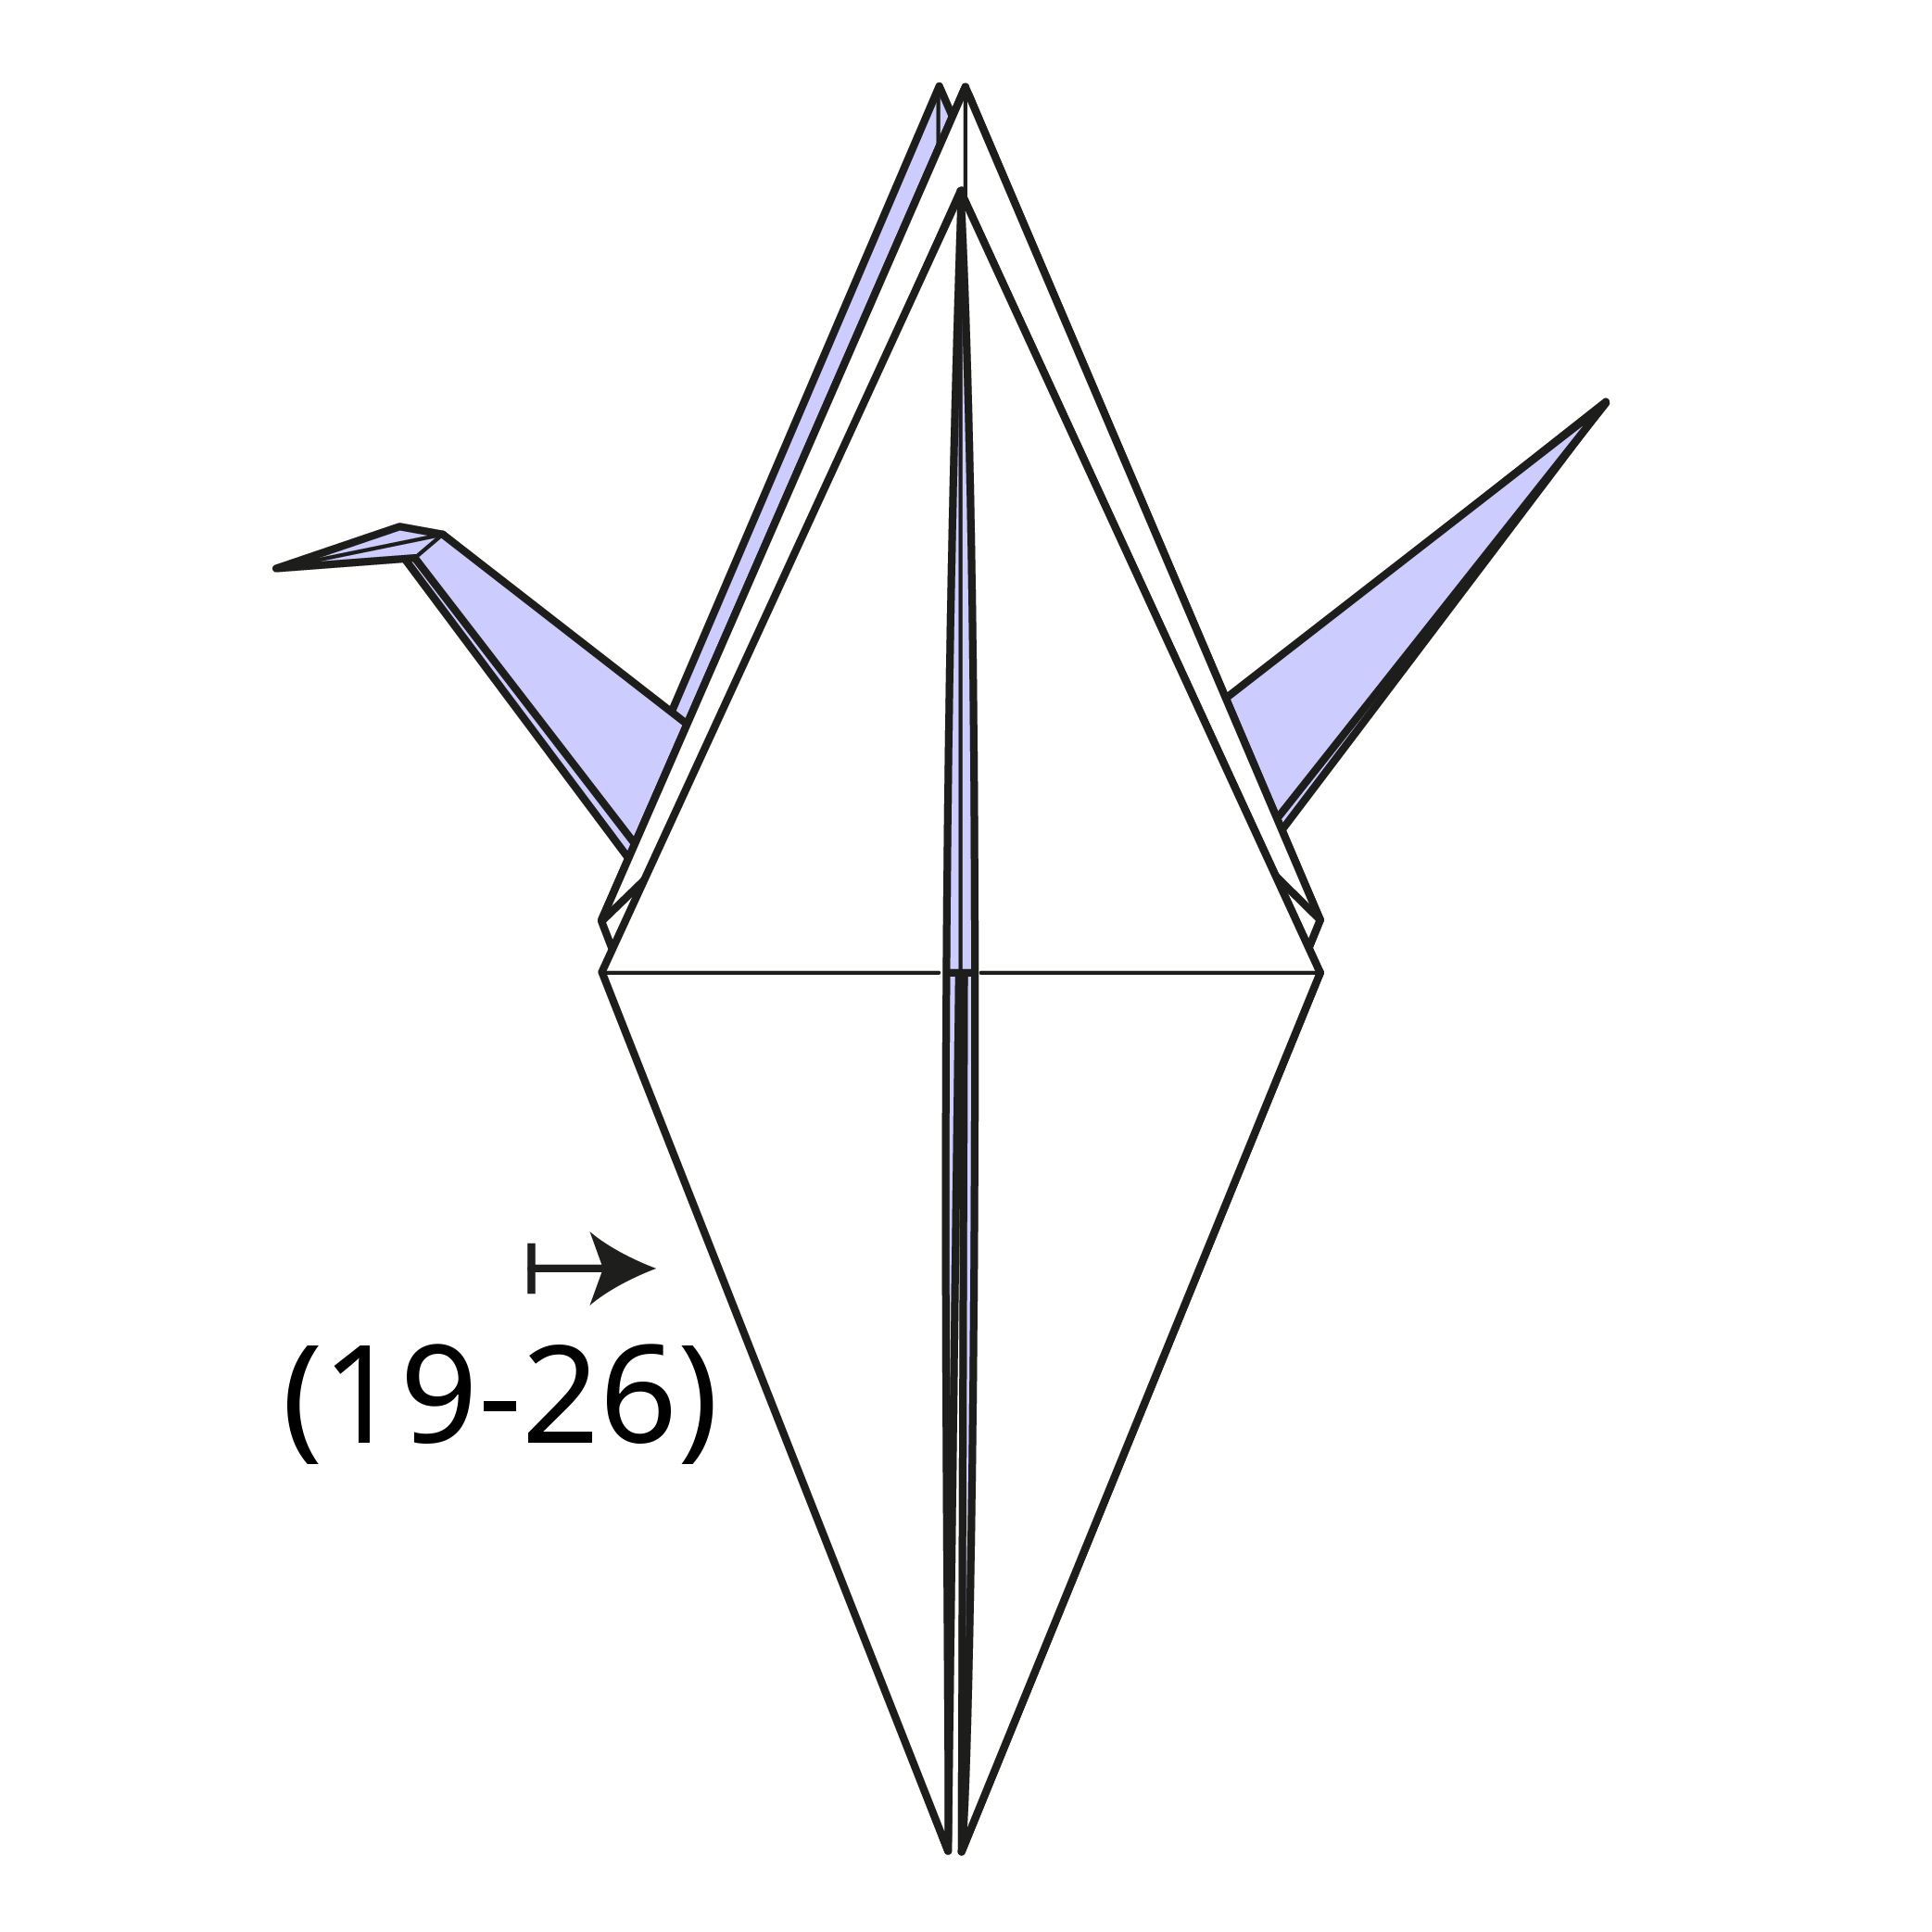
Repeat Steps 19 to 26 on this side to form the second crane.
Step 29
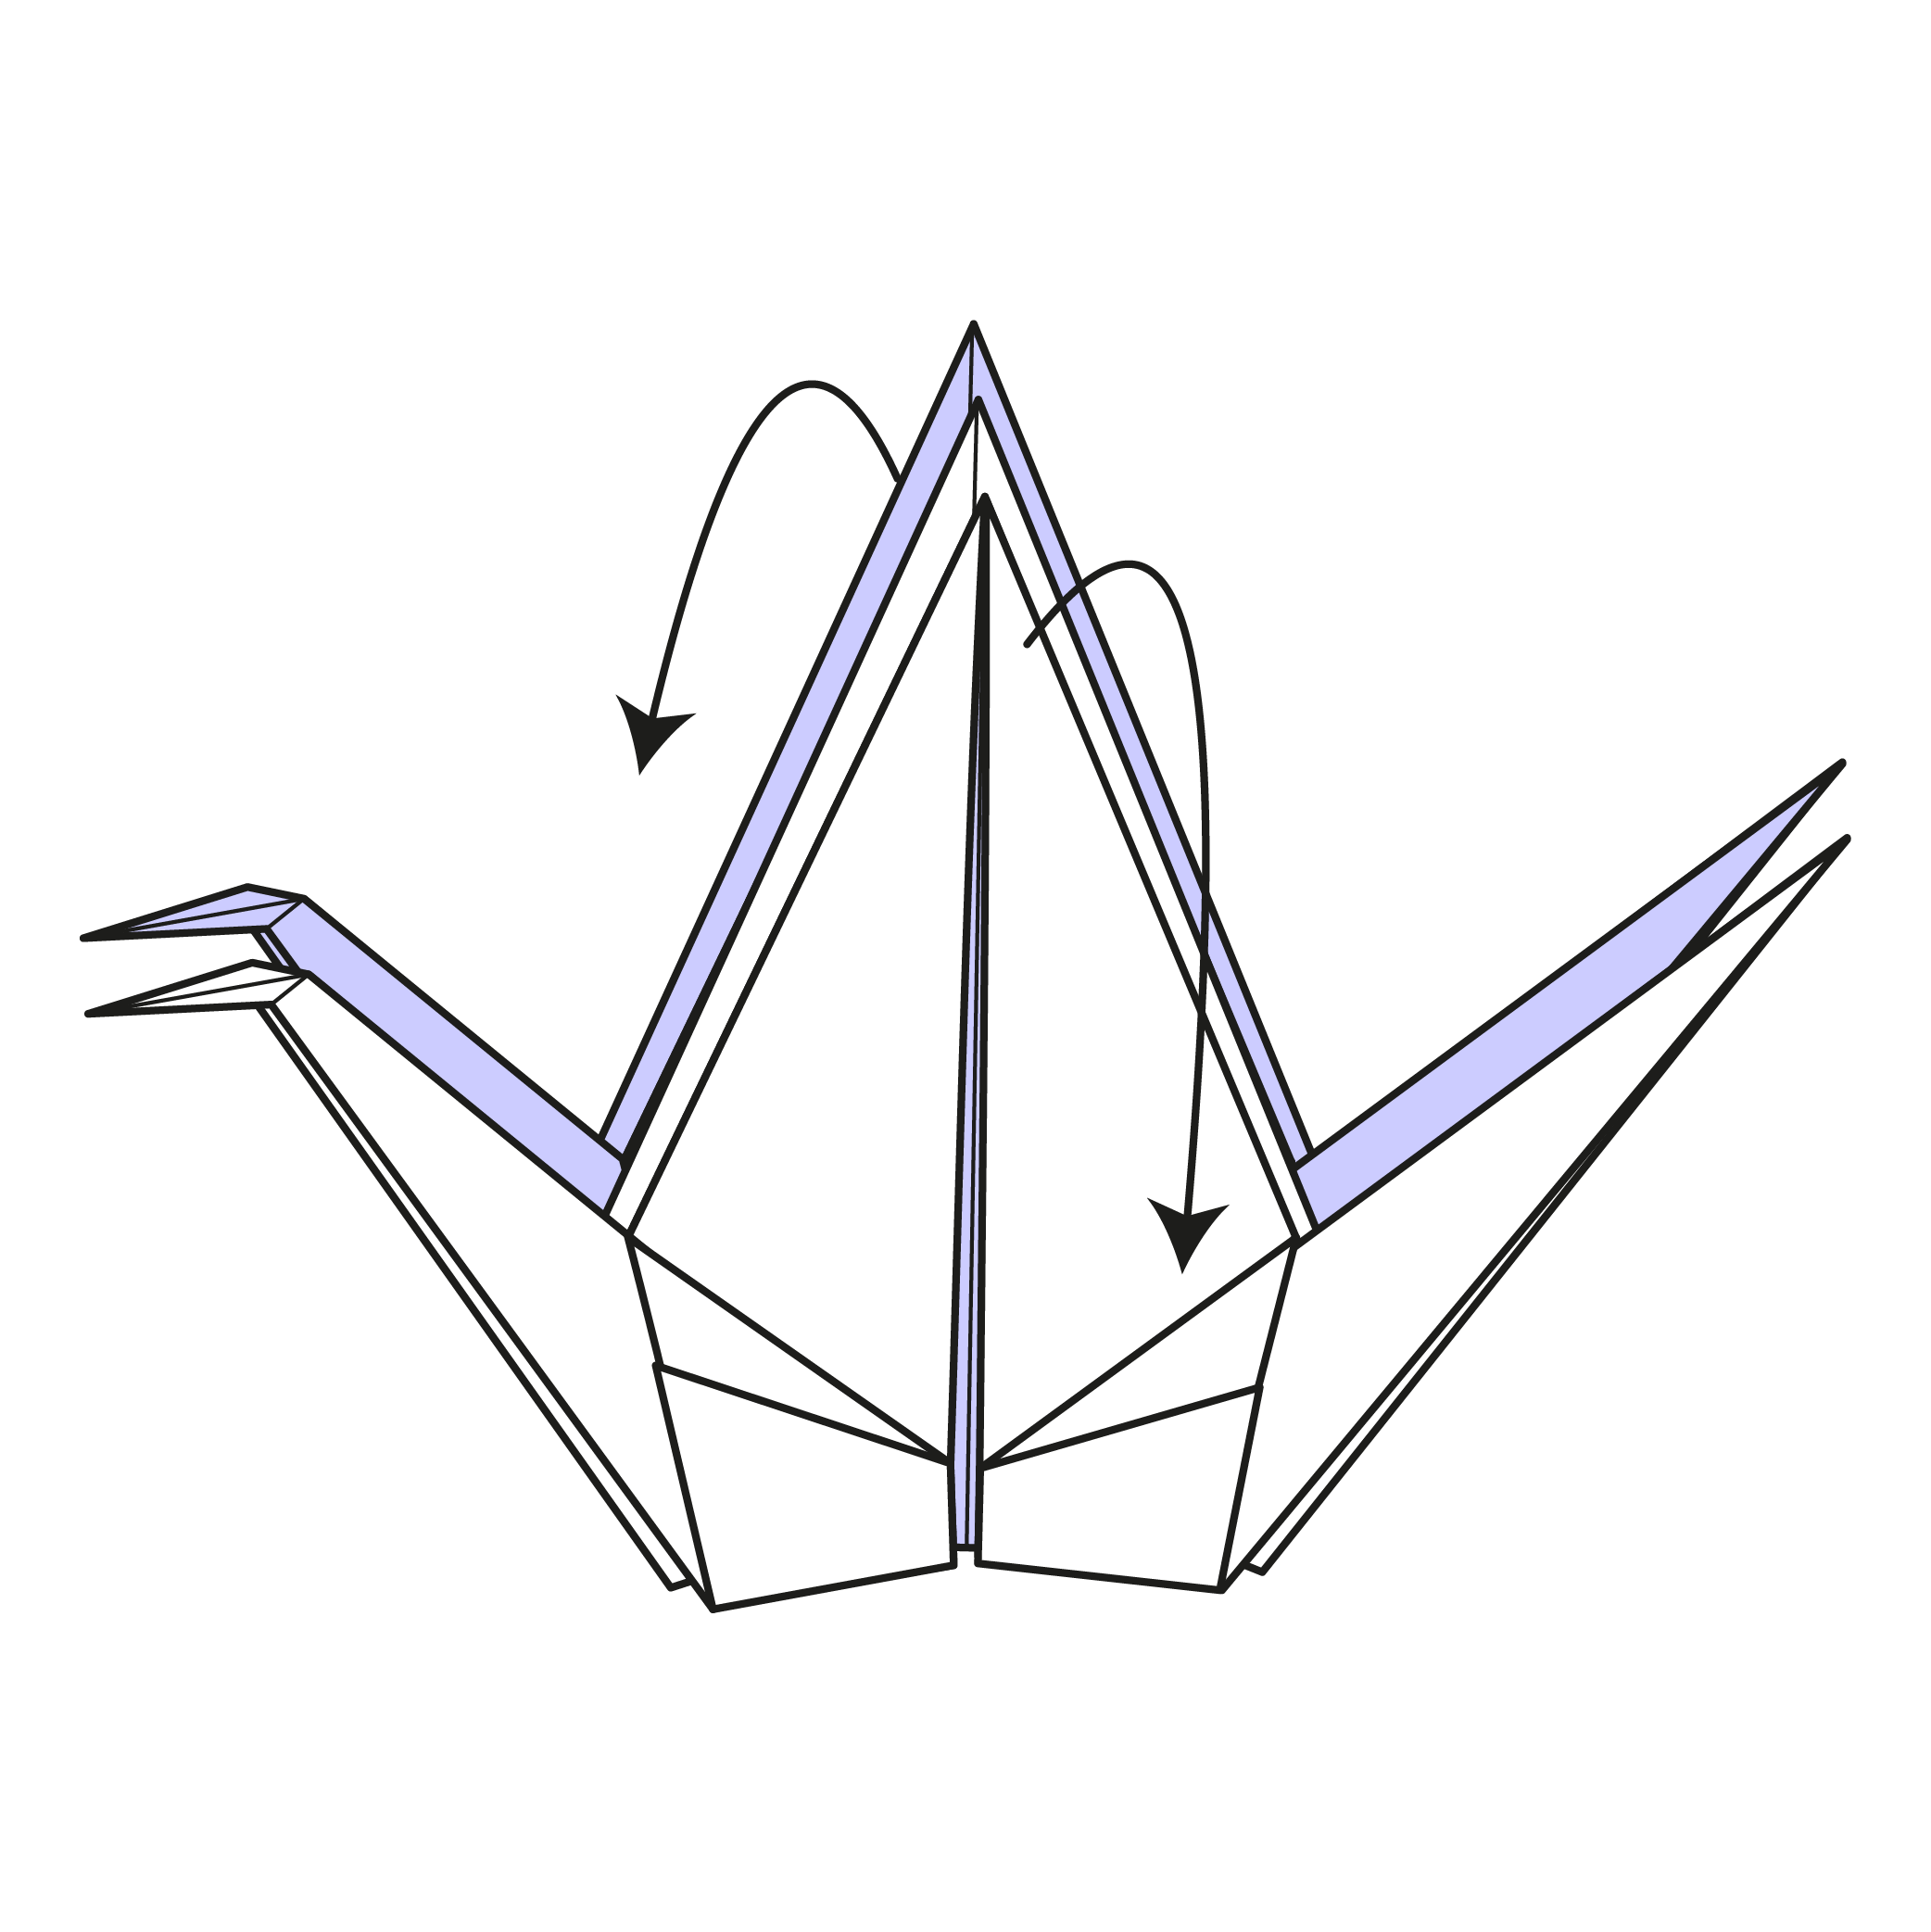
Spread and shape the wings, one crane at a time, to avoid tearing the paper.
Your Origami Imoseyama Cranes Are Finished!
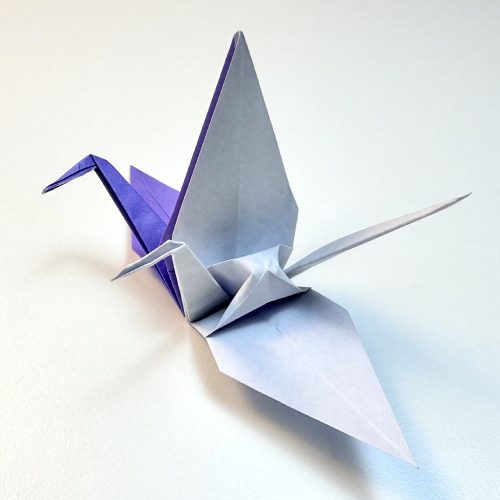
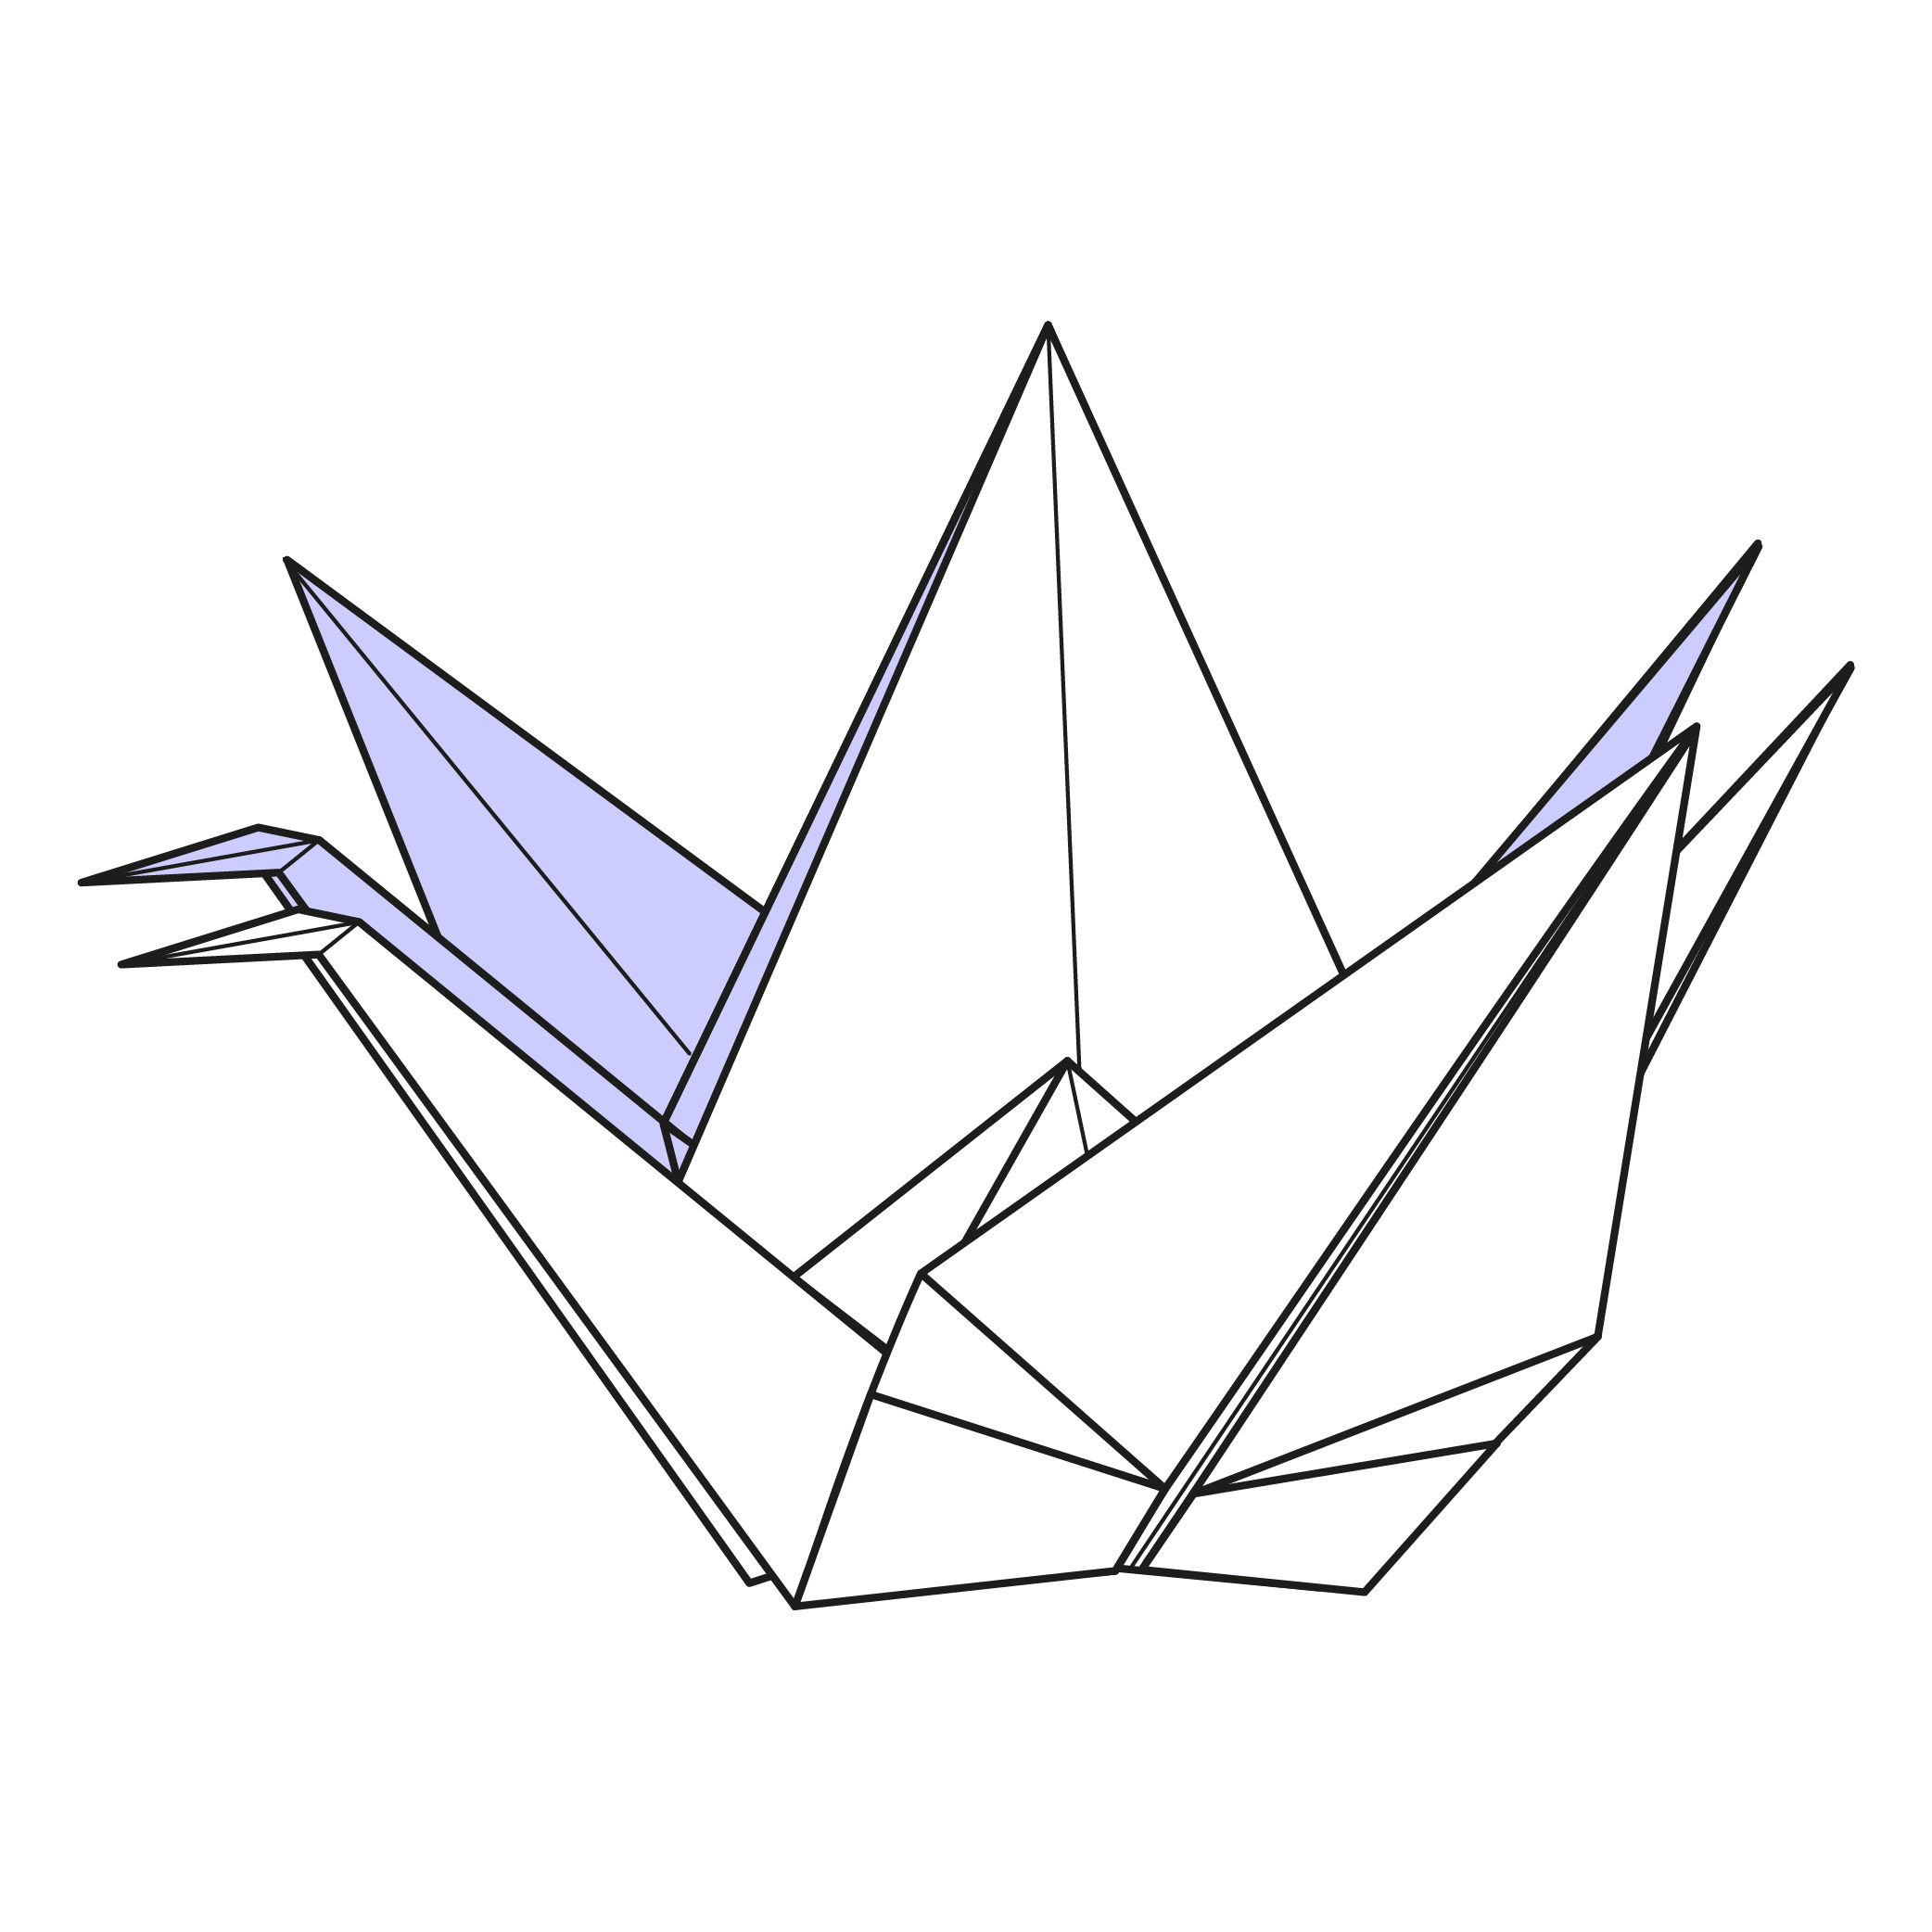
I hope you enjoyed folding the Imoseyama cranes. There is a lovely moment near the end when the second crane finally takes shape, and the pair reads as one piece rather than two birds.
Because of what they stand for, they make a thoughtful gift for a wedding or an anniversary, or a quiet addition to a Valentine’s Day card. Try a duo paper so each crane takes its own color.
If you fold a pair, share a photo in the comments. I would love to see which colors you chose.
Want to keep folding? Browse more easy origami tutorials, or our other origami cranes.
You can also get new tutorials and folding ideas in our newsletter, and if you like folding along with video, subscribe to our origami YouTube channel.
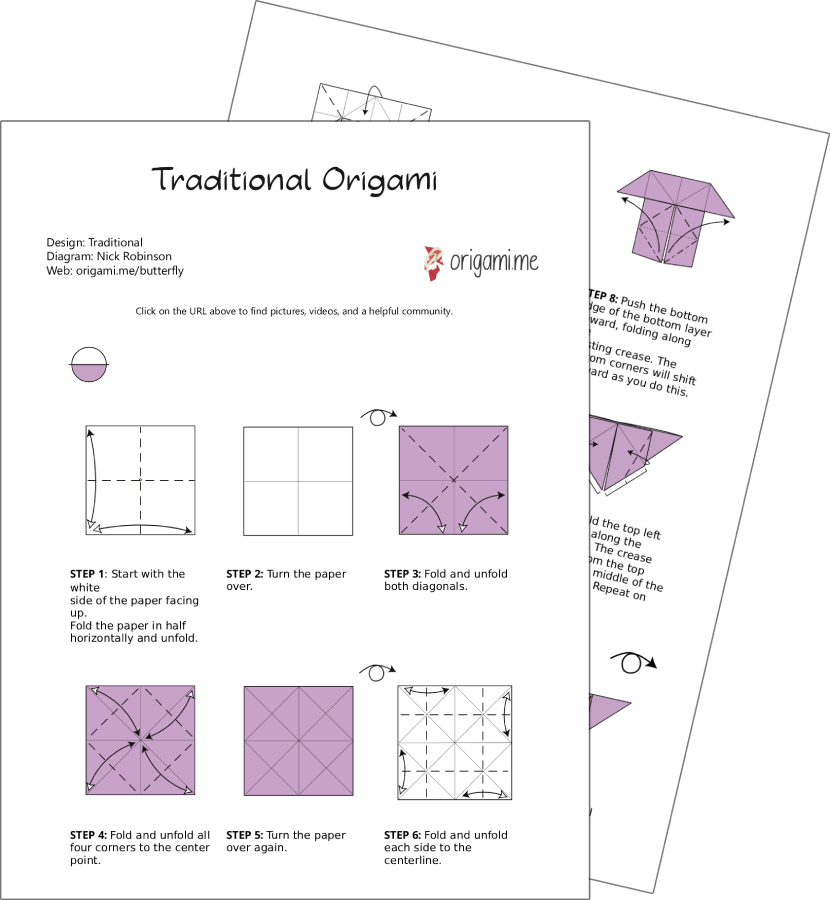
Download the Complete Origami Imoseyama Cranes Printable PDF Instructions
This printable PDF is part of our Origami Friends membership on Patreon. As a member, you get access to these diagrams, our full library of 120+ printable PDFs, and member-only content.
🎓 Need printables licensed for classroom or group use? See the Origami Library for Educators →




Thanks!
can you please release this?
Hi Dylan, this post will be made public next week.